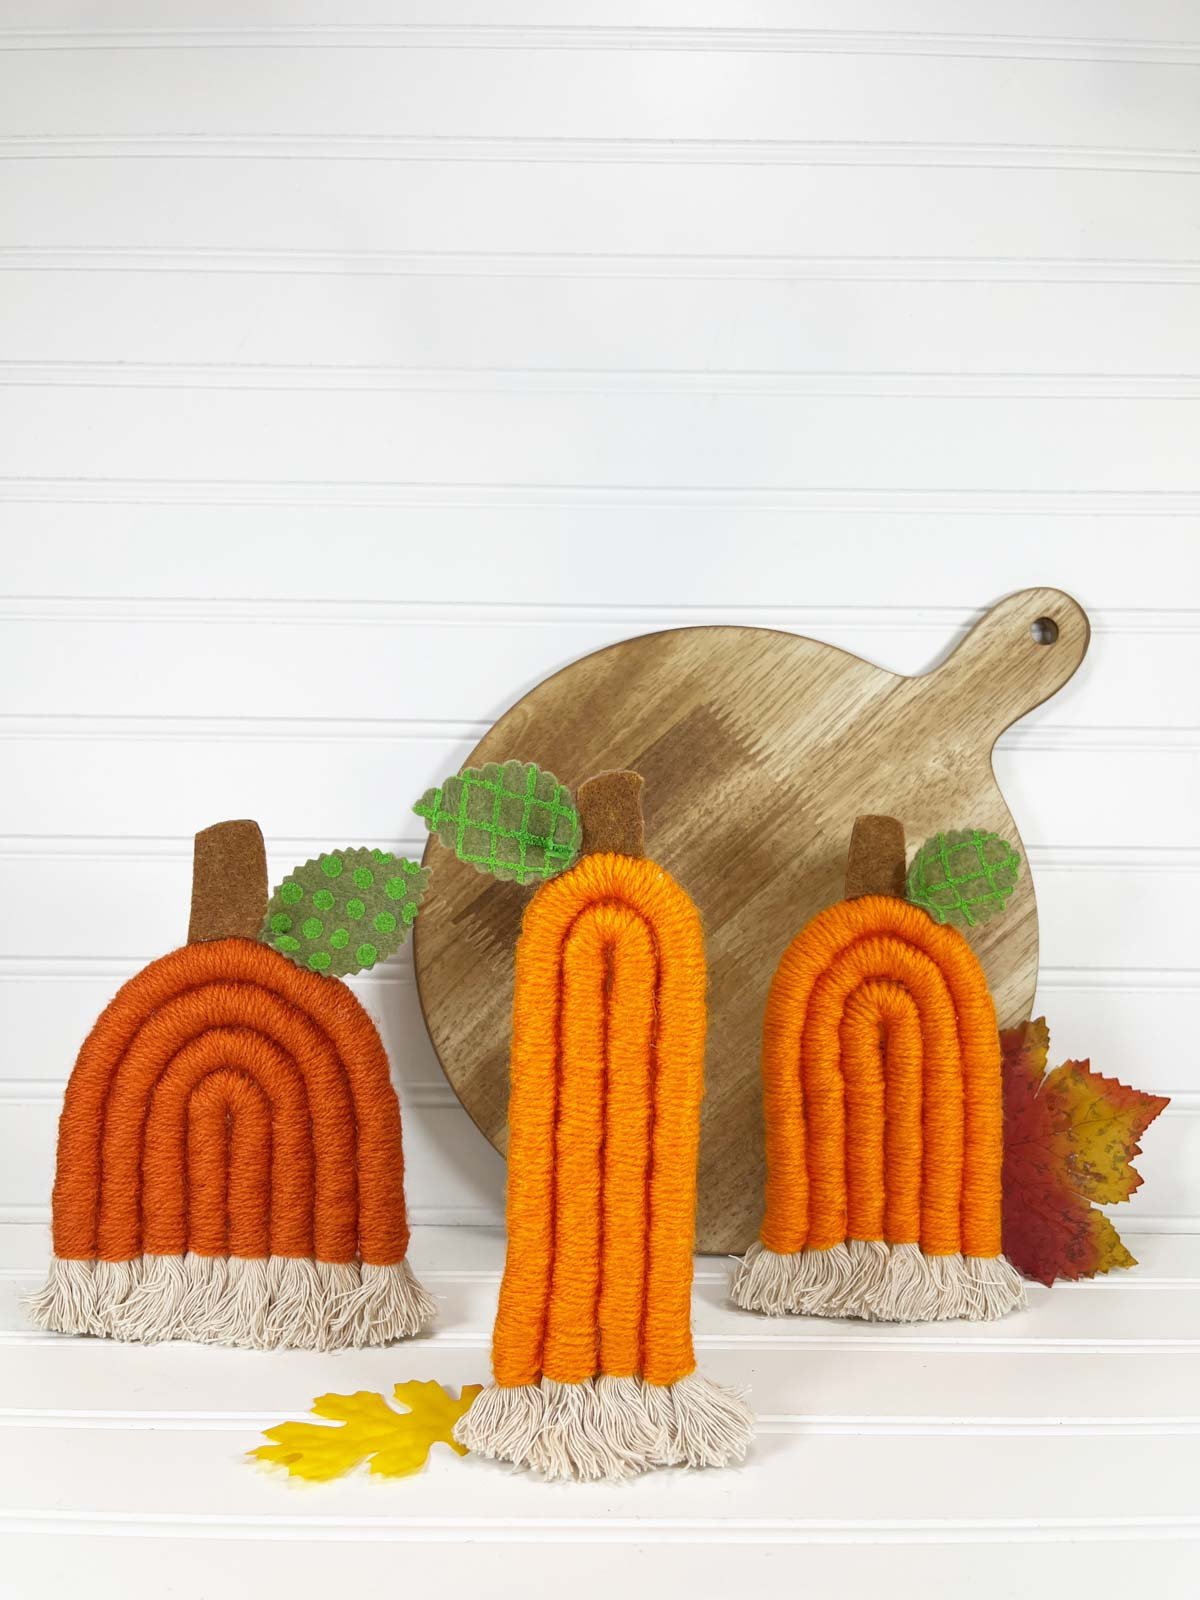
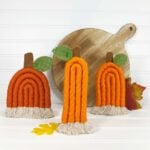
This DIY rope pumpkin makes the perfect fall craft that you will want to display in your home. The supplies are easy to find and go a long way so it’s easy on the budget while still looking great! It’s simple enough for kids to do on their own while still being cute enough that adults will want to join in on the fun!
Want to save this Idea?
Enter your email below and we’ll send this idea straight to your inbox (plus you’ll receive tons of fun weekly ideas from us!)
Kid’s crafts are great but not always something you want to use as home decor. This braided rope pumpkin craft is the best of both worlds, easy and cute!
Not a huge fan of bright orange? You can easily customize it so it fits perfectly with your home by changing out the rope color.
Want something more spooky for Halloween?
No problem, add scary jack-o-lantern faces to the large rope pumpkin and you’ve got the perfect seasonal items.
For another eerie home decor idea you can do easily at home try out this DIY black flame candle.
Why you’ll love this Craft
- Easy process - this process is really easy to replicate, once you do one, you’ll be a pro.
- Customizable - make it work for you by easily switching out colors or materials while still following the general process.
- Simple supplies - you won’t need anything fancier than a hot glue gun to create this classic pumpkin craft. And we found everything at Dollar Tree, so it’s inexpensive too!
Supplies
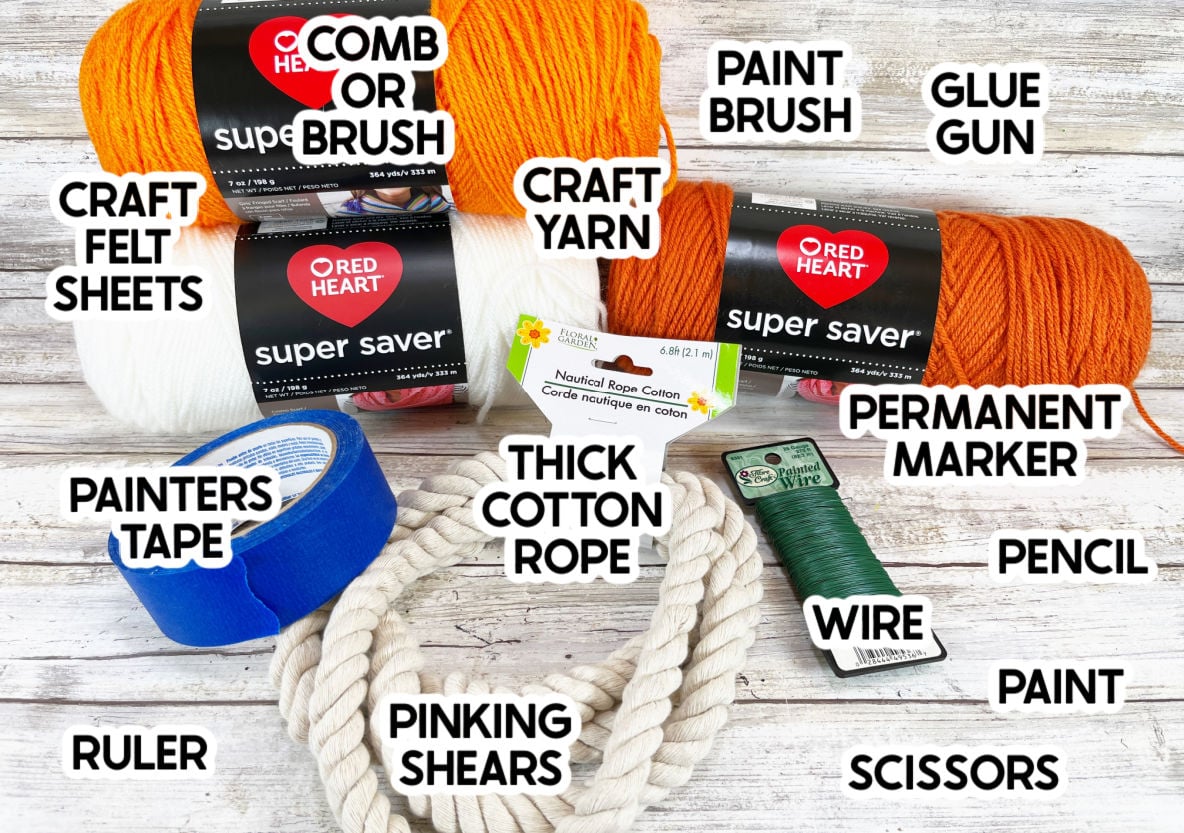
Supply notes
- Craft yarn – I used a bright orange because I like bright colors, but you can use whatever color works best for you. I just grabbed the cheap stuff at Dollar Tree but any yarn works! Anything in one of these fall color palettes would be great!
- Thick cotton rope – you can easily find this at Dollar Tree or any craft store!
- Painter’s tape – this is the best tool to get the ropes to stick together. I do not recommend using a glue stick for this portion because it won’t keep them together. You could use super glue but painter’s tape is definitely the best option!
- Felt sheets – you’ll use these for the stems so just grab whatever color you want the stem and leaves to be. I used dark brown, black, lighter brown, and an olive green.
- Paint – any color paint works, just make sure it’s lighter than the felt you’re painting on.
- Pencil – you could also use a Q-tip for painting dots.
- Comb – I find the wider the comb the better. You can also use your fingers, but I found the comb makes it much easier.
How to make this rope pumpkin
I have included detailed instructions with pictures of how I made the braided rope pumpkin in various sizes. Feel free to follow exactly or get creative and make them the size you want.
Like I’ve said before, once you do it, you’ll be a pro and can make a new rope pumpkin exactly how you want it. Let’s get started.
1- Prepare The Supplies
Begin by gathering all of your supplies. Make sure before you begin this craft that you remove any tags and any extra packaging.
2 – Cut The Ropes
Next, cut the rope to make the different-sized pumpkins.
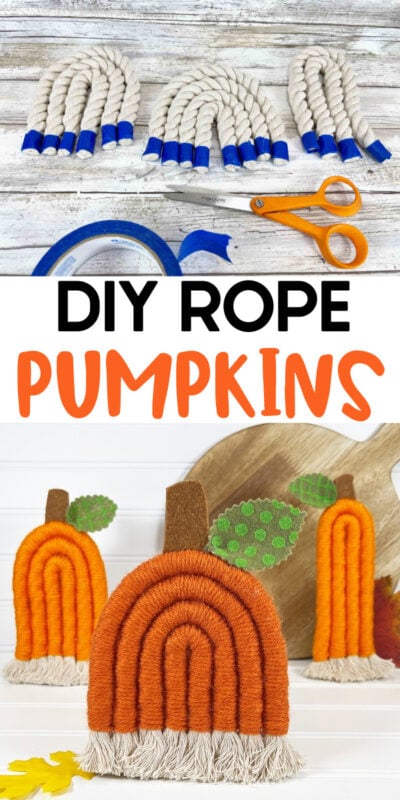
To do this start by taping off the rope where you will be cutting it. This will prevent any fraying while working with the rope.
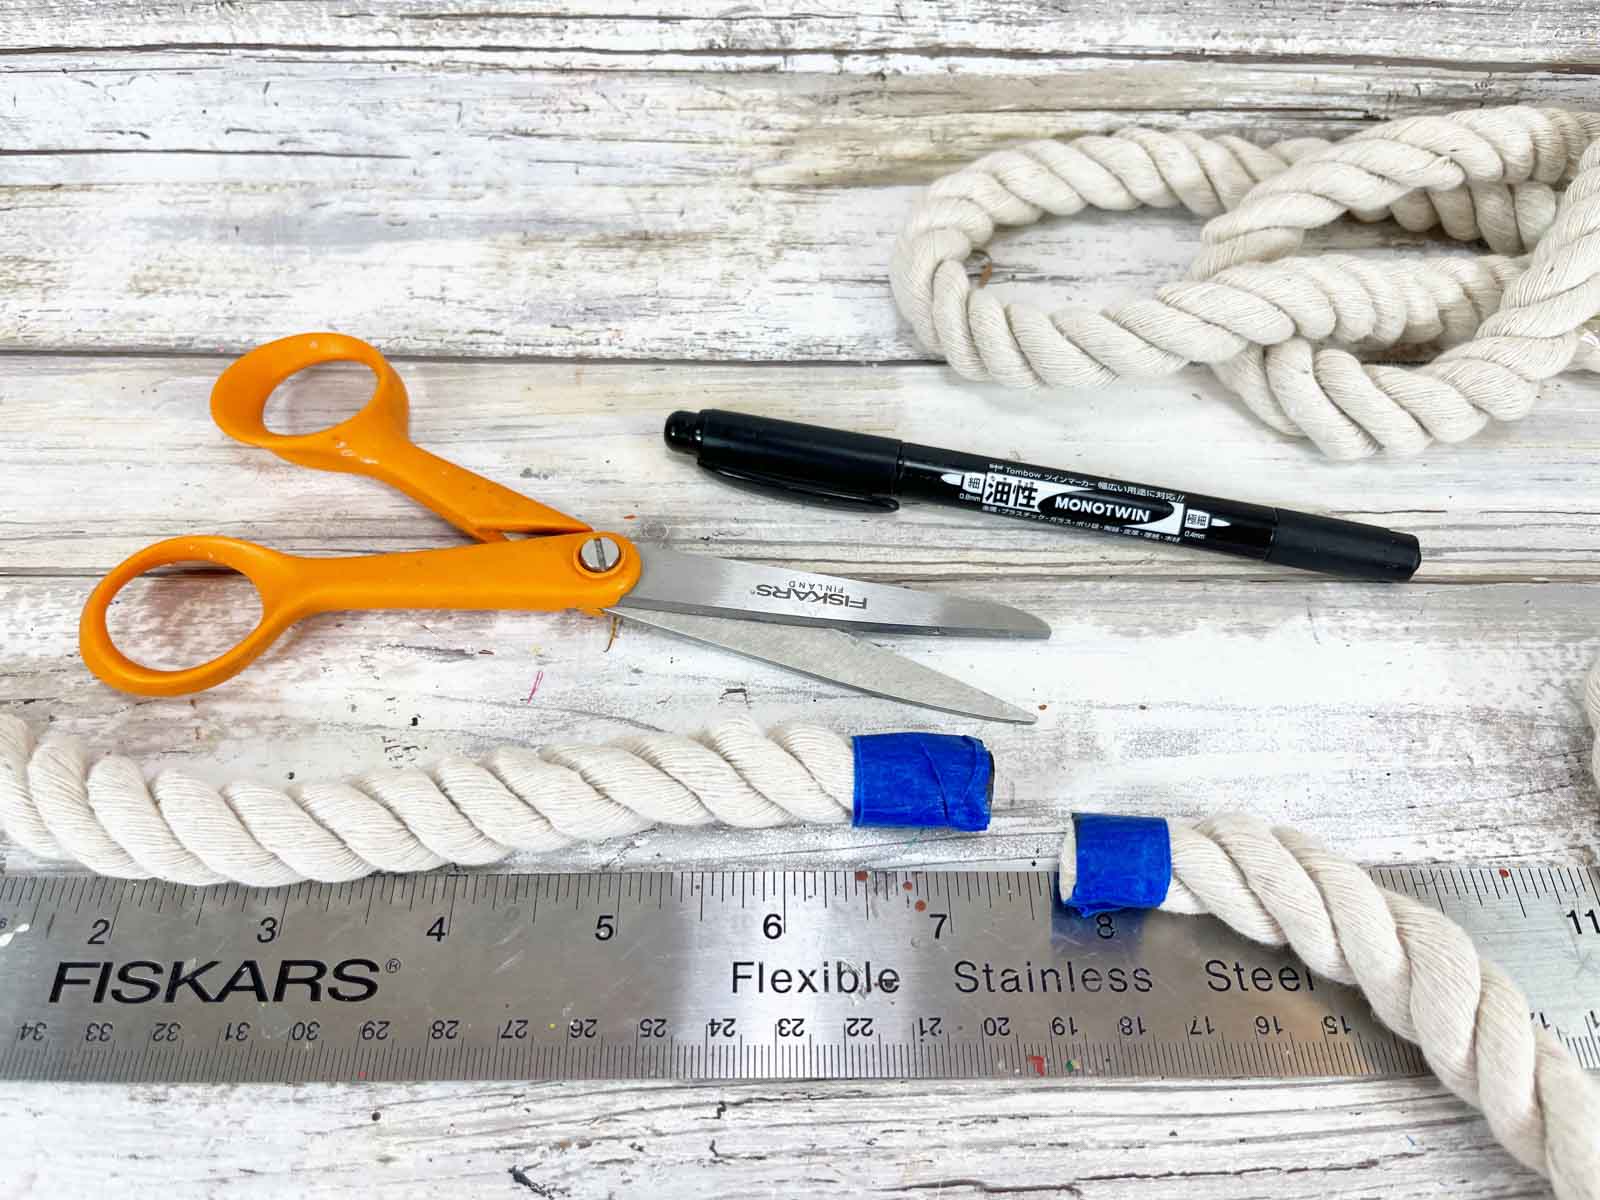
Here are the sizes of each of the pumpkins.
- Tall pumpkin – Cut two ropes. One should 10 inches long and the other should be 12 inches.
- Small pumpkin – Cut three ropes. One should be 8 inches, one should be 9 1/2 inches, and one should be 11 inches long.
- Wide pumpkin – Cut four ropes. The first should be six inches, one should be 7 1/2 inches, one should be nine inches, and the last should be 11 inches long.
Now that you have all of your rope measured and cut, line them up and dry fit the rope together to make sure all of the lengths will work together.
I like to label the ropes at this point to make sure I don’t forget where each one of them goes but if your memory is better than mine, you can skip this step!
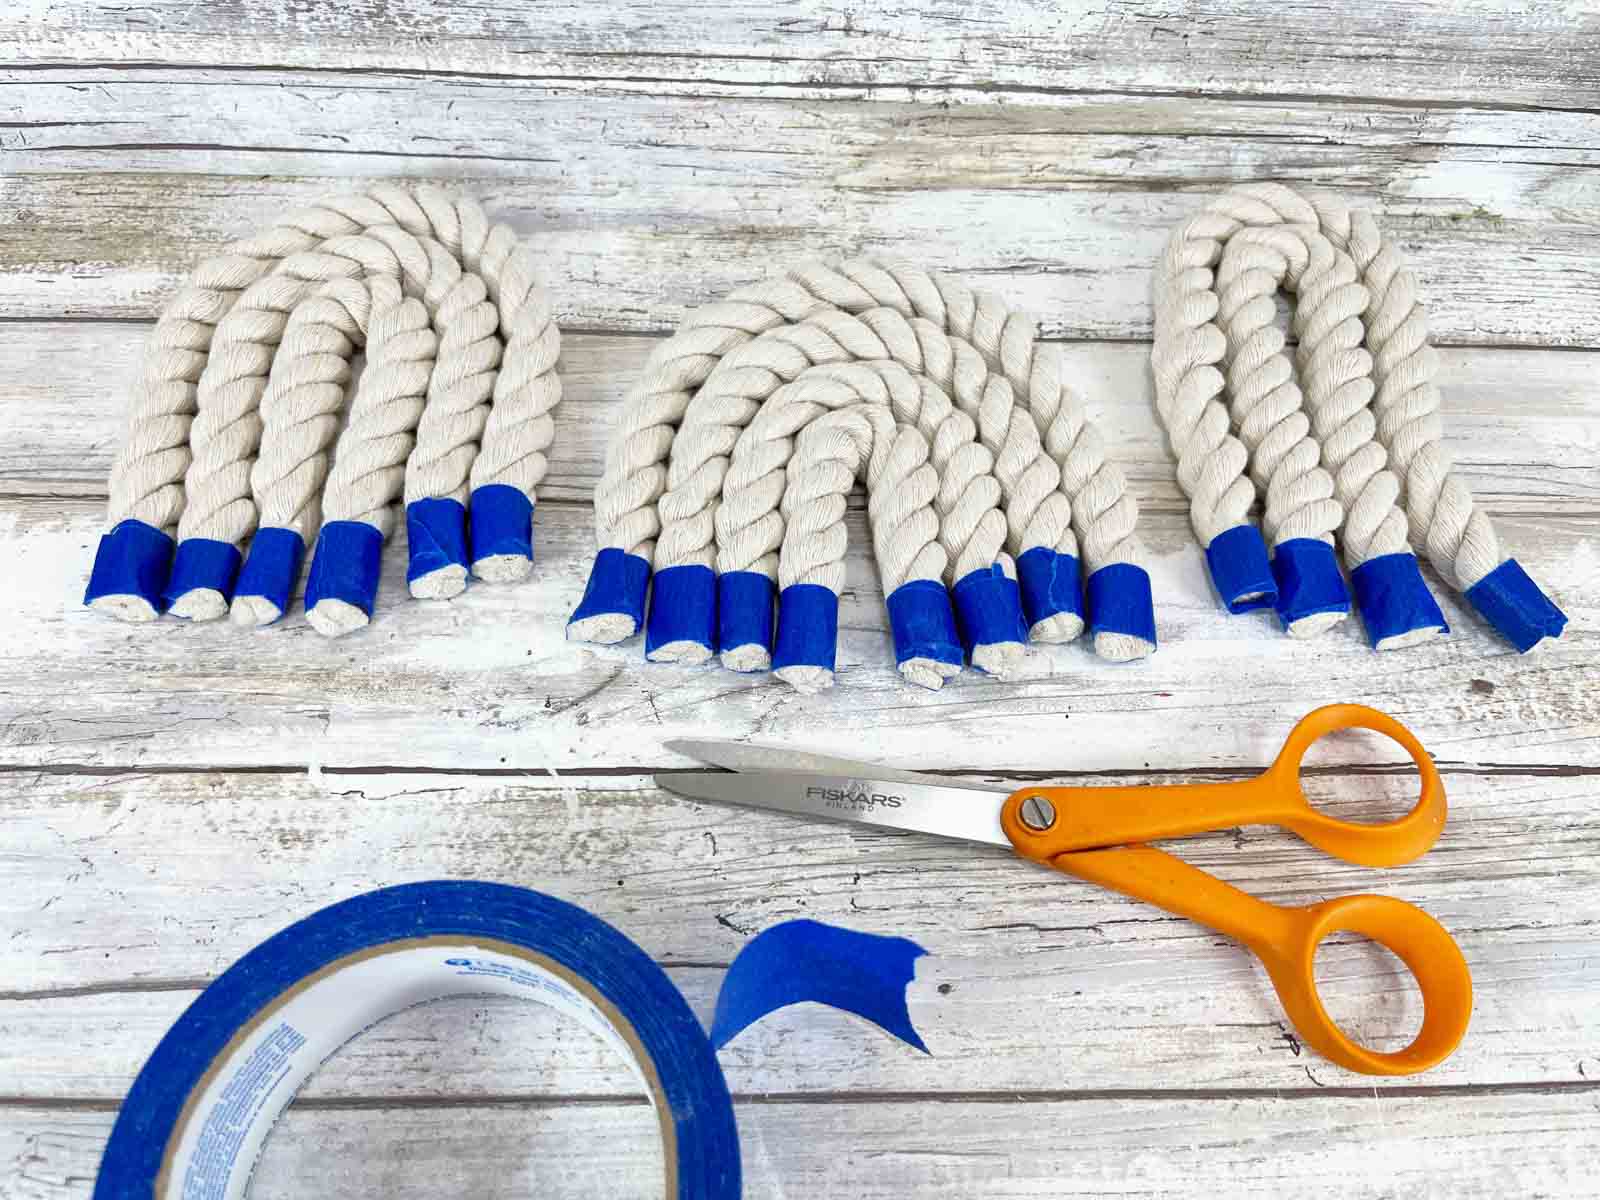
3 – Wrap The Yarn
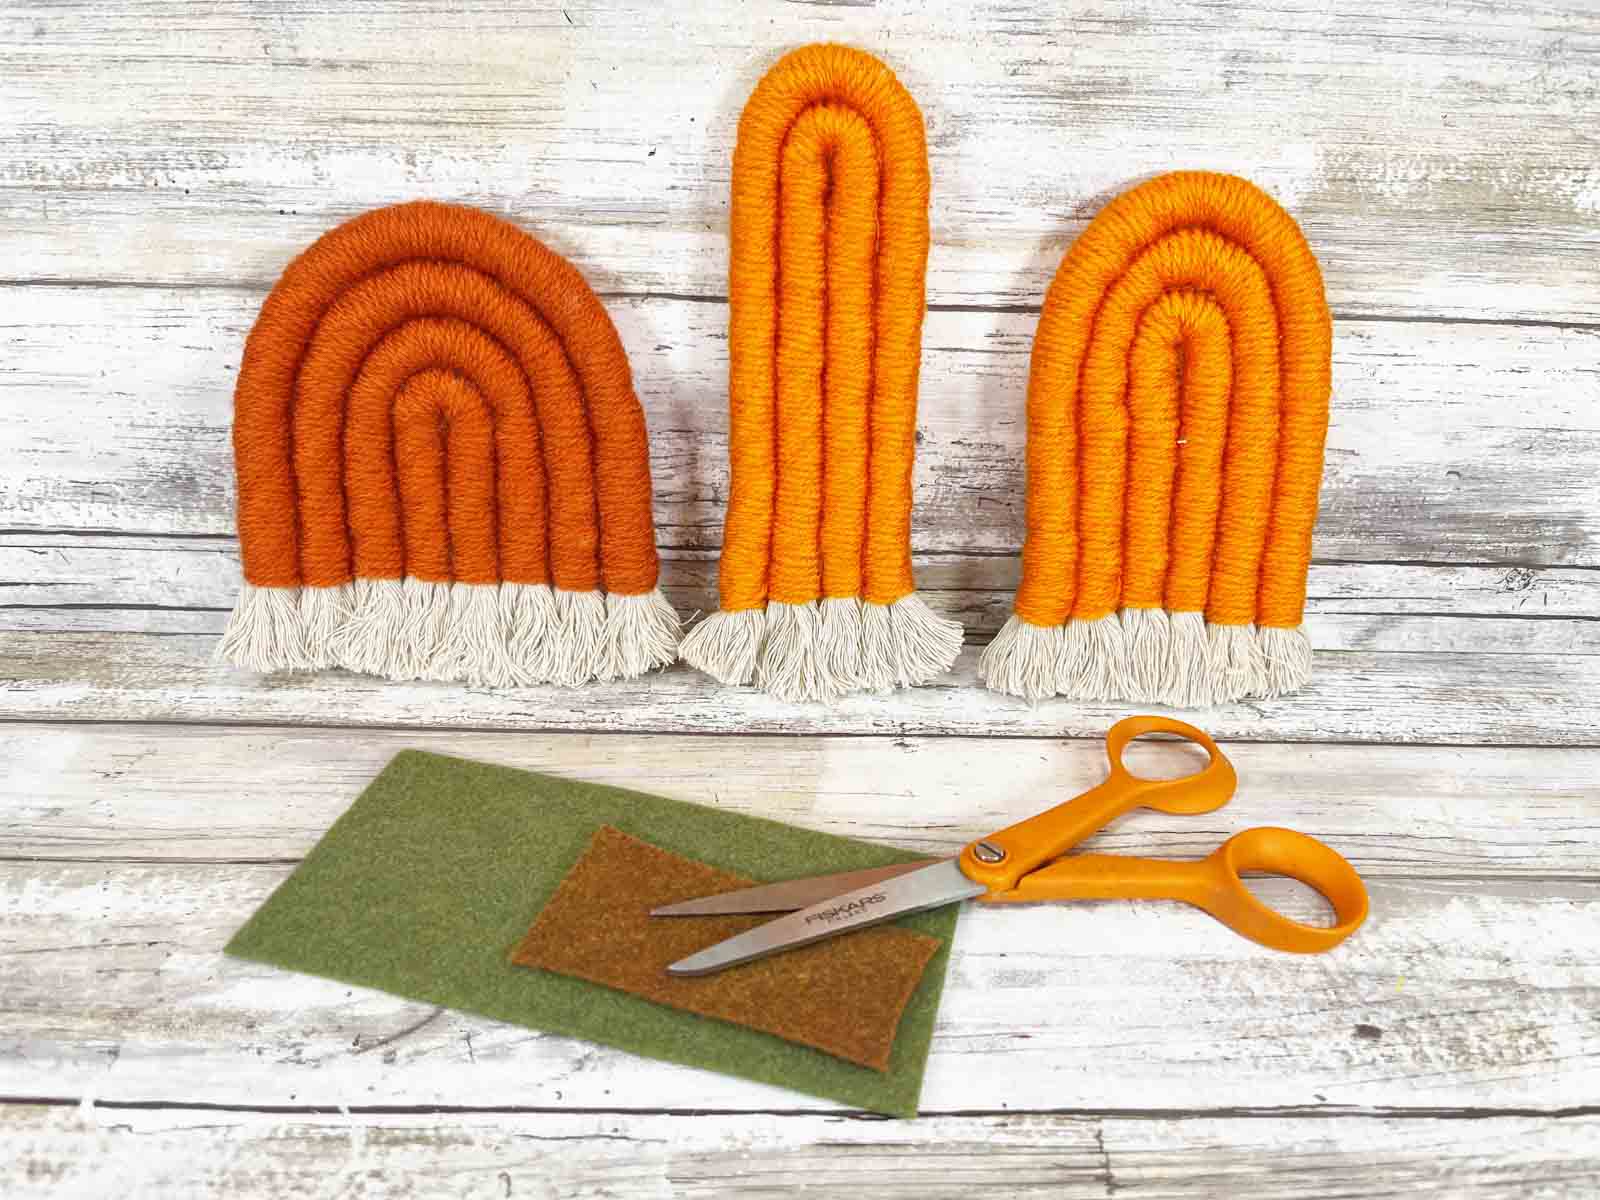
Line up the ropes for the large wide pumpkin from smallest to largest on your table. Now add a small dot of hot glue onto the smallest rope right above the tape. Place the dark orange yarn onto the dot of glue then let it cool for a minute.
Now that it’s cooled, wrap the orange yarn tightly around the small cotton rope working from one piece of tape to the other until it’s completely covered in the dark orange yarn.
Make sure as you are wrapping the rope that you keep the yarn tight and close together so there is no white space sticking out.
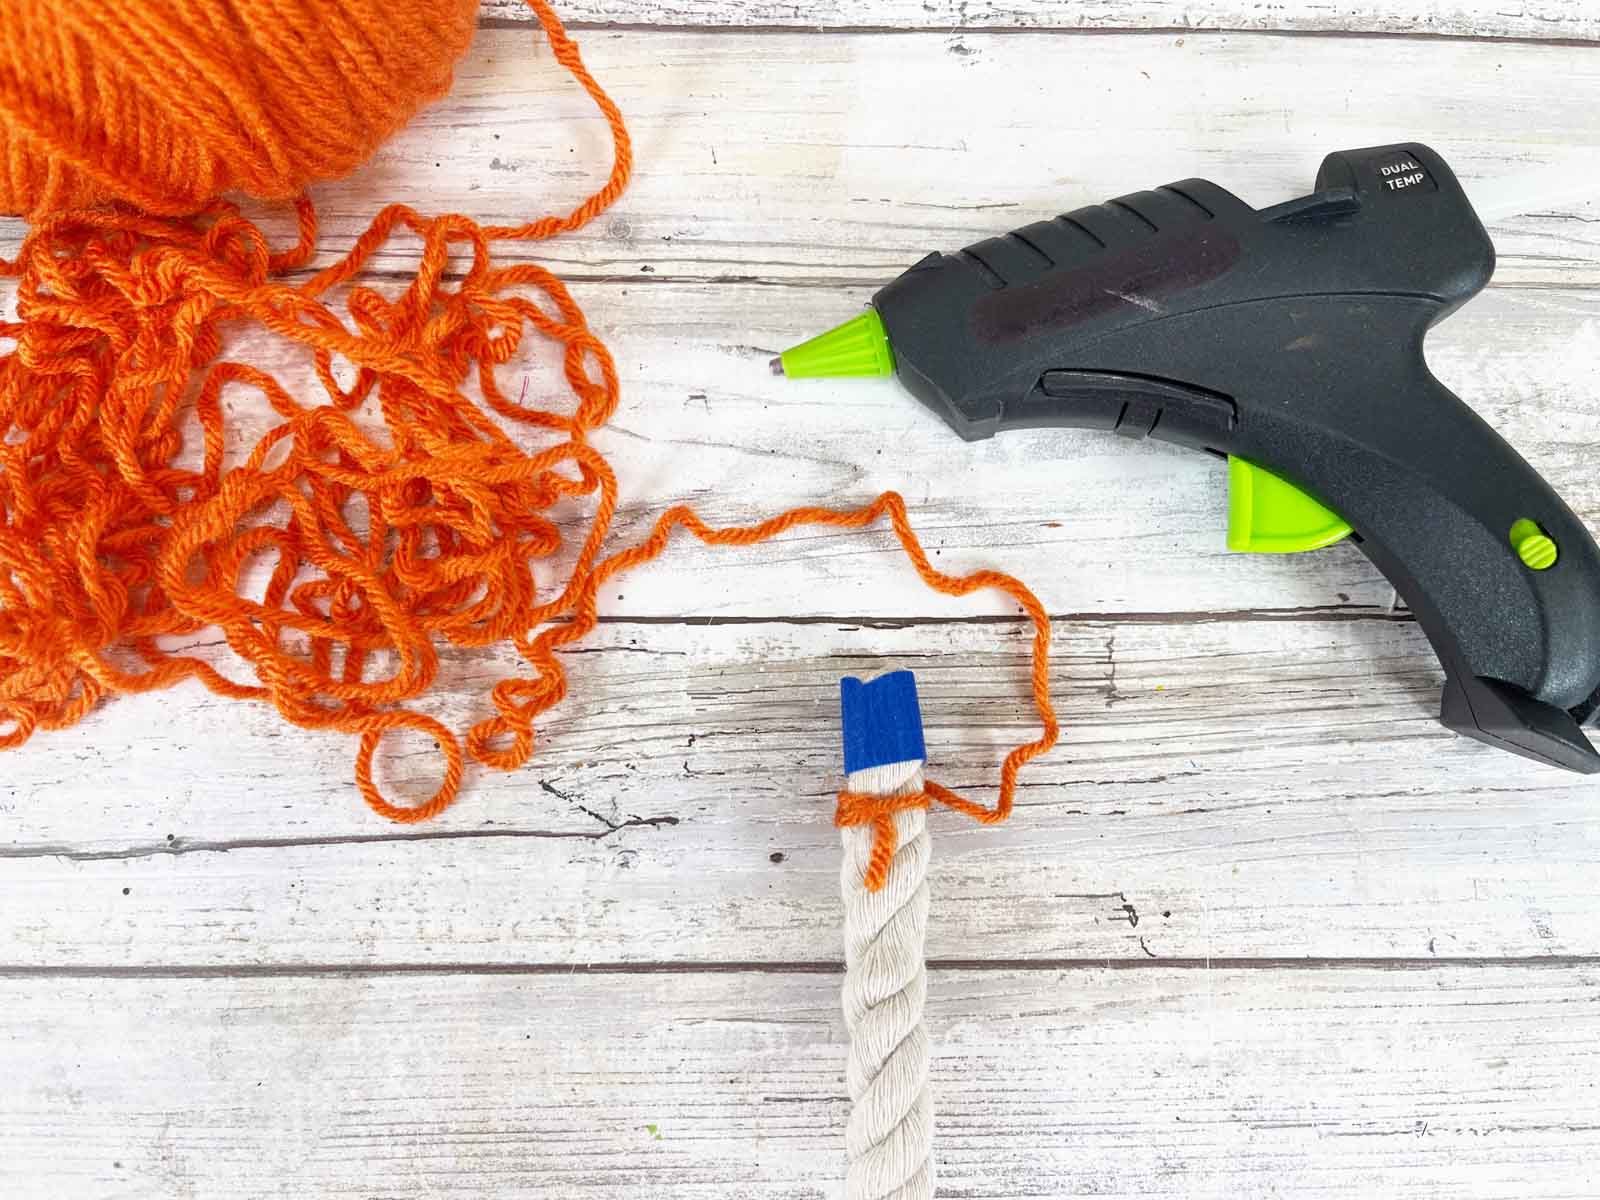
Once the yarn is completely wrapped around the rope, tie it at the end and add a second dot of hot glue.
After the small rope has been wrapped, continue to wrap the rest of the cut white ropes with the dark orange yarn until you have wrapped each of the cut pieces for the large wide pumpkin.
Repeat this process with bright orange yarn and the cut rope for the remaining two pumpkins.
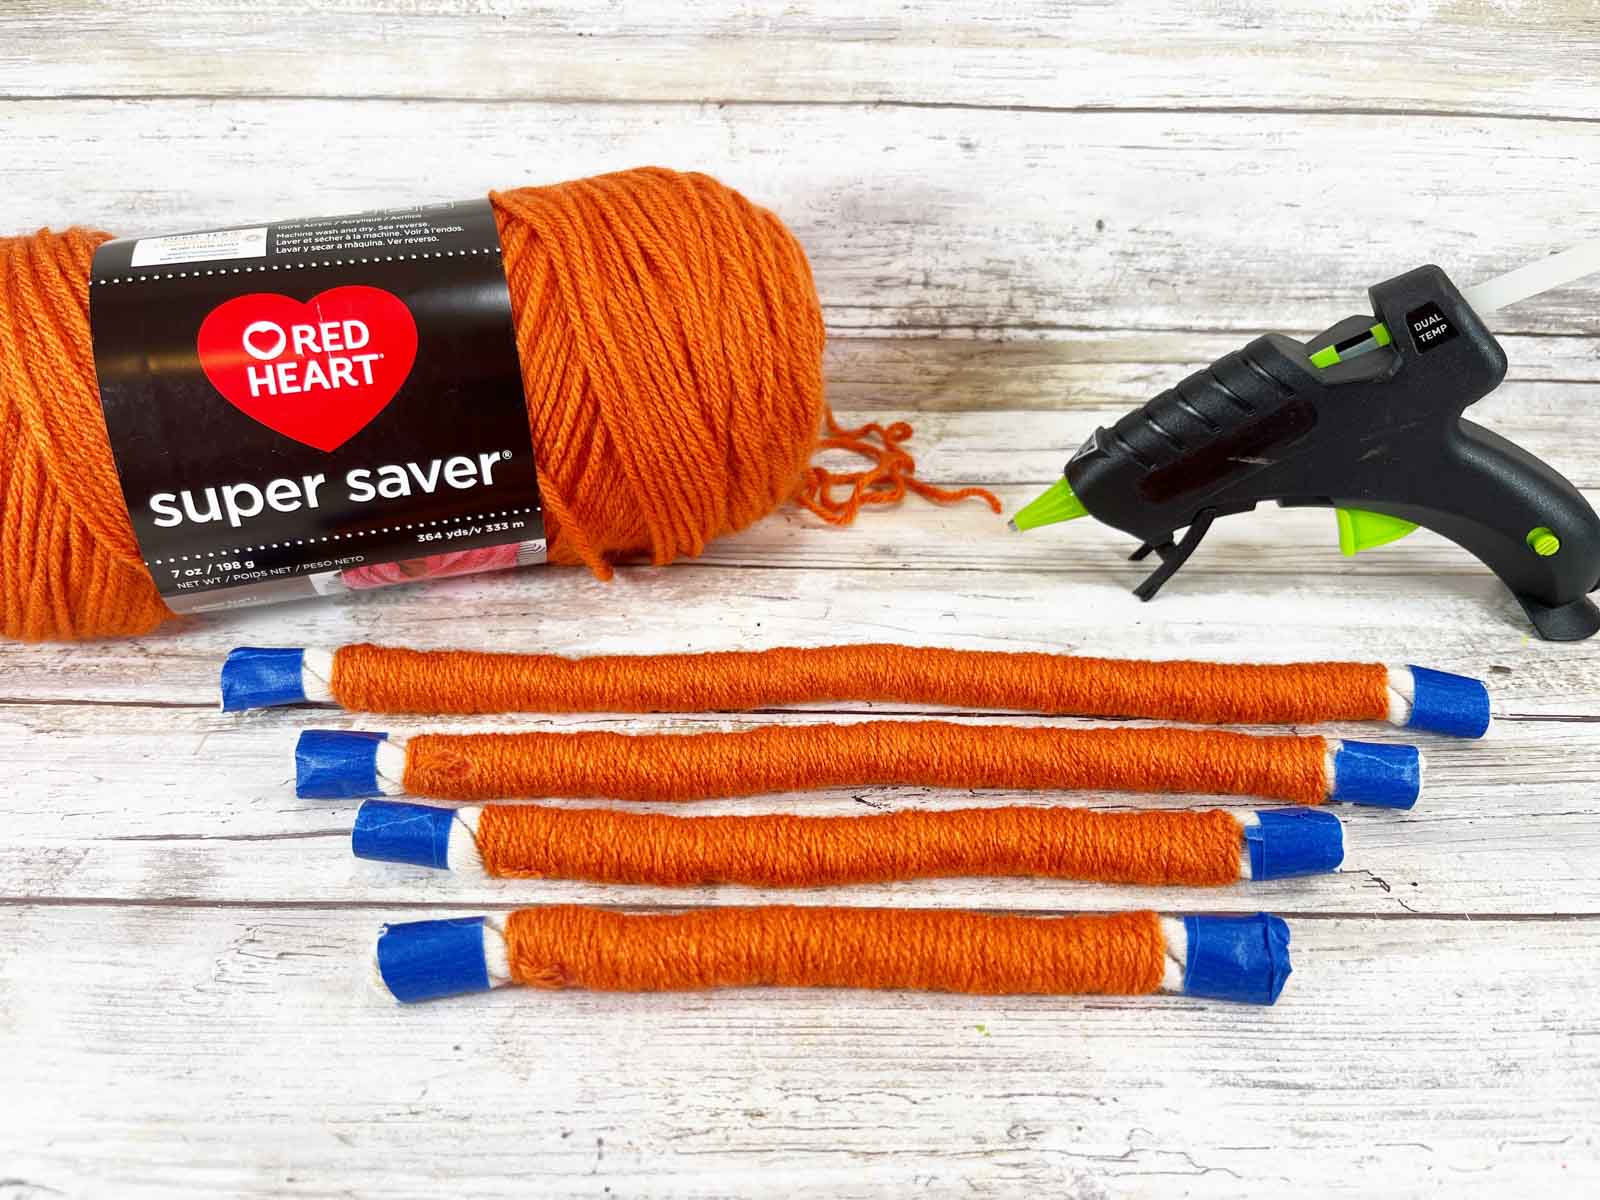
4 – Assemble The Pumpkins
Now the ropes are ready to be hot glued together.
Start with the smallest length and add a thin line of hot glue to one side of the wrapped rope. Immediately fold the rope in half and allow the glue to dry.
Next, hot glue the outside of the folded wrapped rope and place the next biggest length on top, lining up the pieces of tape as best you can. Hold it there for a minute until it cools.
Repeat until all of the ropes are glued together.
Continue this process until all of the pumpkins are assembled. Make sure to go from the smallest to the largest rope.
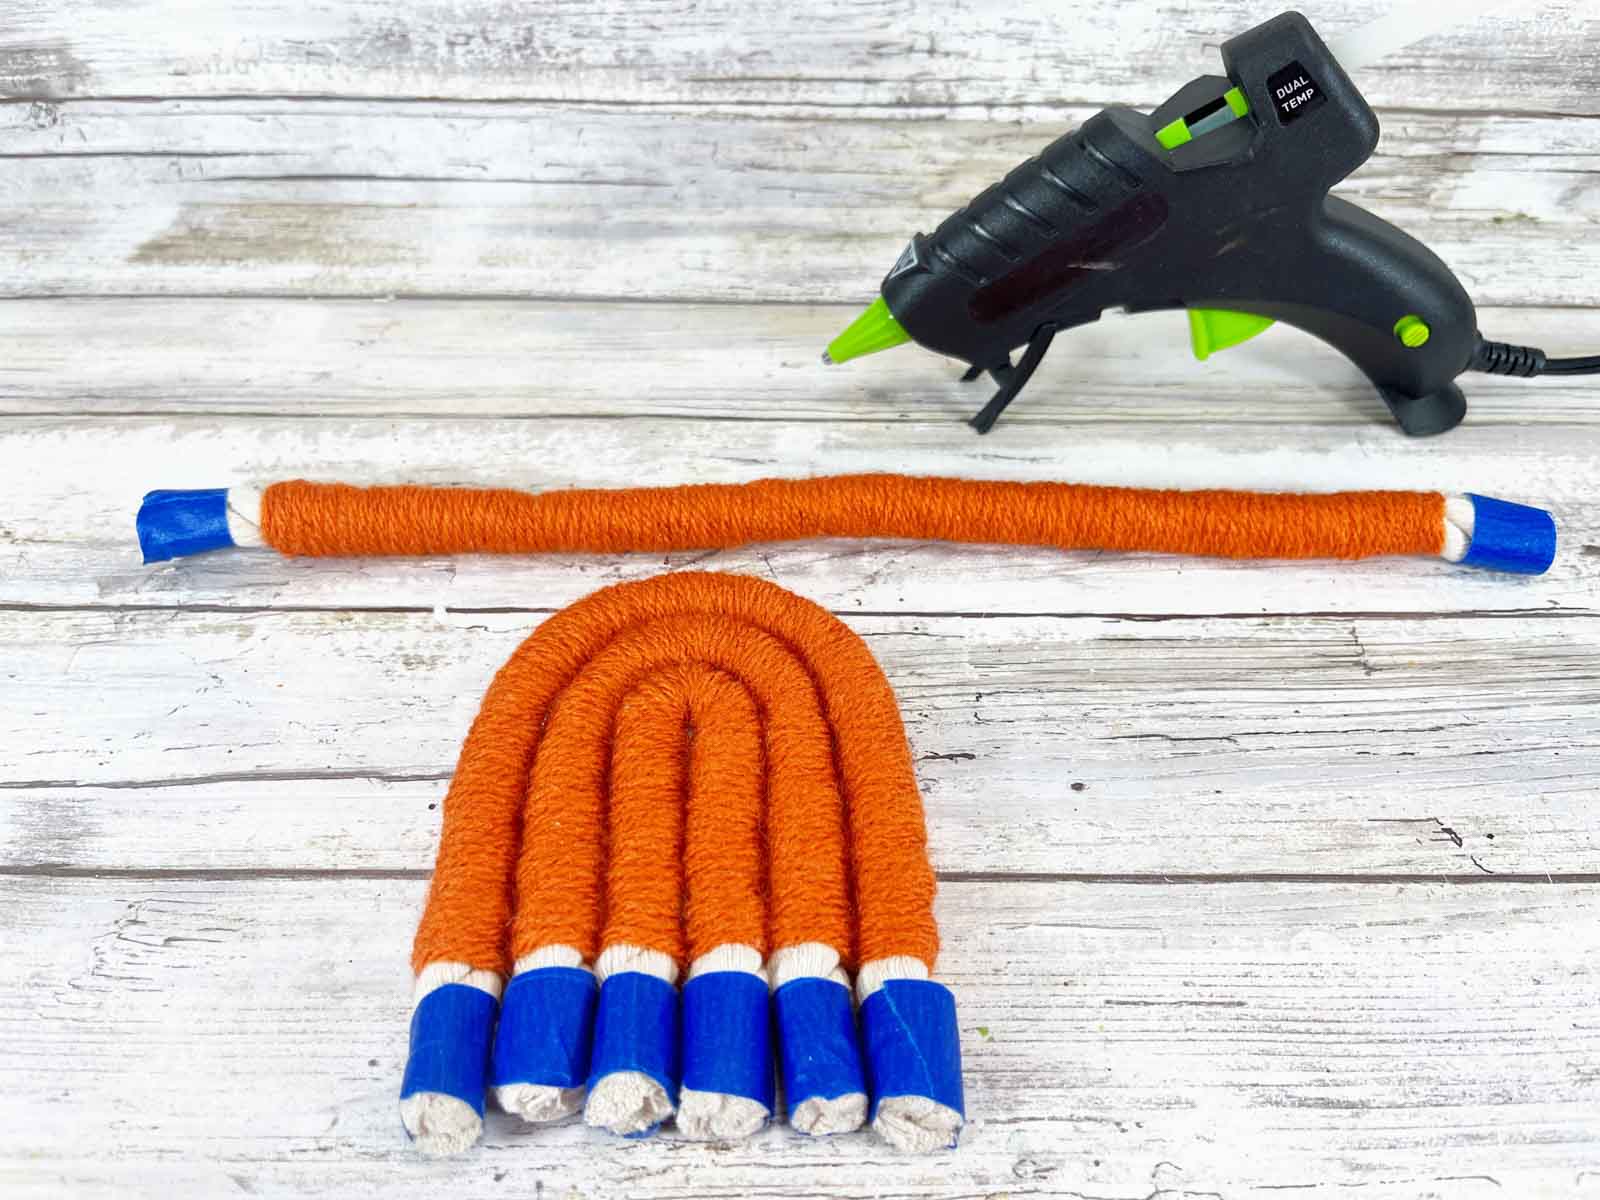
5 – Fray The Pumpkins
Next, cut the tape from the end of the rope. To do this, gently place the scissors between the rope end and tape cutting vertically then remove the tape.
Use a comb or brush to make a cute fringe on the end of each pumpkin by gently brushing out the braided rope.
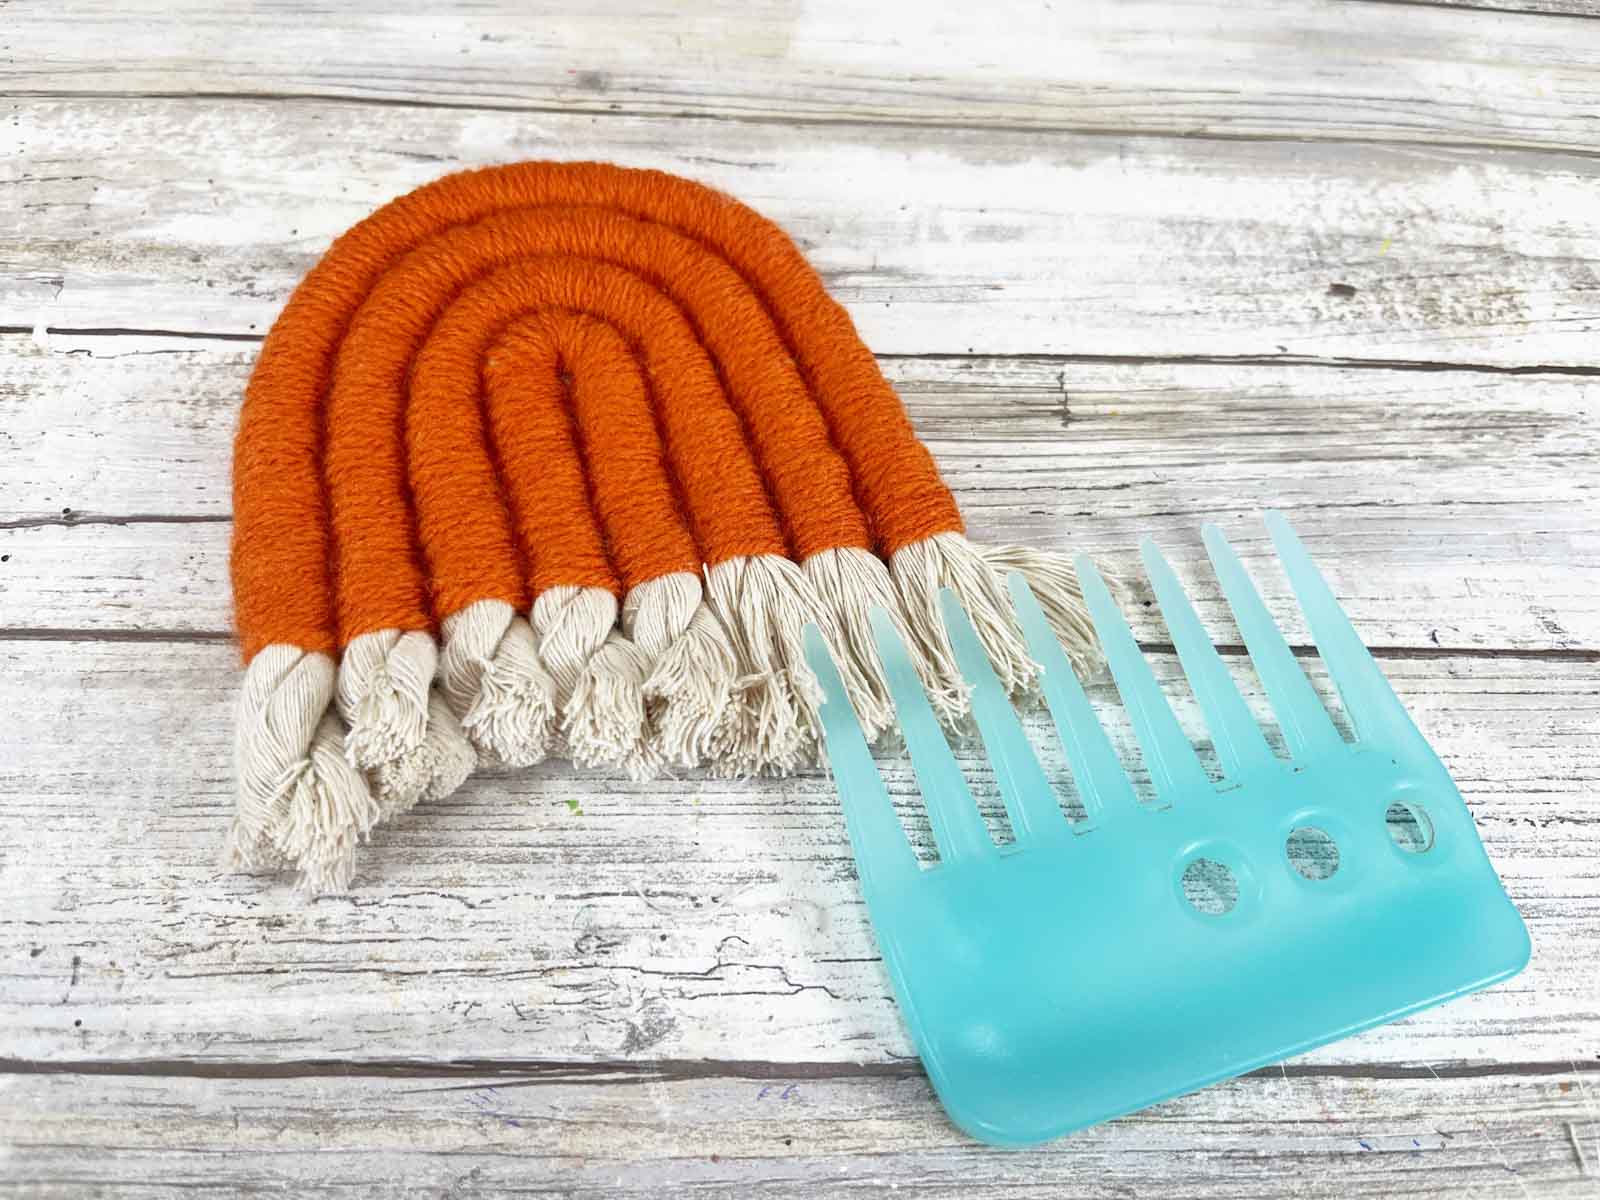
6 – Make The Stems And Leaves
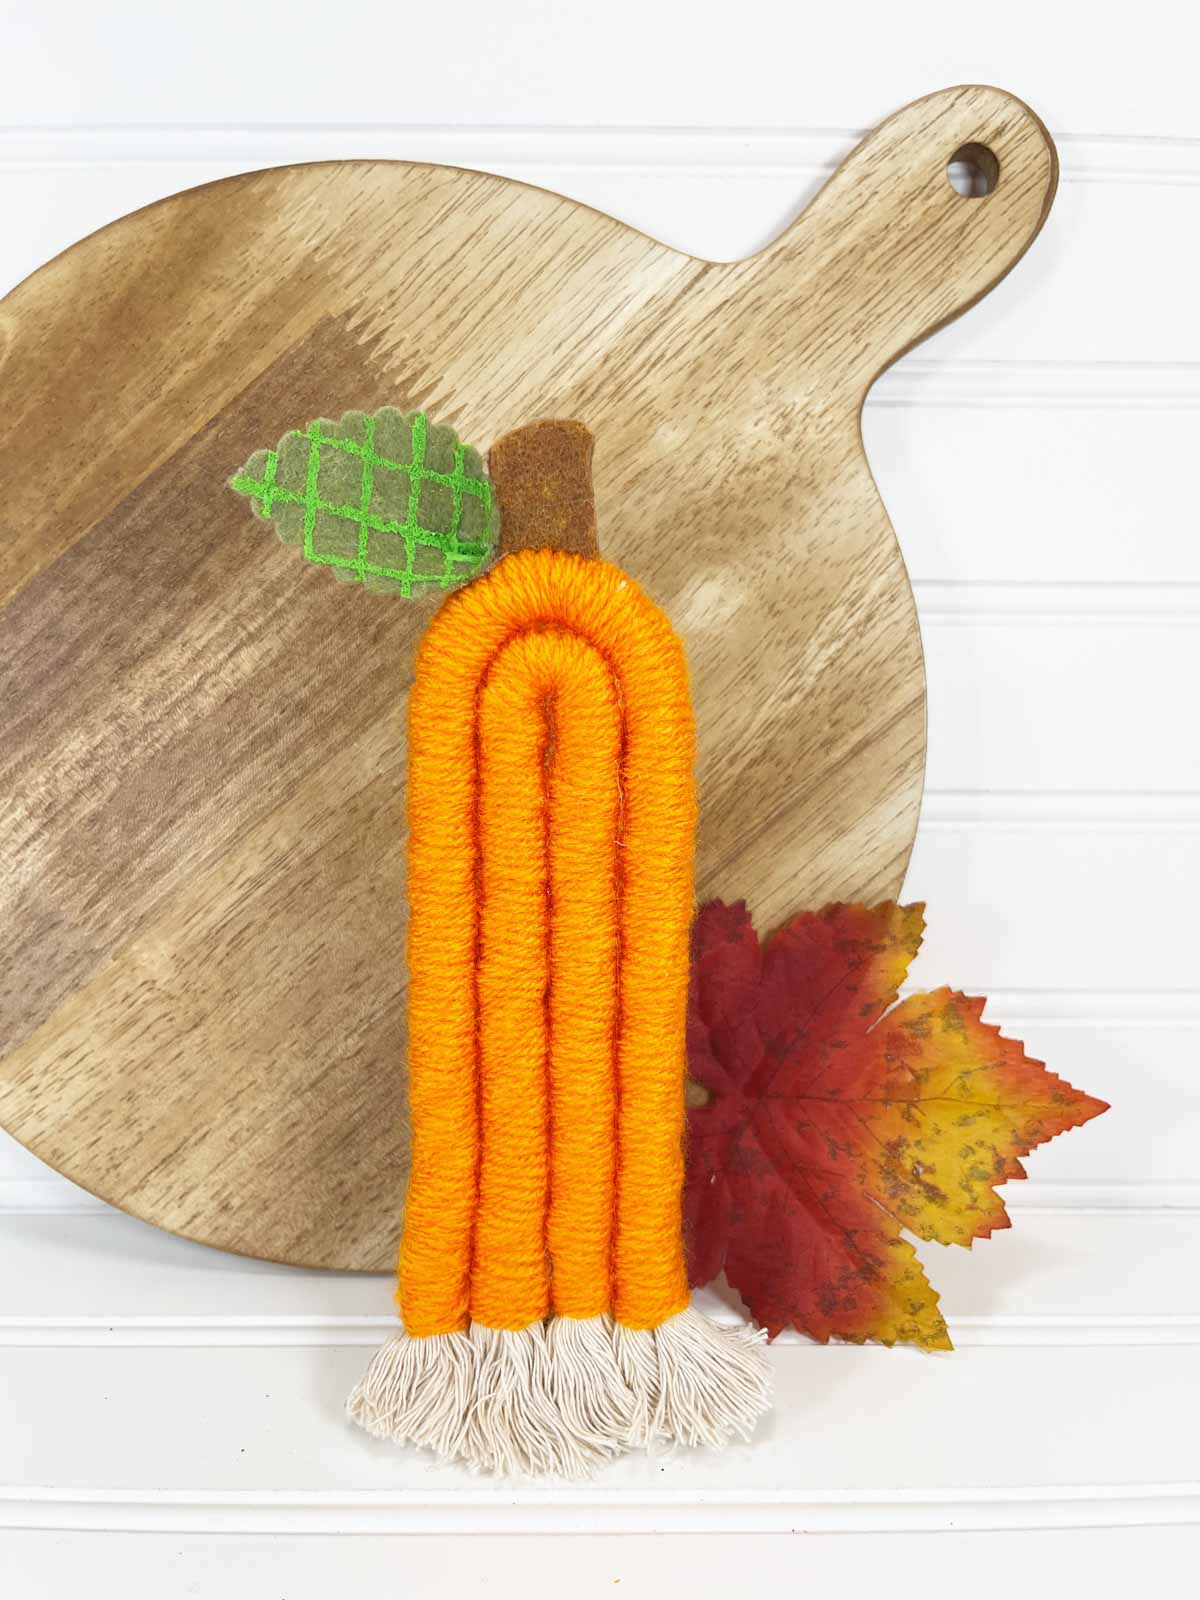
Use the green felt to trace three leaves. Then on the medium and dark brown felt, trace three stems and cut them out.
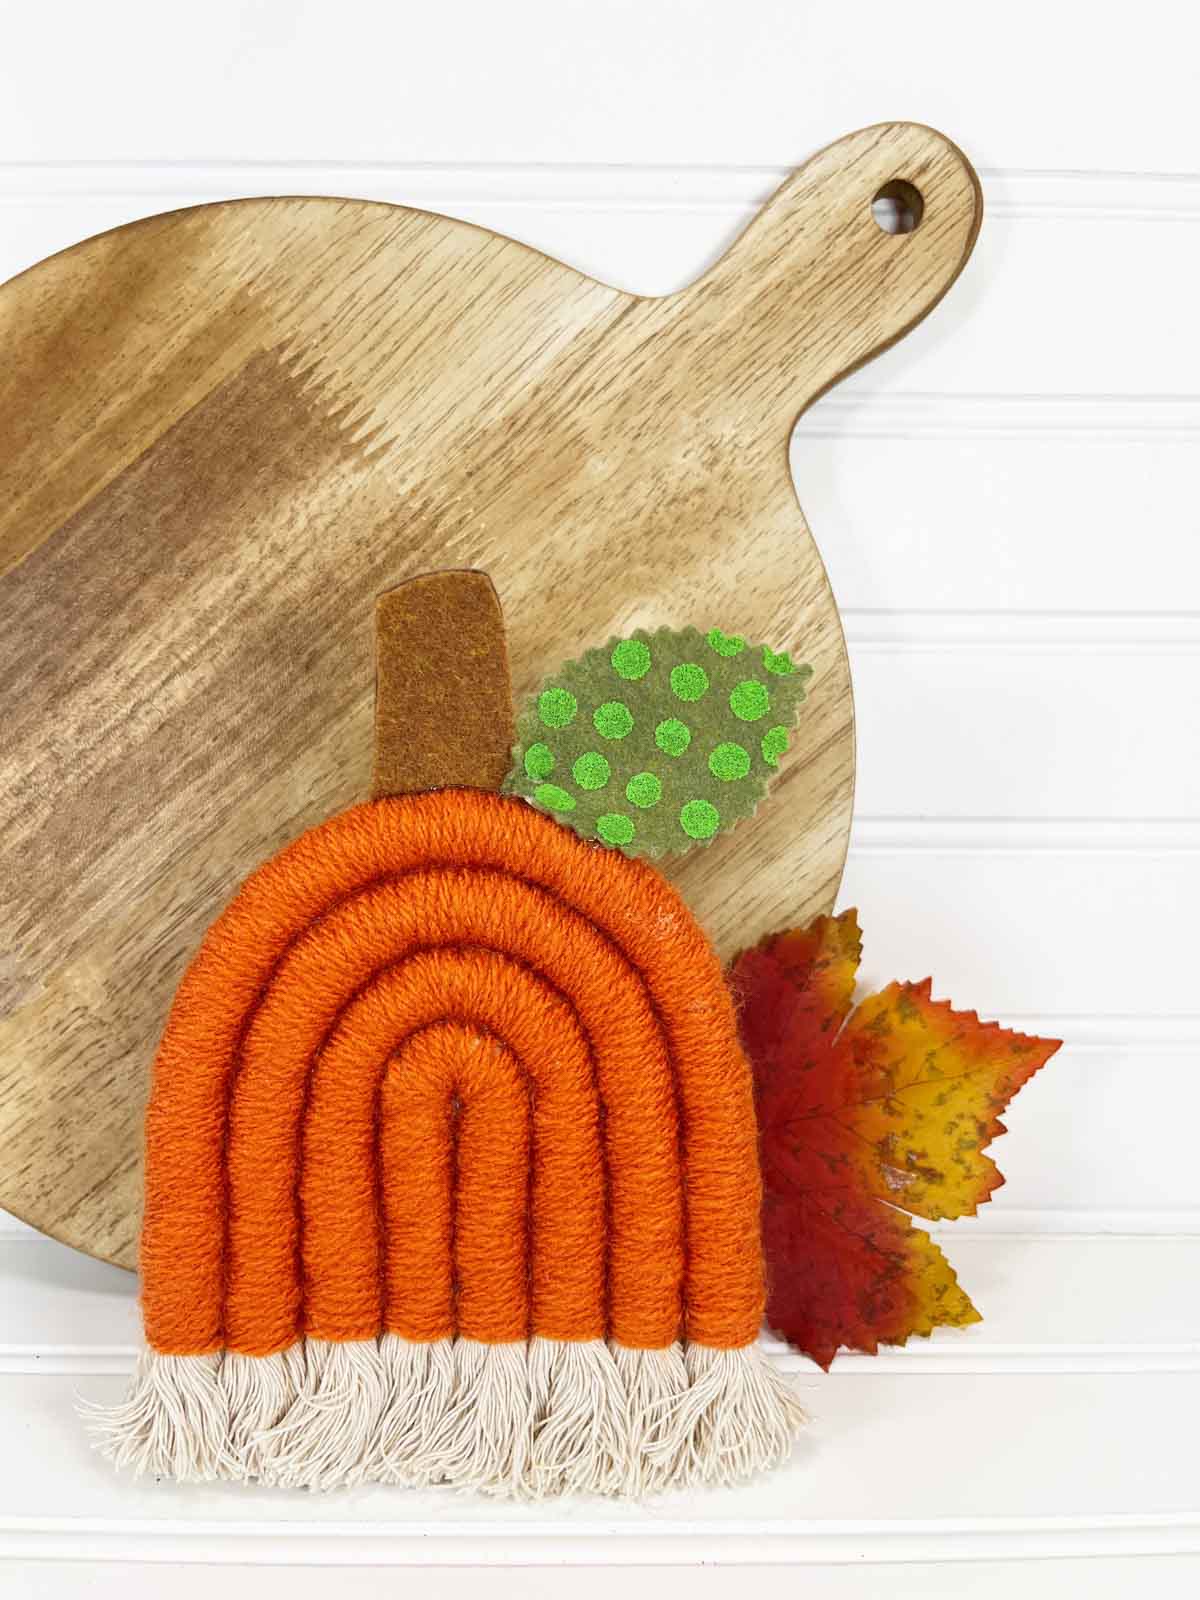
Next, create polka dots on one leaf. Dip a pencil eraser into the brigtht green acrylic paint.
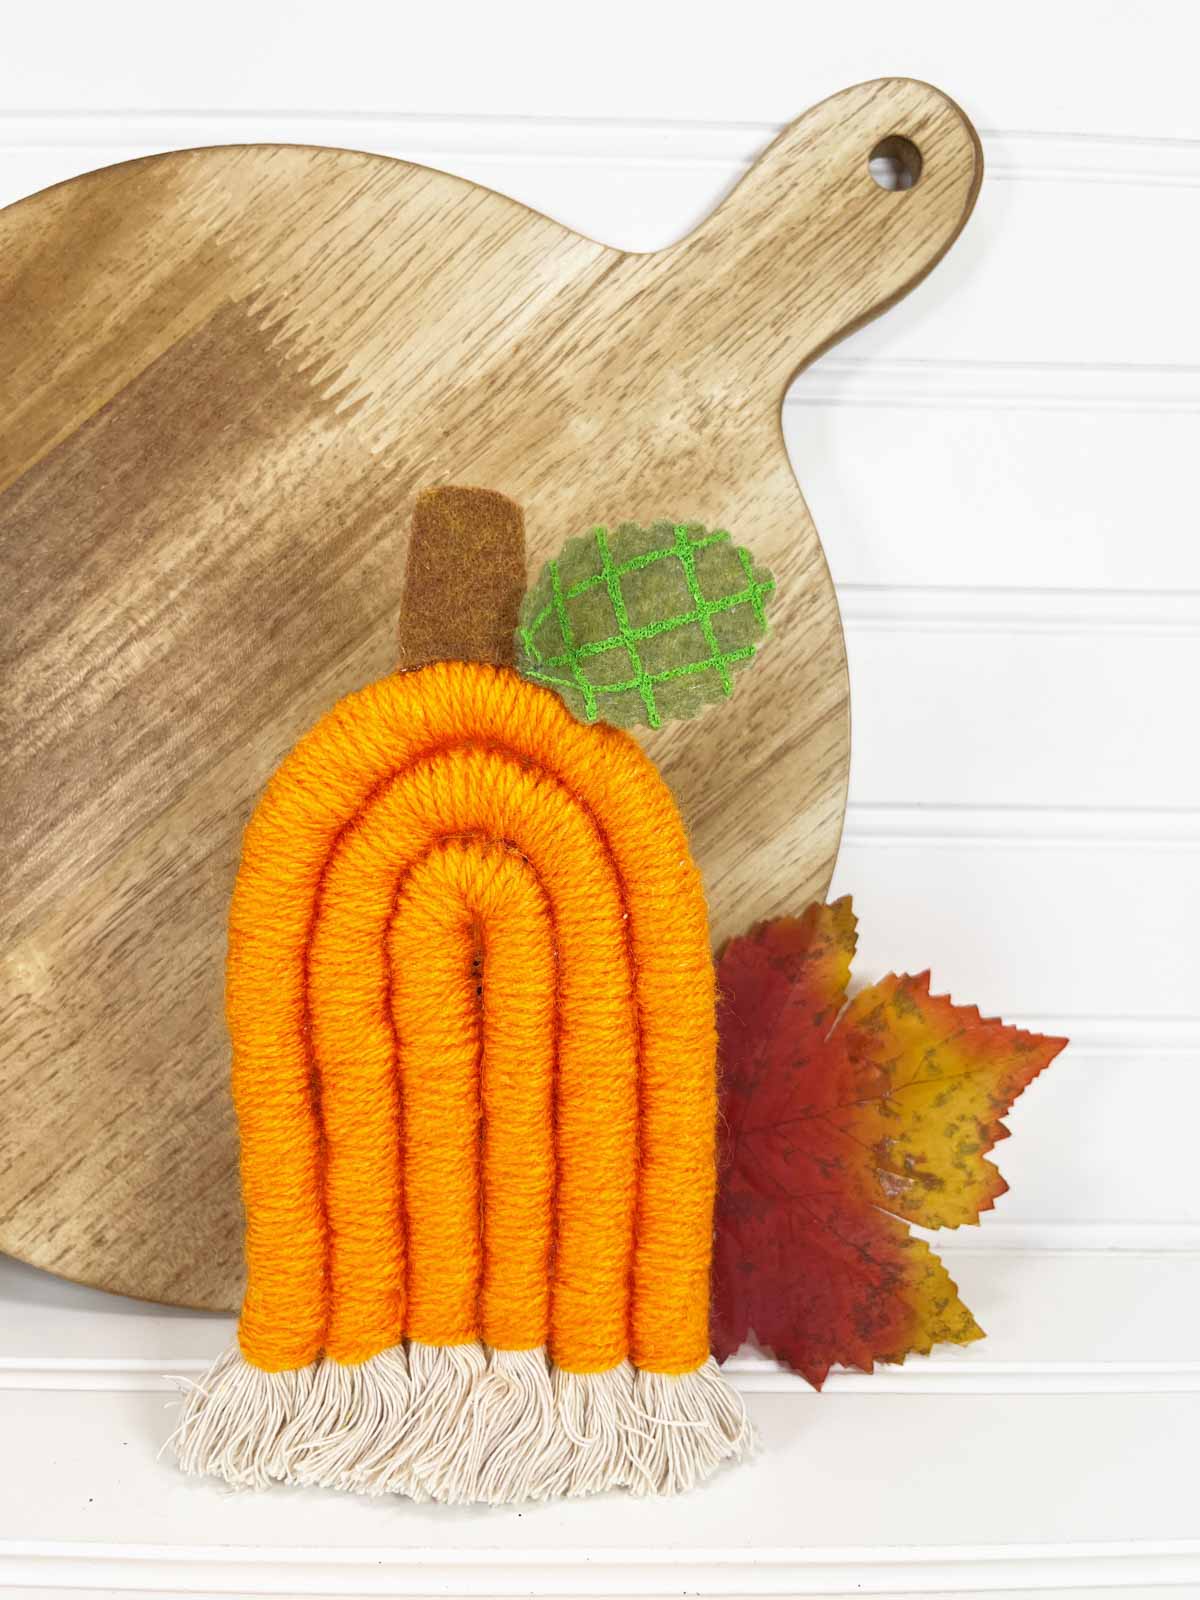
Then create a plaid pattern with verticle and horizontal lines with a flat paintbrush.
Now glue the light and dark brown stems together using the hot glue gun. They should look like wooden stems. Then finish the pumpkins by hot gluing on the leaves and stems on the top of the pumpkins as shown in pictures.
8 – Decorate
Now the hard part is over and you get to decorate!
Hang them on your wall grouped together, add them to a banner or gift bag, or attach them to a Thanksgiving or Halloween wreath! Let me know how you used your in the comments below!
Tips & tricks
Make a bunch of small pumpkins then attach the top of the pumpkin to a long rope to use as a spooky garland on coffee tables or mantles.
Forgo the felt in place of a wooden stem made from a twig and a leaf made from a painted corn husk.
Buy the supplies in bulk so you can make extra to gift your neighbors and friends.
Use rubber bands to secure the wrapped ropes while you wait for the glue to dry.
Craft FAQs
How do I hang the pumpkins?
To hang the pumpkins you can place a small nail in the wall where you want and then place the nail in between the top two ropes to hang.
More Fun Fall Crafts
Want even more fun fall crafts to make with these rope pumpkins? Try one of these!
- Turkey crafts – tons of great turkey crafts to make with leaves, handprints, and more!
- Turkey paper bag craft – this fun turkey puppet is perfect for kids to make and adults to play with!
- Gratitude game – a craft and game combined, this is one of our favorite gratitude activities!
- Fall art projects – these great fall art projects include pumpkins, apples, turkeys, and more!
- Scarecrow craft – this cute craft only takes some popsicle sticks, paper, and glue!
Want more Goodies?
Want more delicious recipes just like this one? Enter your first name and email address in the form below to join the Play Party Plan community! You’ll receive weekly recipes and party ideas directly to your inbox!
Rope Pumpkin Craft
Ingredients
- painters tape
- thick cotton rope
- craft Yarn bright orange and dark orange
- craft felt sheets olive green, dark brown, Black, Medium brown
- acrylic paint bright green
Instructions
- Cut the rope to make the different sized jack-o-lanterns. Measure and tape off the rope where you will be cutting it. Tall pumpkin – Cut two ropes. One should 10 inches long and the other should be 12 inches. Small pumpkin – Cut three ropes. One should be 8 inches, one should be 9 1/2 inches, and one should be 11 inches long.Wide pumpkin – Cut four ropes. The first should be six inches, one should be 7 1/2 inches, one should be nine inches, and the last should be 11 inches long.thick cotton rope, painters tape
- Line up the rope and dry fit them together to make sure all of the lengths will work together. Label the ropes at this point with permanent marker so you know where they go.
- Add a small dot of hot glue onto the smallest rope. Place the dark orange yarn onto the dot of glue then let it cool for a minute. wrap the orange yarn tightly around the small cotton rope until it’s completely covered in the dark orange yarn.craft Yarn
- Continue to wrap the rest of the cut ropes with the dark orange yarn. Once the yarn is completely wrapped around the rope tie it at the end and add a second dot of hot glue.
- Start with the smallest length of rope and add a thin line of hot glue to the top of the rope. Fold the next biggest length on top of the smallest rope nd hold it there for a minute until it cools. Repeat until all of the ropes are glued together. Continue this process until all of the pumkins are finished.
- Cut the tape off the end of the rope. Use a comb or brush to make a cute fringe on the end of each pumpkin.
- Add stems and leaves to the pumpkins. Download the leaf patterns then print them out and cut the leaf pattern. Use the green felt to trace three leaves. Then on the medium and dark brown felt trace three stems.craft felt sheets
- Next create polka dots on one leaf. Dip a pencil eraser into the brigtht green acrylic paint. Then create a plaid pattern by verticle and horizontal lines with a flat paintbrush. Now glue the light and dark brown stems together using the hot glue gun.acrylic paint
- Hot glue on the leaves and stems on the top of the pumpkins and your pumpkins are finished!
Tips & Notes:
Supply notes
Supply notes
Want More Fun Ideas?
Want more fun ideas like this one? Enter your first name and email address in the form below to join the Play Party Plan community! You’ll receive weekly recipes, party ideas, games, and more directly to your inbox!



Leave a Reply