As someone who has planned too many Halloween parties to count and always been put in charge of the games, I’m always trying to come up with simple, inexpensive, and fun Halloween games that will work for various ages. This bone to pick game is exactly that – a Halloween game that you can customize to make work for any group of people and any Halloween celebration!
Plus, we show you a super simple way to make your very own DIY game spinner that you can use not only for this bone to pick Halloween party game but also for any other occasion, just replace the bone with another long and thin thing that will spin!
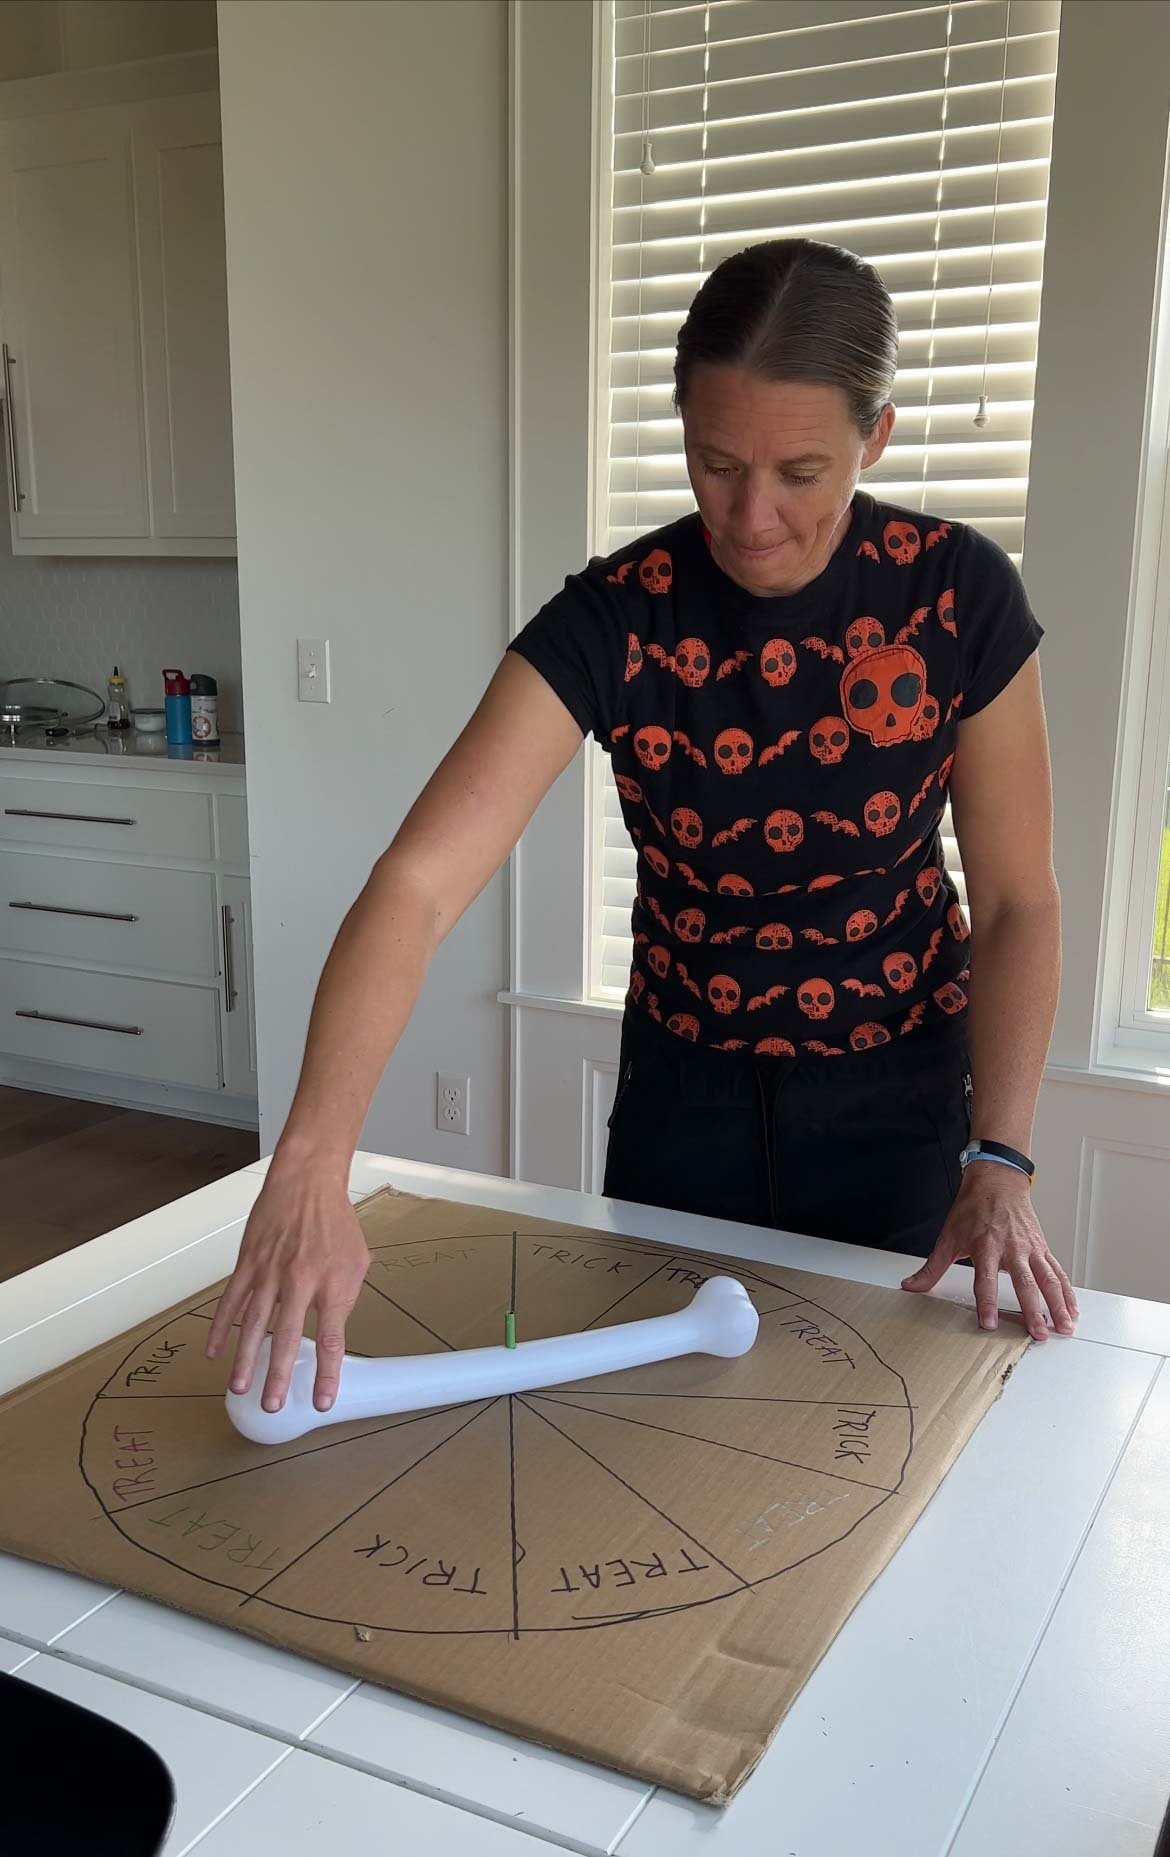
I’ve been the classroom mom for ten years and coming up with new Halloween games for that, our youth nights, and our family Halloween party is a struggle.
The biggest problem I’ve found in the past is finding games that work for all ages so that I can repeat them across parties. For instance this Halloween family feud game works great for our family party but isn’t necessarily a good option for my preschooler.
And this Halloween word search definitely doesn’t work well for adults, but these Halloween trivia questions do. It’s a real problem I run into every single year!
So this year I wanted to create fun Halloween party games that would work for kids, teens, and adults. I already shared our ghost bowling game and this DIY bone to pick game is the second in our collection of games for any age.
This game is as easy as creating a DIY spinner, adding choices, and then turning it into a game. And I’ve come up with various options you can use to make the game work for any age – so no having to come up with new games for every Halloween celebration this year!
It’s one of the Halloween activities we’re going to setup with our trunk or treat this year too along with this viral witch hat ring toss game!
Why You’ll Love This Game
- Cheap – the materials to make this spinner cost me $1. That’s right, all I needed was the bone and everything else I had on hand to make the spinner. And that’s not just because I have a lot of stuff at home, you’ll likely have it on hand too! The only thing that you’ll have to pay for on top of the spinner is any prizes you want to use!
- Easy to make – you’ll be surprised how easy this comes together with everyday items. I think the hardest part was drawing the circle.
- Endless variations – there are so many different ways to play this game that you can make it a fun Halloween game that any age can enjoy!
Supplies
- Cardboard – I used an old box I had lying around the house. You will want it to be big enough to fit the bone and writing. You can also use a foam board.
- Plastic bone – I got mine from the Dollar Tree. If you can’t find one there, you can try using a paper towel roll with a bone drawn on it or a piece of PVC pipe. Or really anything else long and skinny that will spin.
- Markers – it worked best to have a variety of colors for the game we played with it. If you’re just going to do trick or treat (and not use the colors), you can just do black permanent marker.
- Plastic straw – you will want two of these.
- Drill – while I would highly recommend using a drill with a drill bit for this, you could try using an Exacto Knife. Please remember to use caution when using this and keep it out of the hands of any kids. If you are using a paper towel roll a knife will be just fine.
- Tape – I used painter’s tape because that’s what I found first, but any type will do as long as it’s sturdy!
- Compass – I used a makeshift compass by tying two pencils together with a string. You can also simply trace a circle if you have something on hand large enough. I have used a clock before that worked great as well or a pizza pan works too!
- Prizes – if you’re doing a version with prizes, you’ll want to make sure and have different prizes on hand!
- Trick cards – I use the ones that you can print out in this trick or treat game but you could also print out yoru own!
How to make the DIY Game Spinner
This easy DIY spinner takes about ten minutes to make, uses mainly things you have on hand, and can be used for several different games.
Adding this spinner to your Halloween games should be a no-brainer. And once it once, it should be easy to recreate for different holidays!
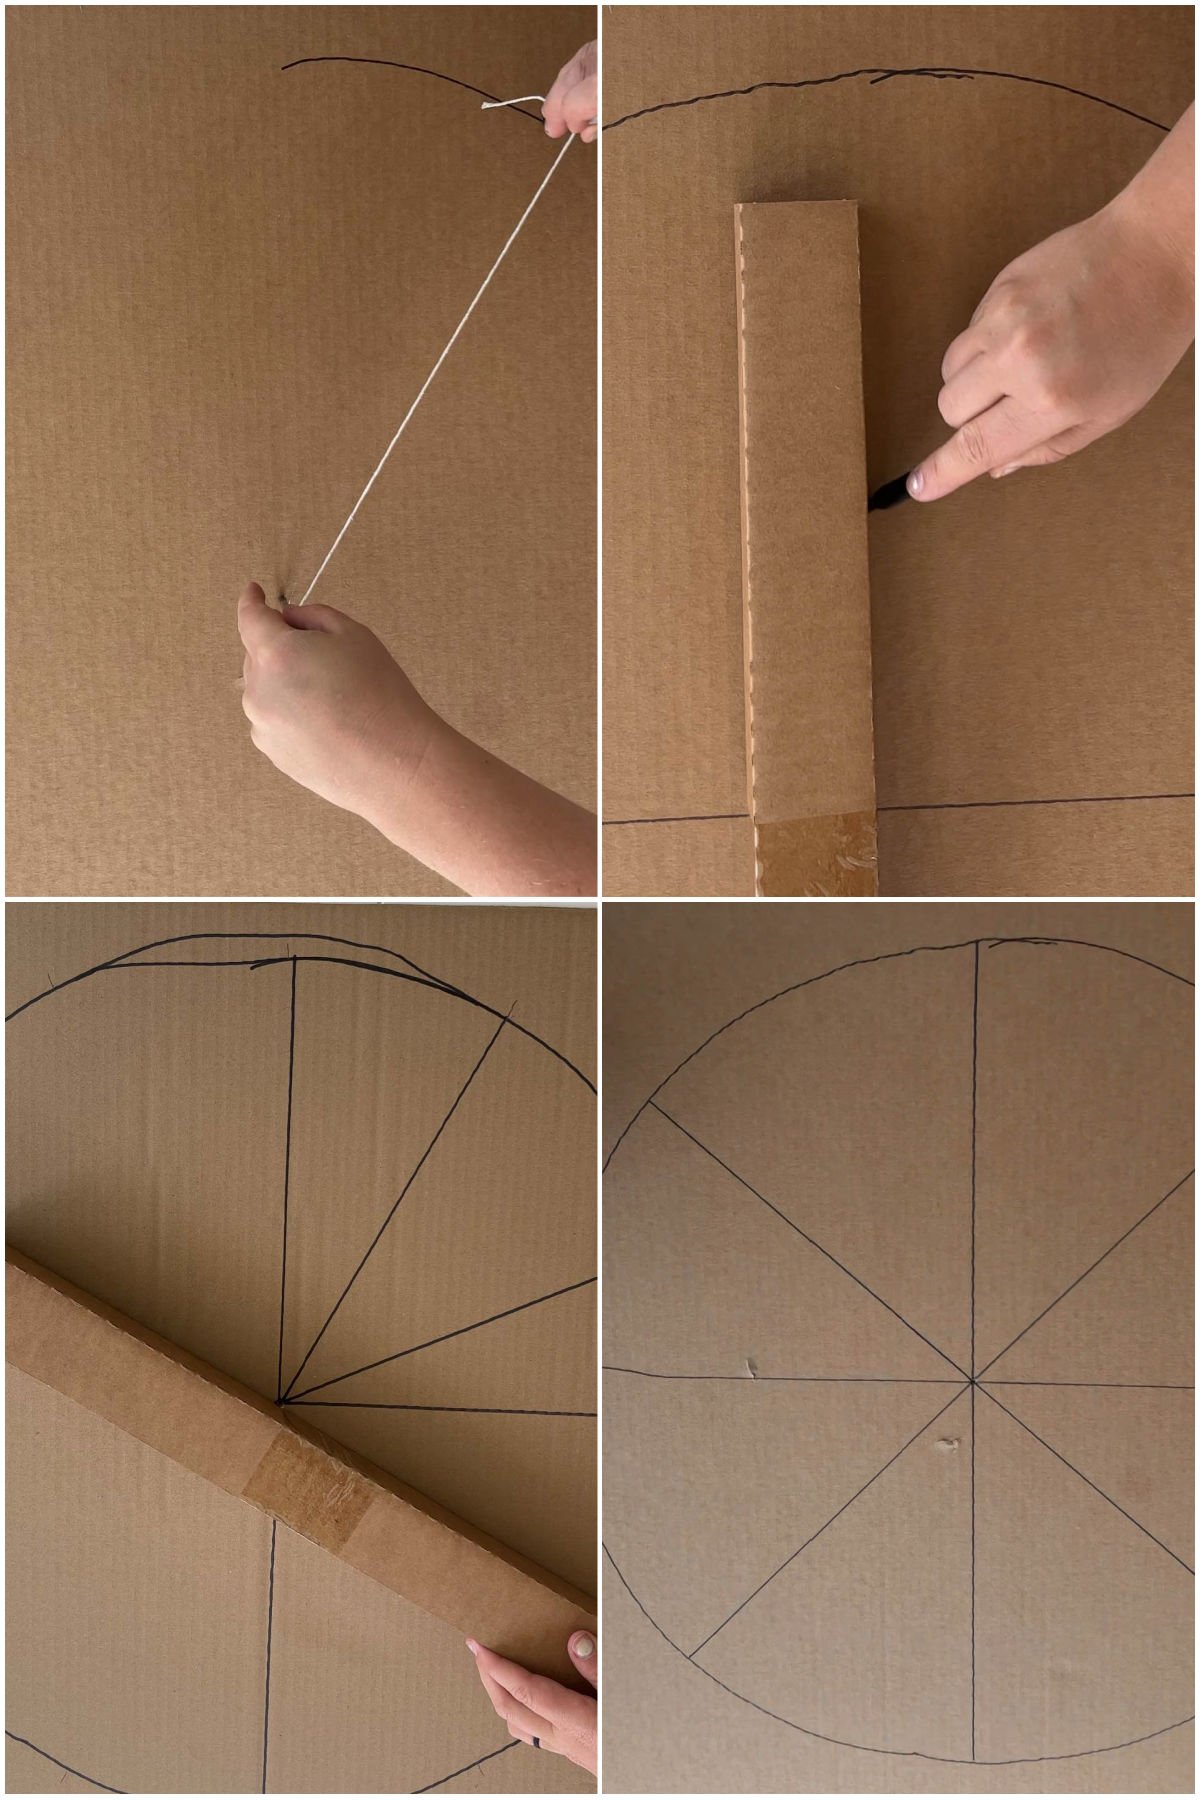
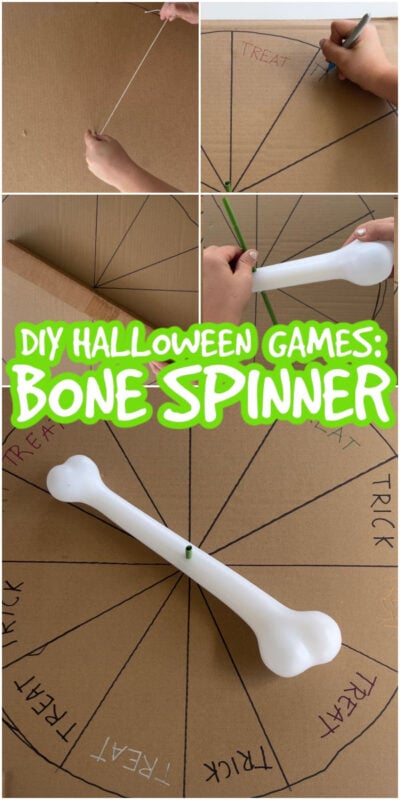
1 – Create Your Circle
- Start by cutting your cardboard to the desired size using a box cutter, knife, or scissors. Remember to be careful while doing this portion since the tools are sharp!
- Once cut you will want to mark the center of the cardboard using a marker.
- Using your compass place one pencil in the center of the cardboard. Then, without moving the pencil in the middle begin drawing a circle with the other attached pencil by keeping the string taut while you circle the cardboard. This is easier if you have a large circular item like a clock you can trace. Or you can freehand it if you trust yourself!
- Then use a straight edge, like a ruler or a leftover piece of cardboard, and divide the circle into twelve sections. It’ll look like a pie chart.
2 – Add the bone to the Spinner
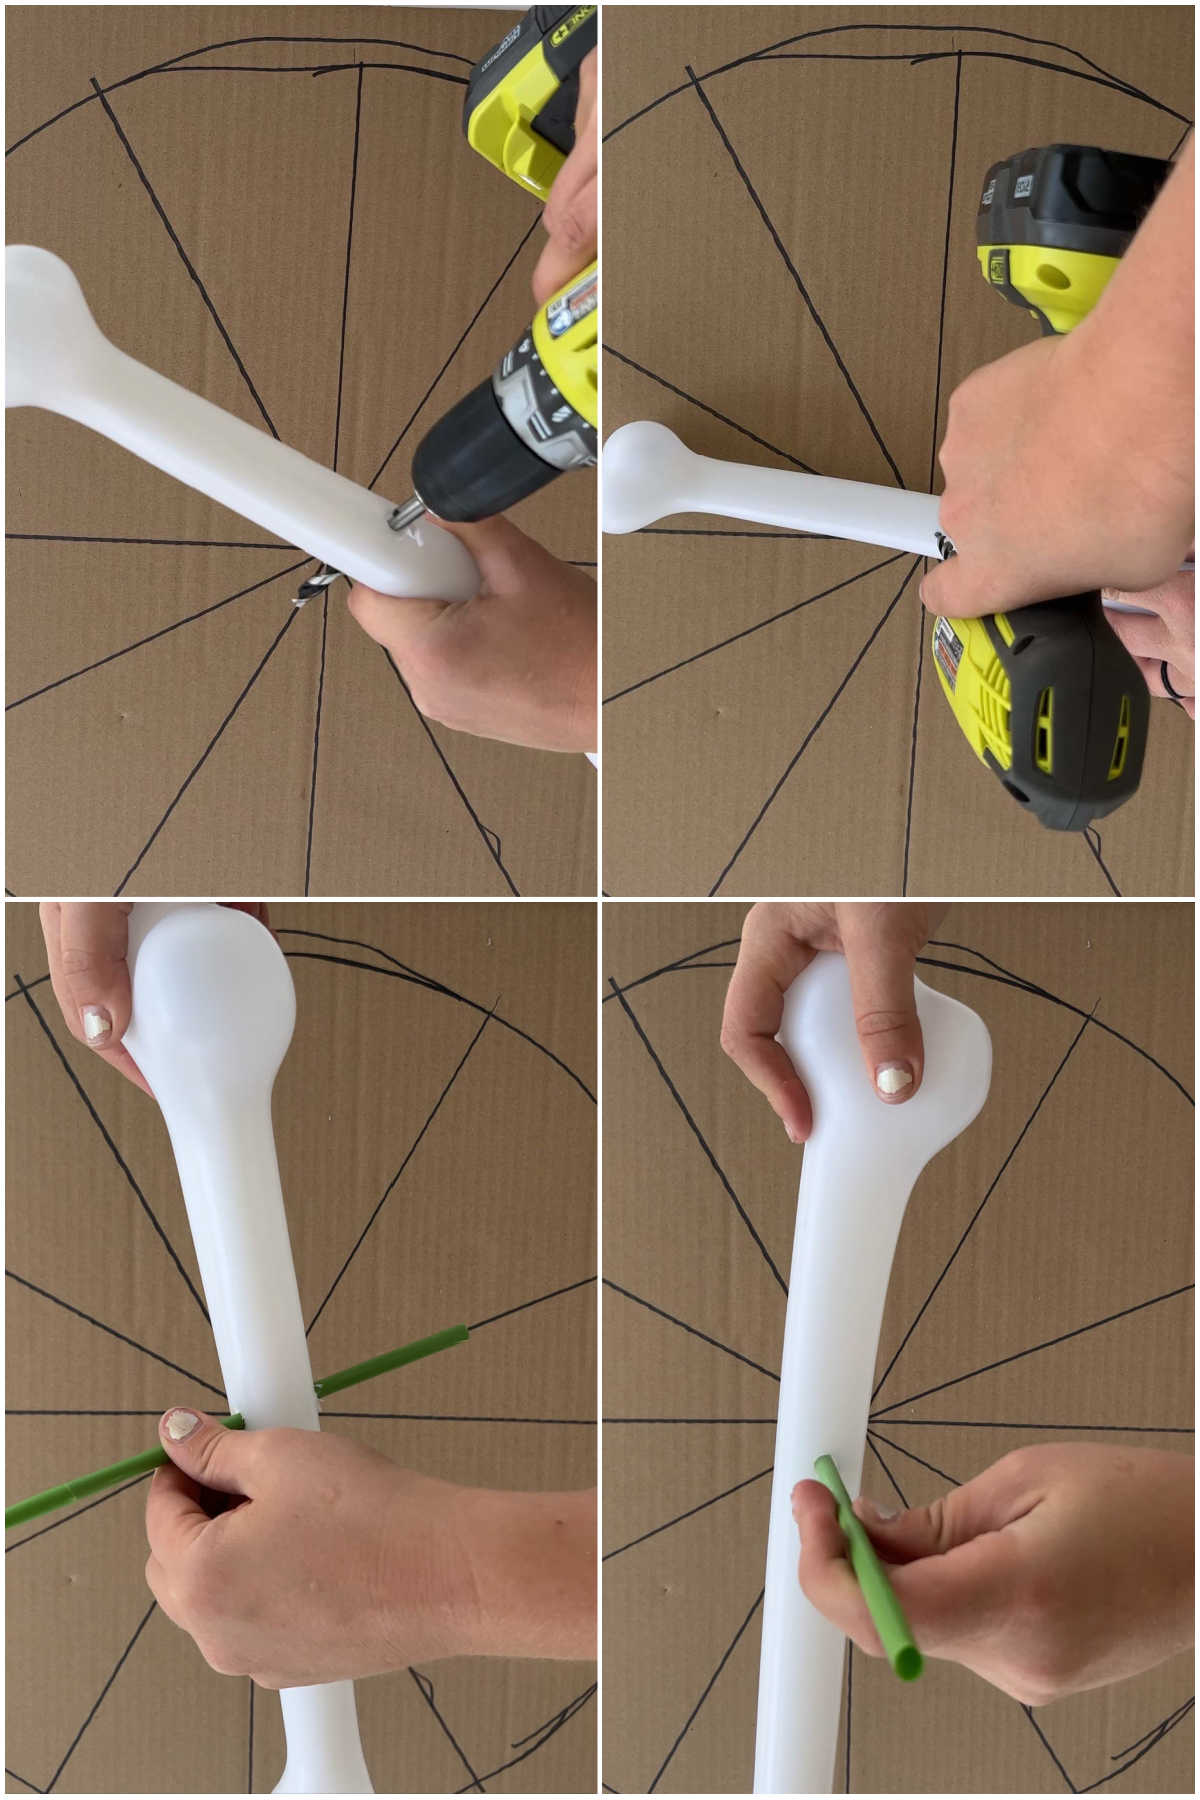
- With the game board set up, it is time to add the spinner. Begin by inserting one of the two straws into the other. I had to squish mine to make it fit, it doesn’t have to be pretty, it’s just for support.
- Next mark the center of your bone using a pencil or marker.
- Using your drill with a drill bit that is slightly larger than your straw, drill a hole through the mark on your bone. You’ll want to keep this as straight as possible when you go through the bone so it spins easily.
- Test your straw to make sure it fits easily into the hole you’ve drilled. Make adjustments as needed using larger drill bits. It’s better to start smaller than get bigger if you need to.
3 – Attach The Bone Spinner
- Make a hole the size of your straw in the marked center of the cardboard. I used a screwdriver for this, but a pen would also be just fine.
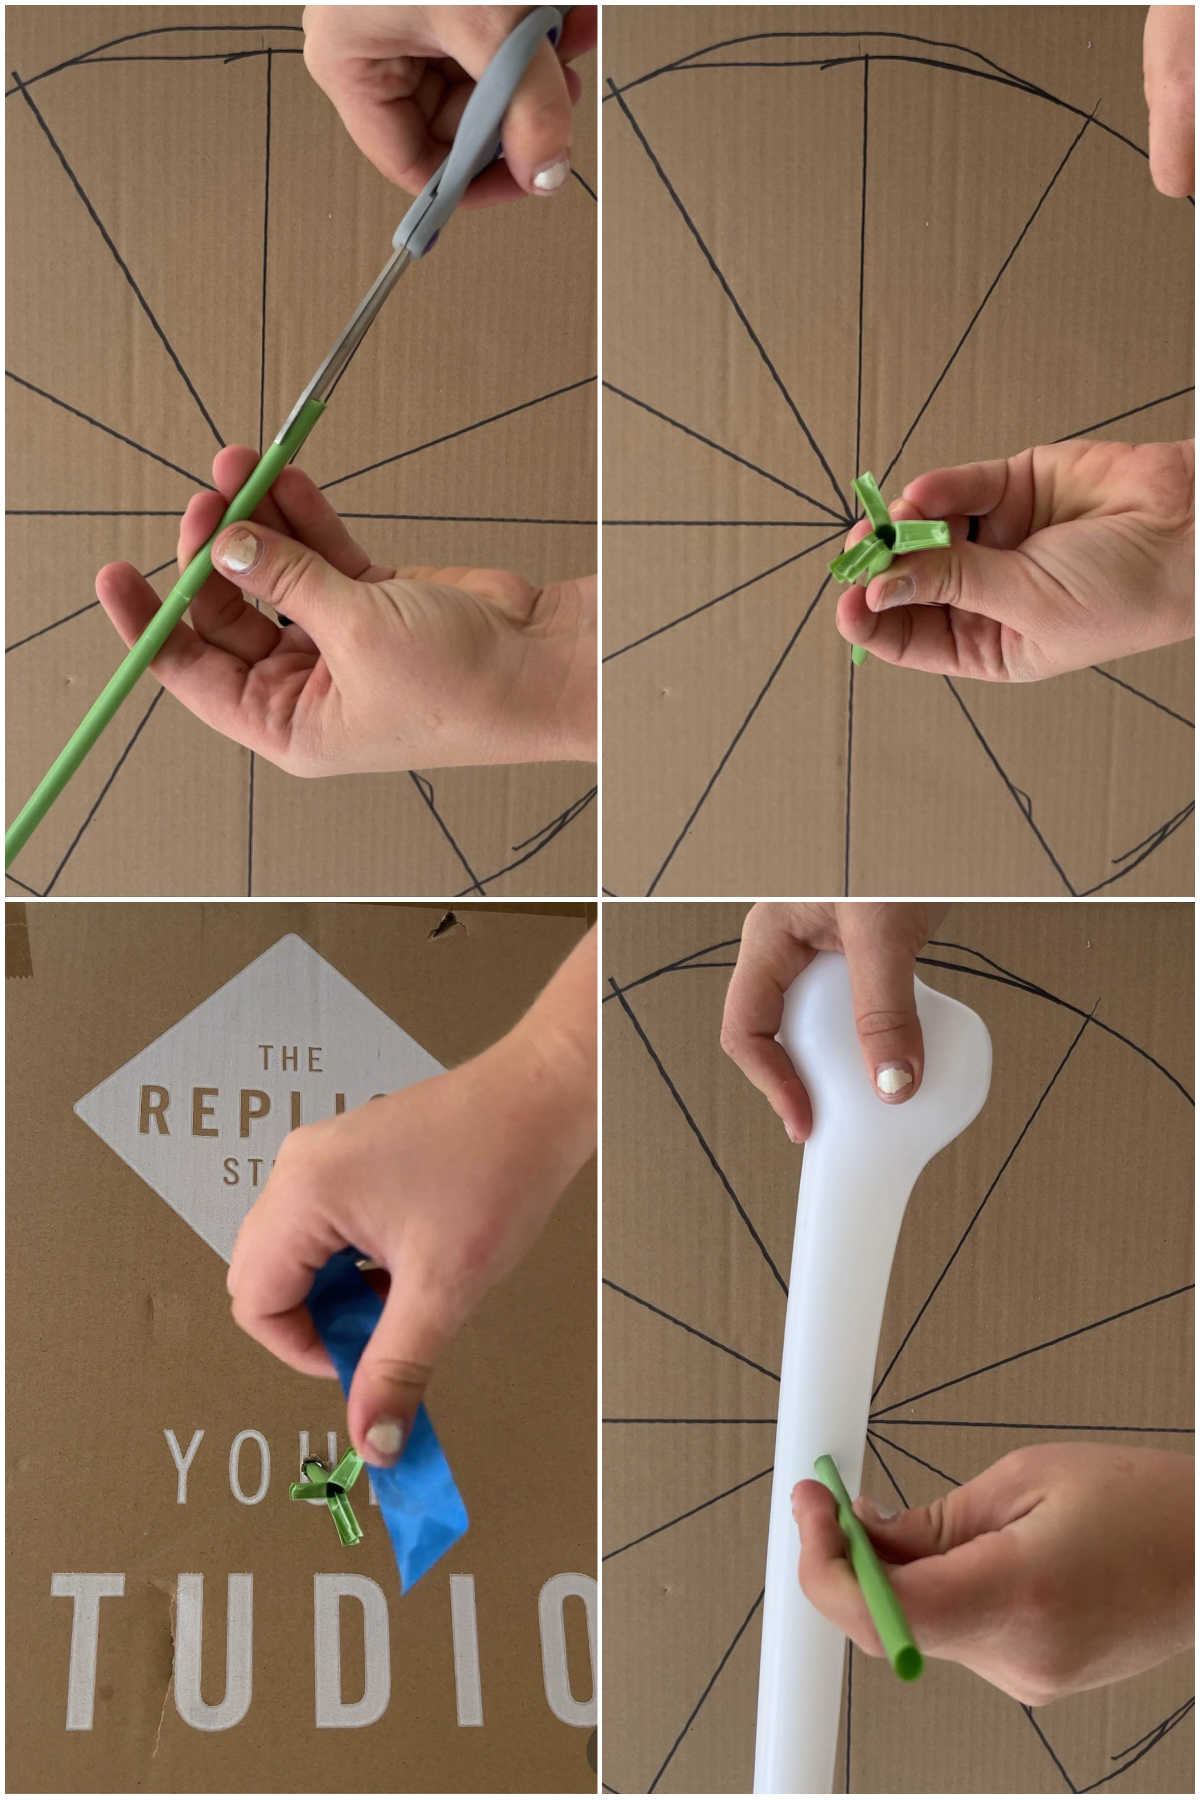
- Cut three slits into the end of the doubled-up straw about an inch long. Then fold those sections so they sit flat on a surface like a tripod.
- Insert the straw into precut hole in the cardboard with the cut slits on the bottom of your game board.
- Tape the cut slits to the back of the cardboard to secure your straw in place.
- Put the bone onto the secured straw then cut the straw to an appropriate length so you don’t have an extra long straw sticking out of your game board.
- Test out your spinner and make any minor adjustments you need.
4 – Fill in Your Game Board
This is going to vary depending on how you want to play the game. So before you write on the cardboard you will want to decide what version of the game you want to play and write your sections accordingly.
Here are the instructions for the version we played.
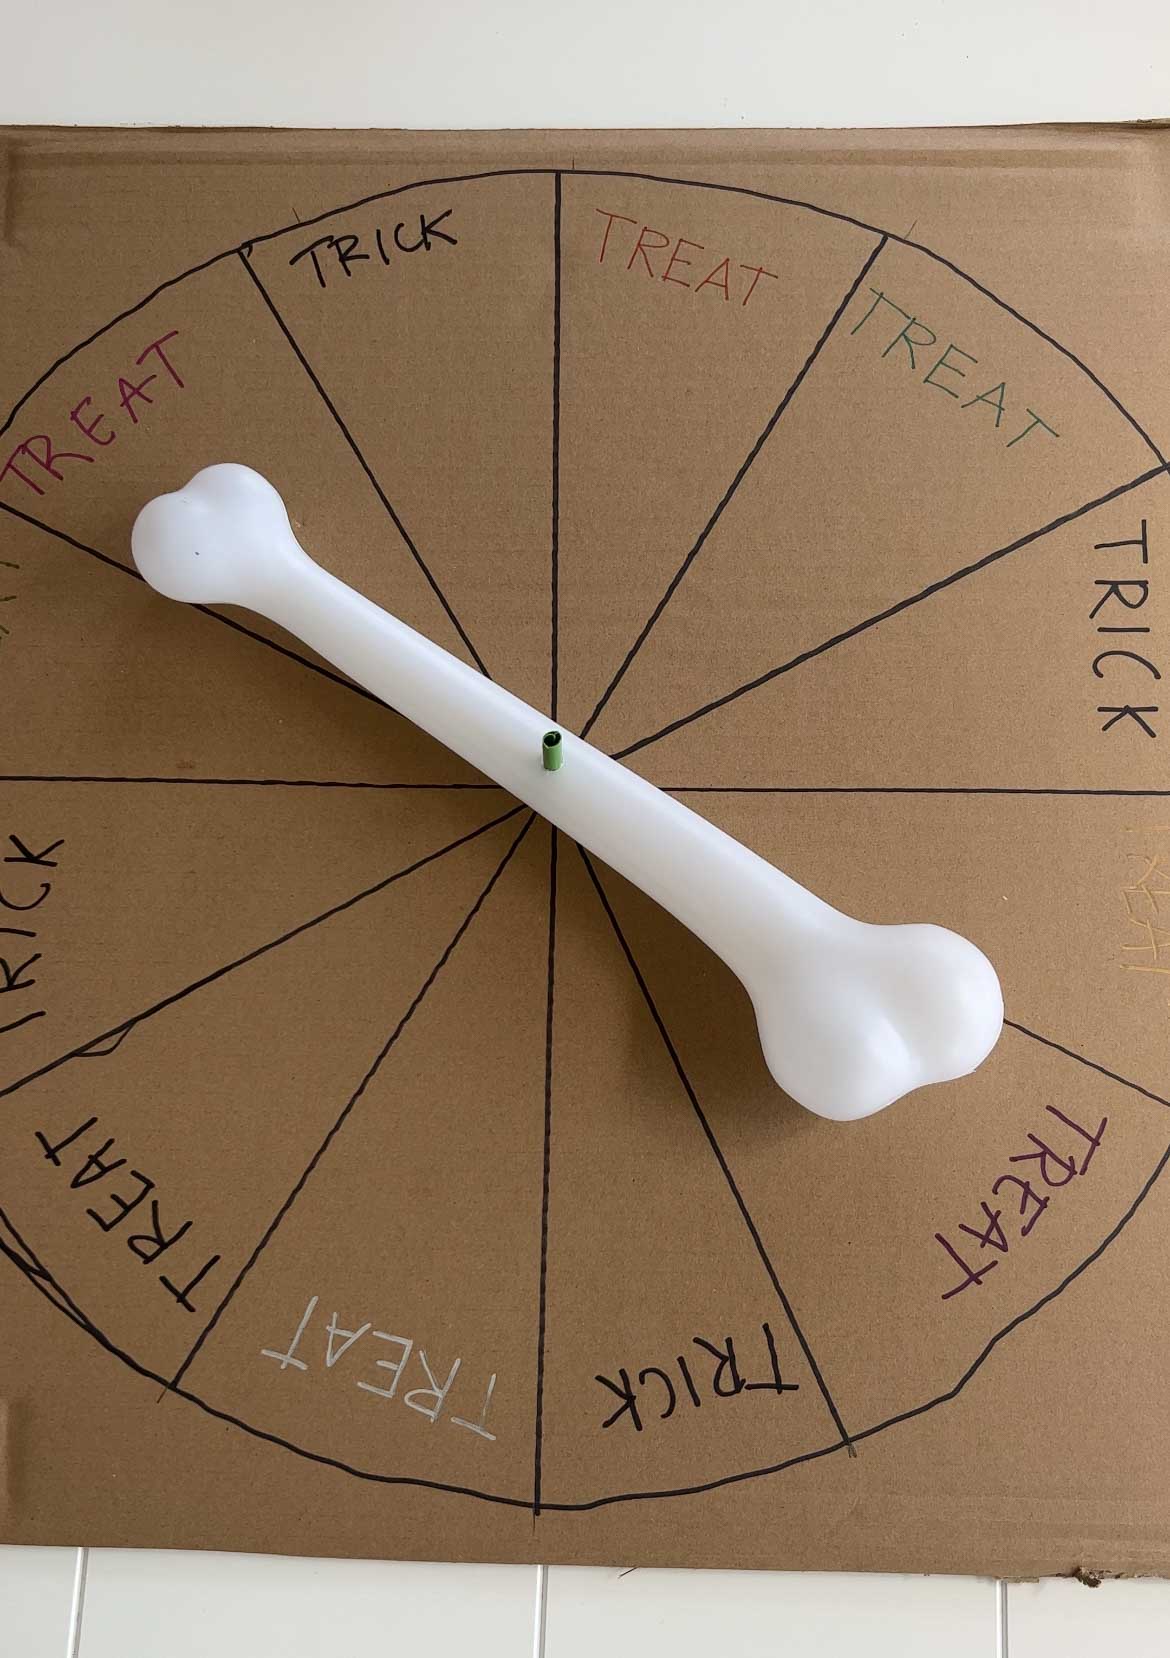
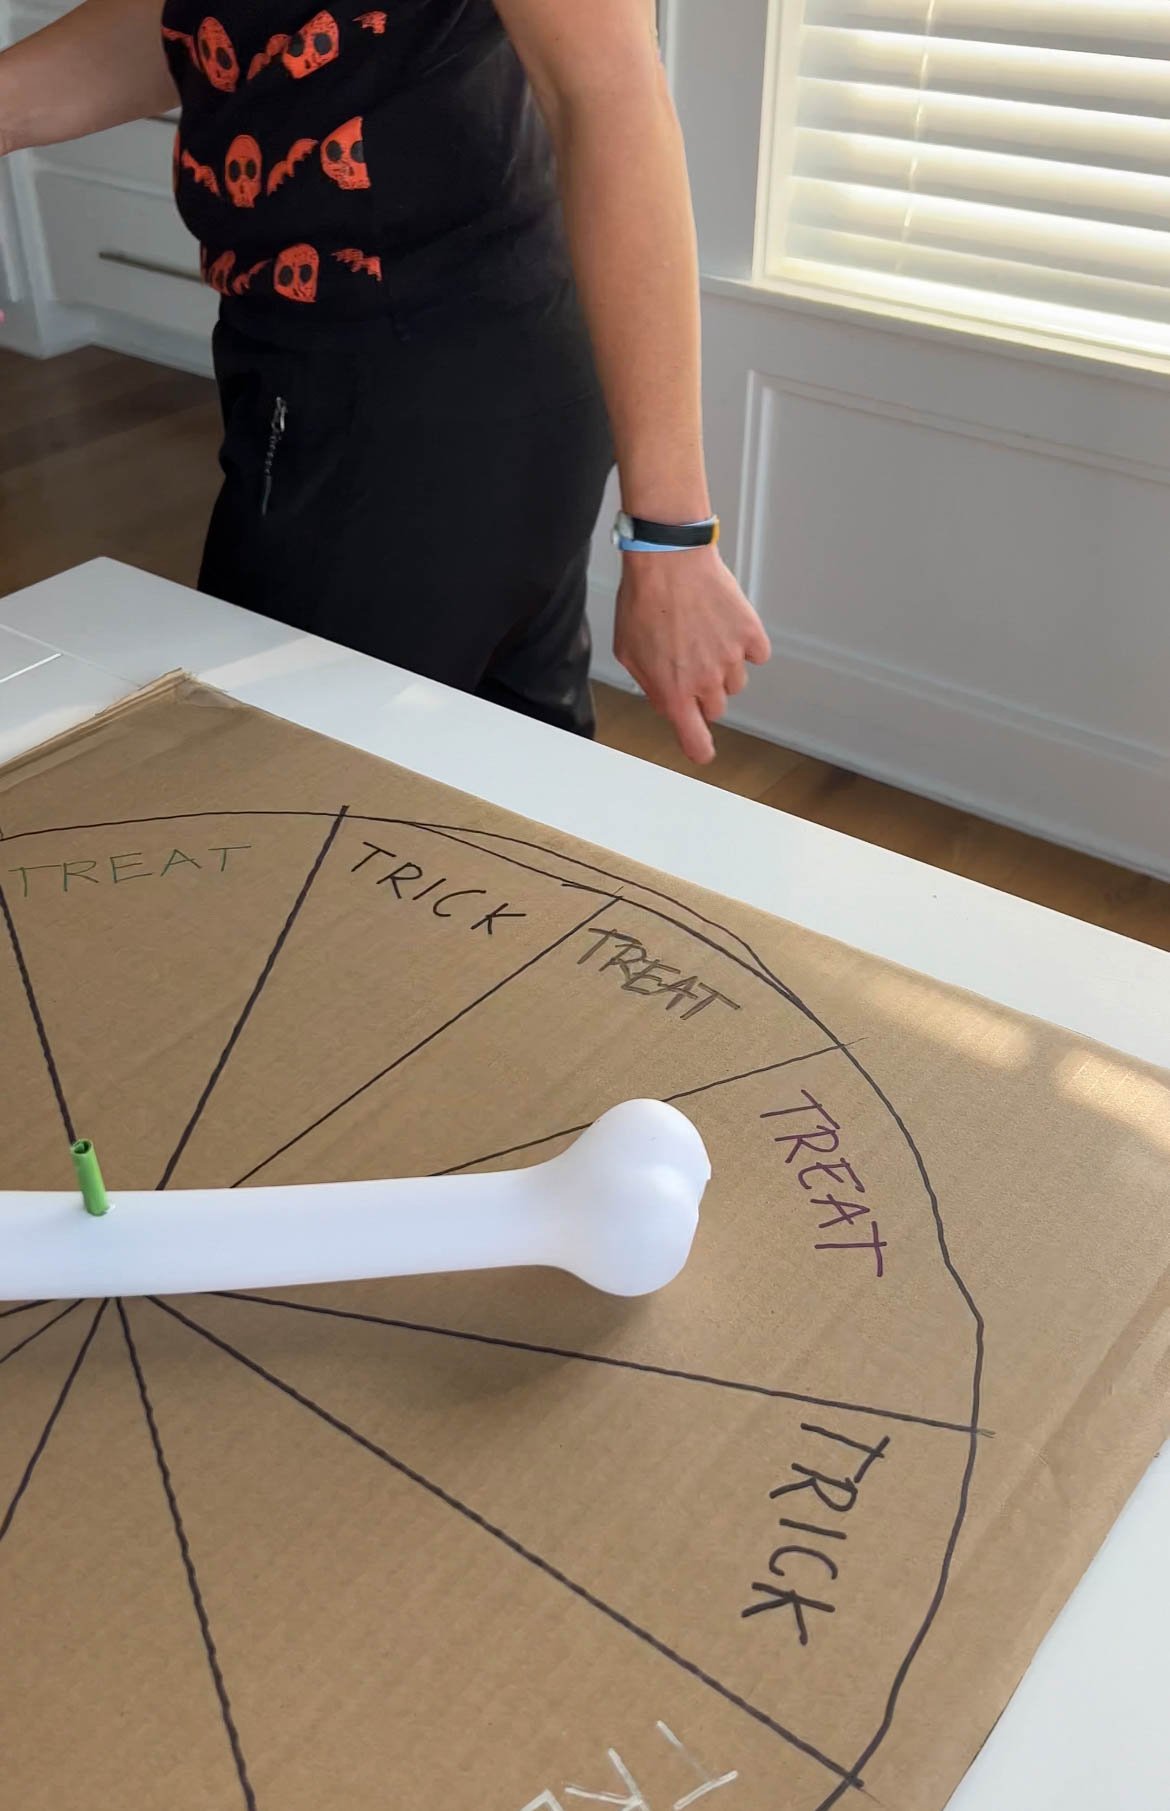
- Using a different colored marker for each section, write the word treat in eight of the twelve sections. We used markers in colors that matched Halloween buckets that we had filled with prizes!
- Then using a black marker write the word trick in the remaining four. These can be in any order you want. There is no wrong way to do this.
- Once your game board is filled in how you want it, your spinner is ready to go!
How To Play The Bone to Pick Game
There are a lot of different ways you can use this easy DIY Halloween spinner to play games. I wrote out some of my favorites, but I’d love to hear how you ended up using it in the comments.
For all of these options, you will want to write trick and treat on the game board. You can include as many trick-or-treats as you want, I chose to do eight and four.
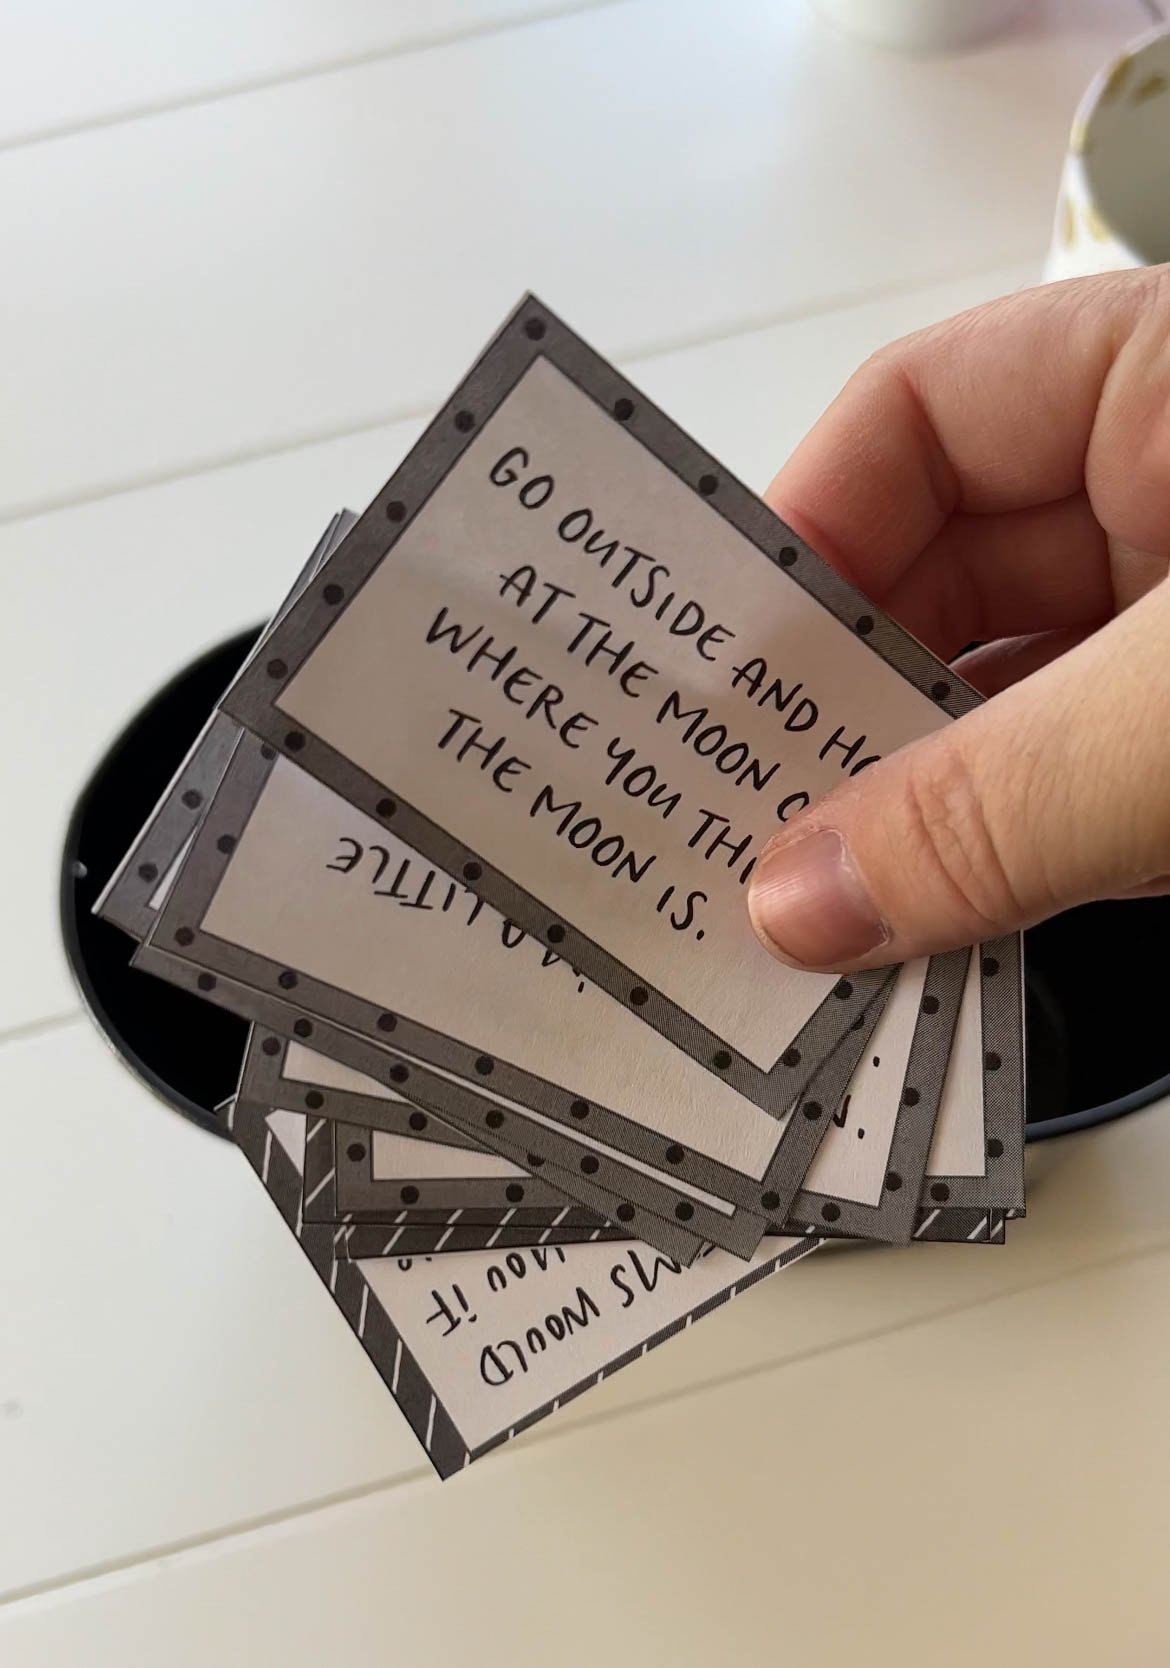
You will also want to set up your tricks and treats before the game. For tricks, fill a bucket with trick cards, I used these printable trick cards and they worked perfectly! The “scares” from our truth or scare game would also work great!
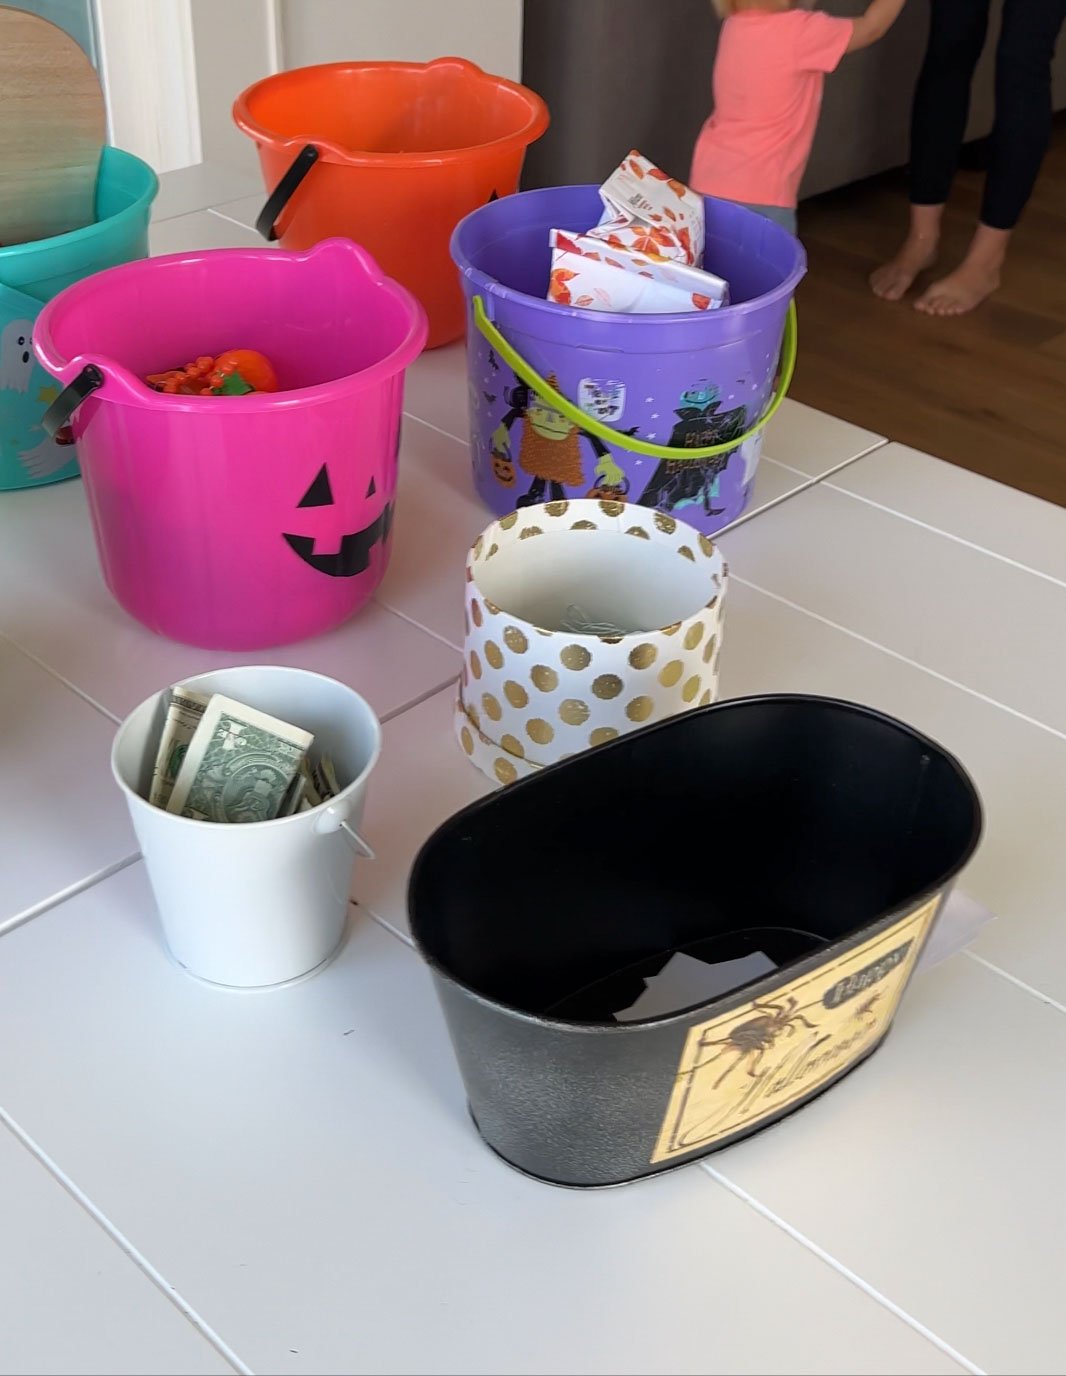
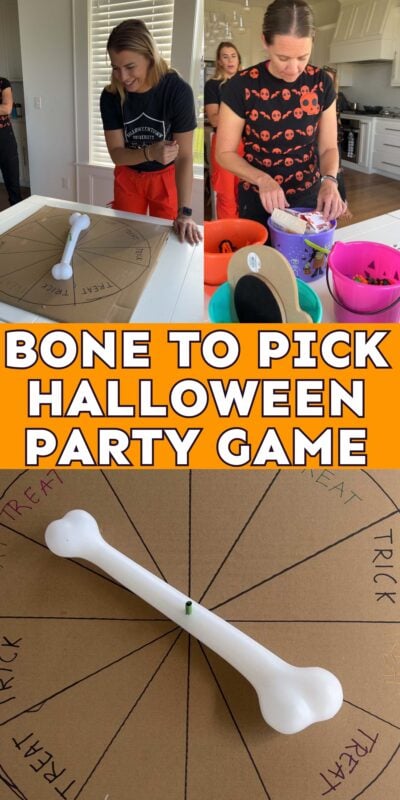
The treats will vary depending on what version you are playing and what age you are playing with. You can see the different types of treats and buckets we used for our game below!
Option 1: Bone To Pick
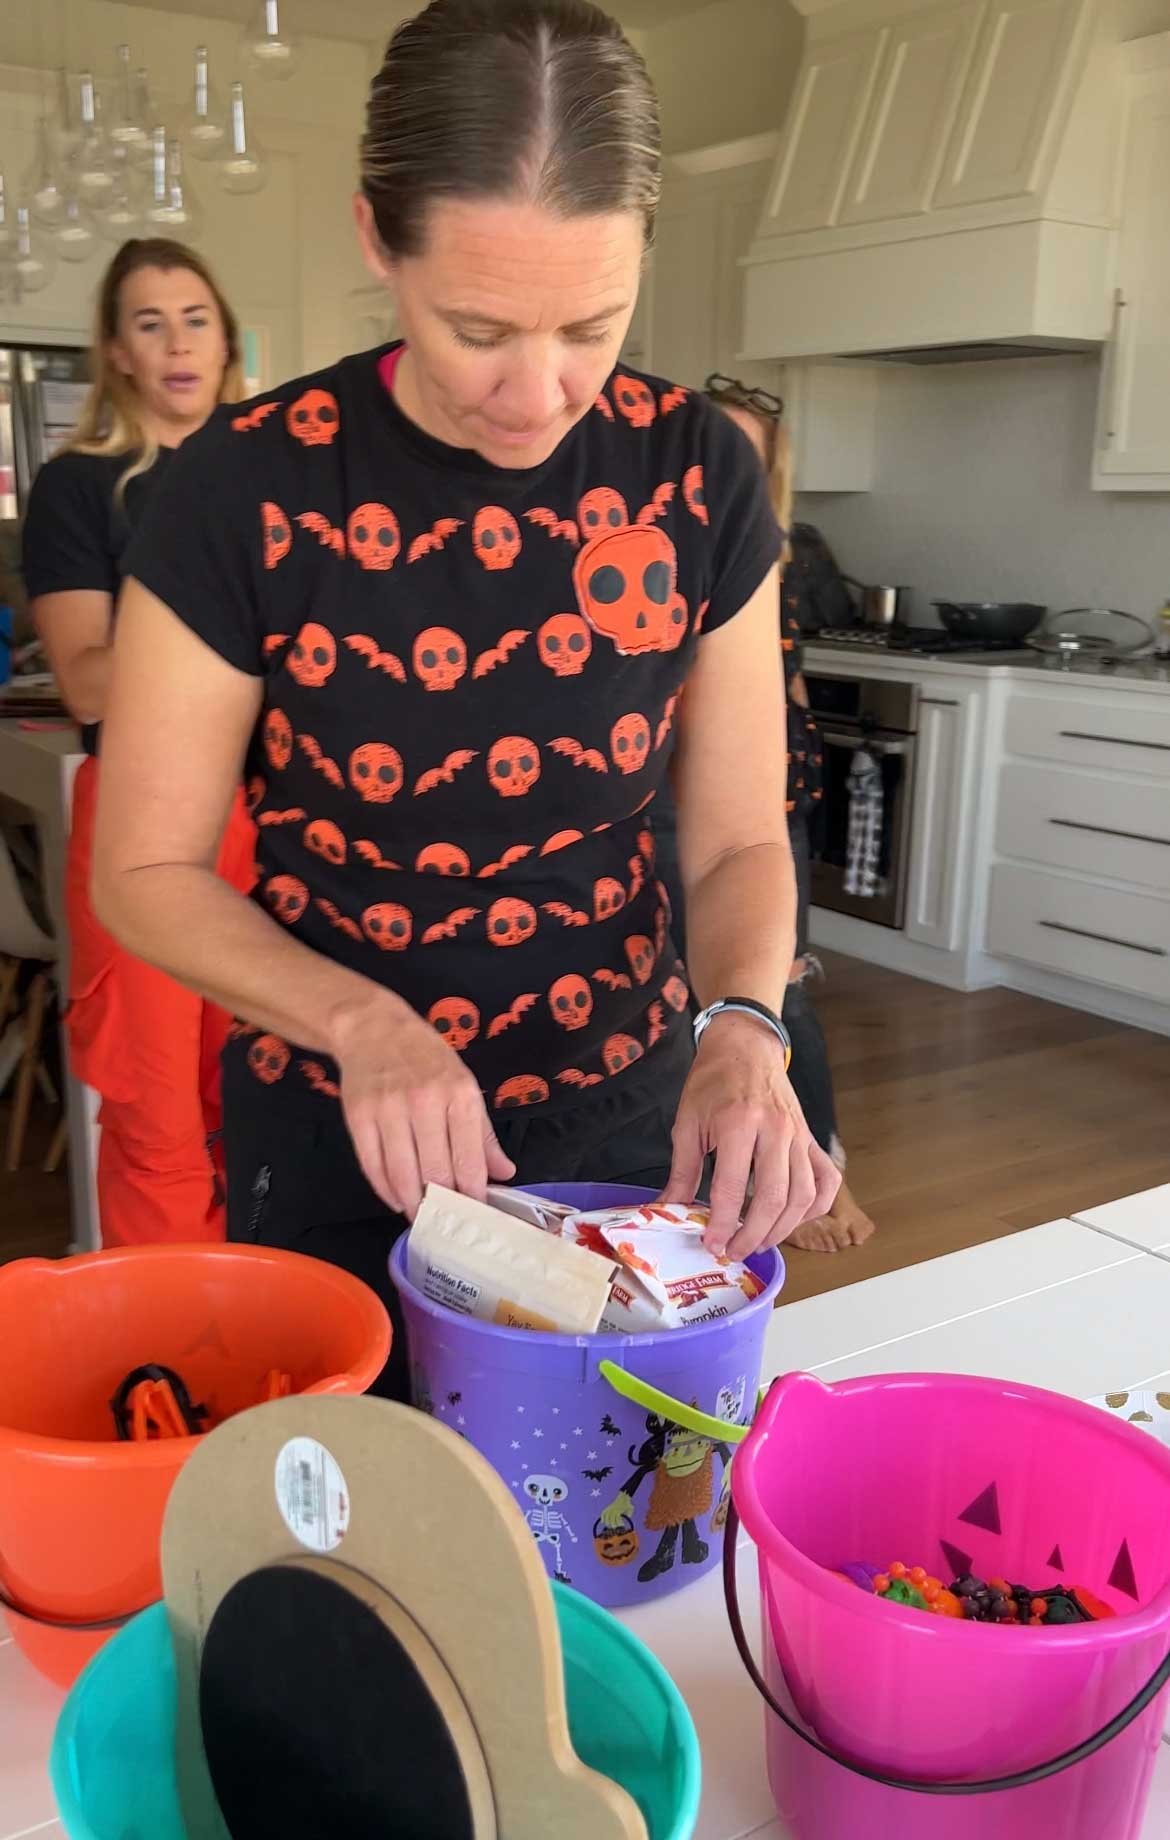
For this option, you will want to write the word treat in a different color that is coordinated with a prize. Gather colored buckets that match the markers you use and fill them with individual prizes.
For example, fill a pink bucket with a bag of spider rings. Make sure you remember to set out your trick bucket as well.
To play, take turns spinning the spinner. Where the smallest part of the bone lands is the prize they get. If they land on the orange treat space they would pick a treat from the orange bucket.
If the person spinning lands on a trick space they would have to pull a trick card from the bucket and do what it says. If you’re playing with kids, I recommend letting them pick out a treat of some sort (maybe one from a consolation bucket) after they complete their trick!
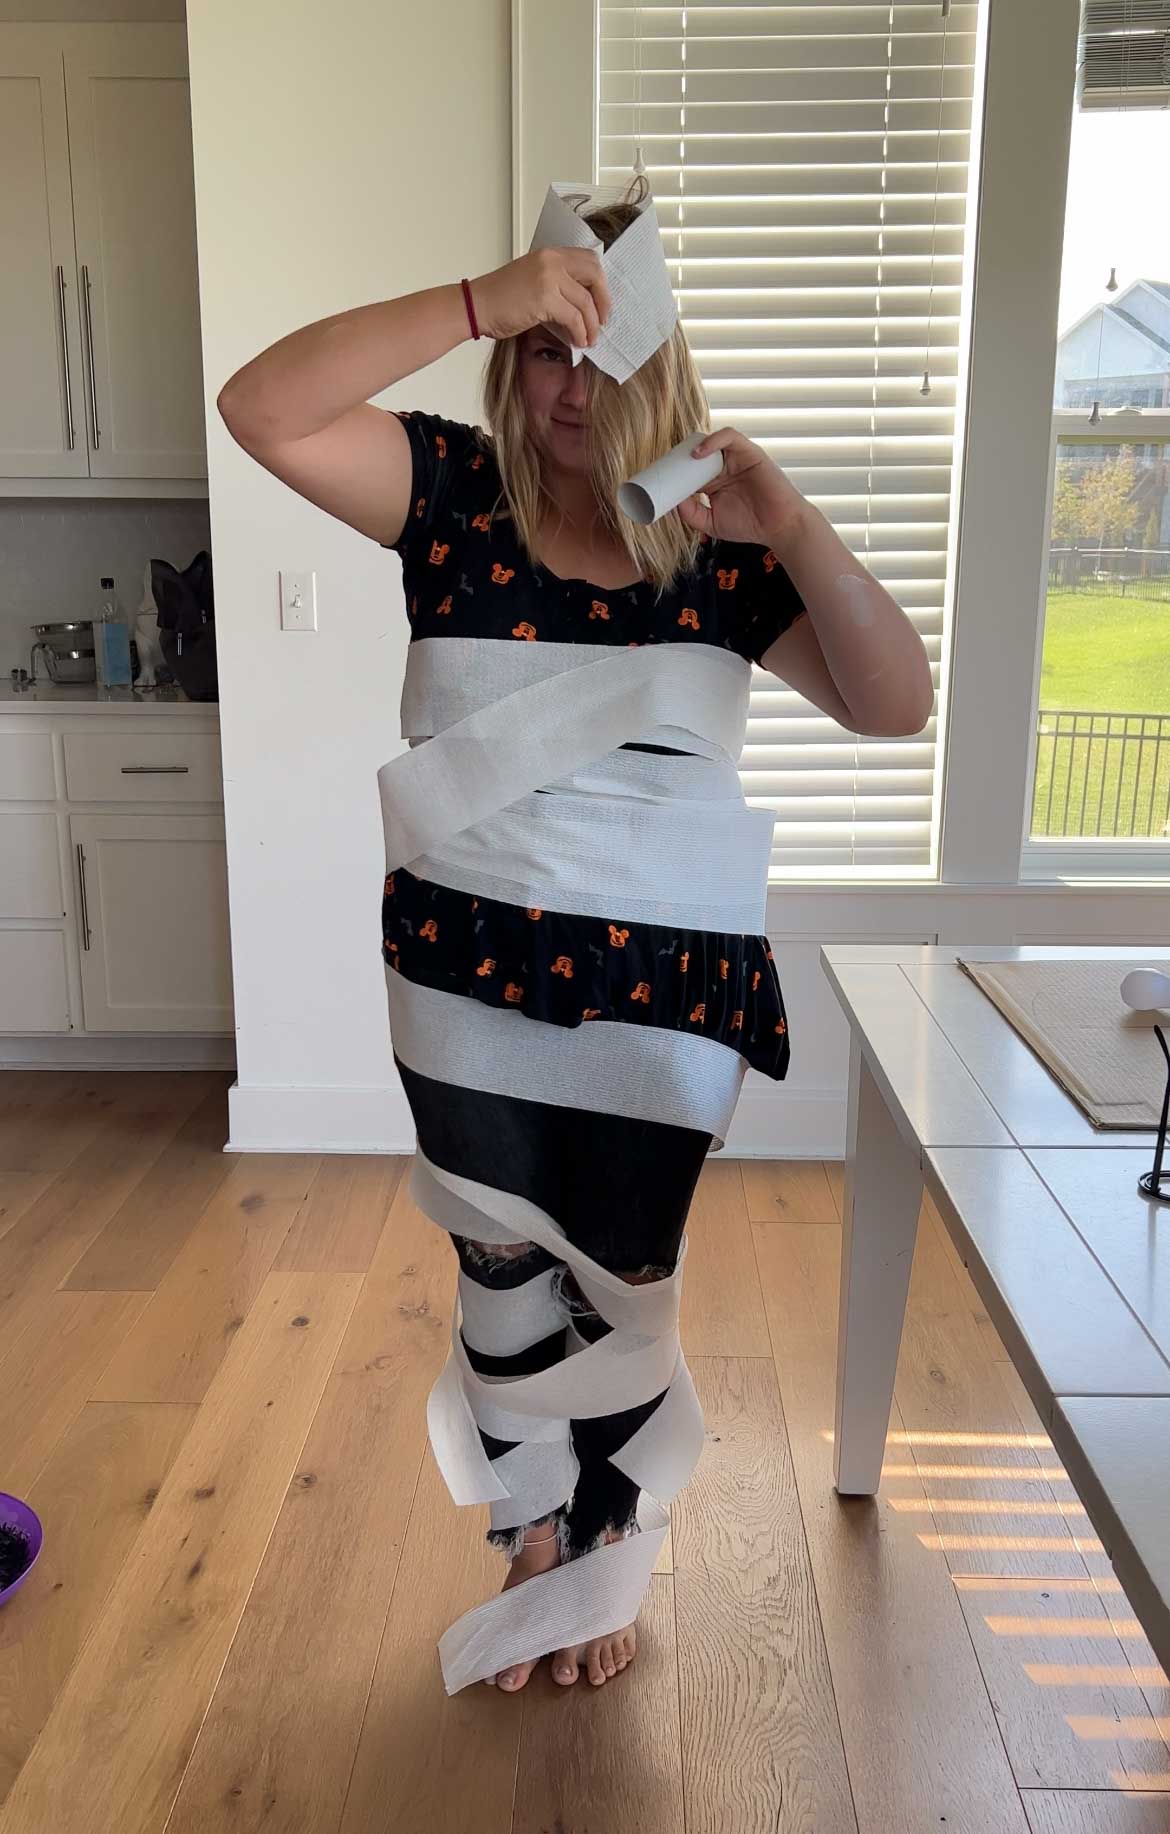
Play until everyone gets to spin once or until everyone earns a prize.
Upgrade for Teens and Adults
Buy just one prize per treat spot on the board and add a colored sticker instead of using buckets. Once that treat gets spun, the person who spun it wins the treat and it’s gone. If someone else spins that treat spot, they’re out of luck!
Option 2: Bone of Fortune
Begin by printing out these Halloween trivia questions and filling your board with trick and treat spots.
This version is simple, start by asking one person a trivia question. If they get it right they get to spin the bone and either win a prize or do a trick.
Play until everyone gets two turns or earns a prize.
Upgrade for Teens and Adults
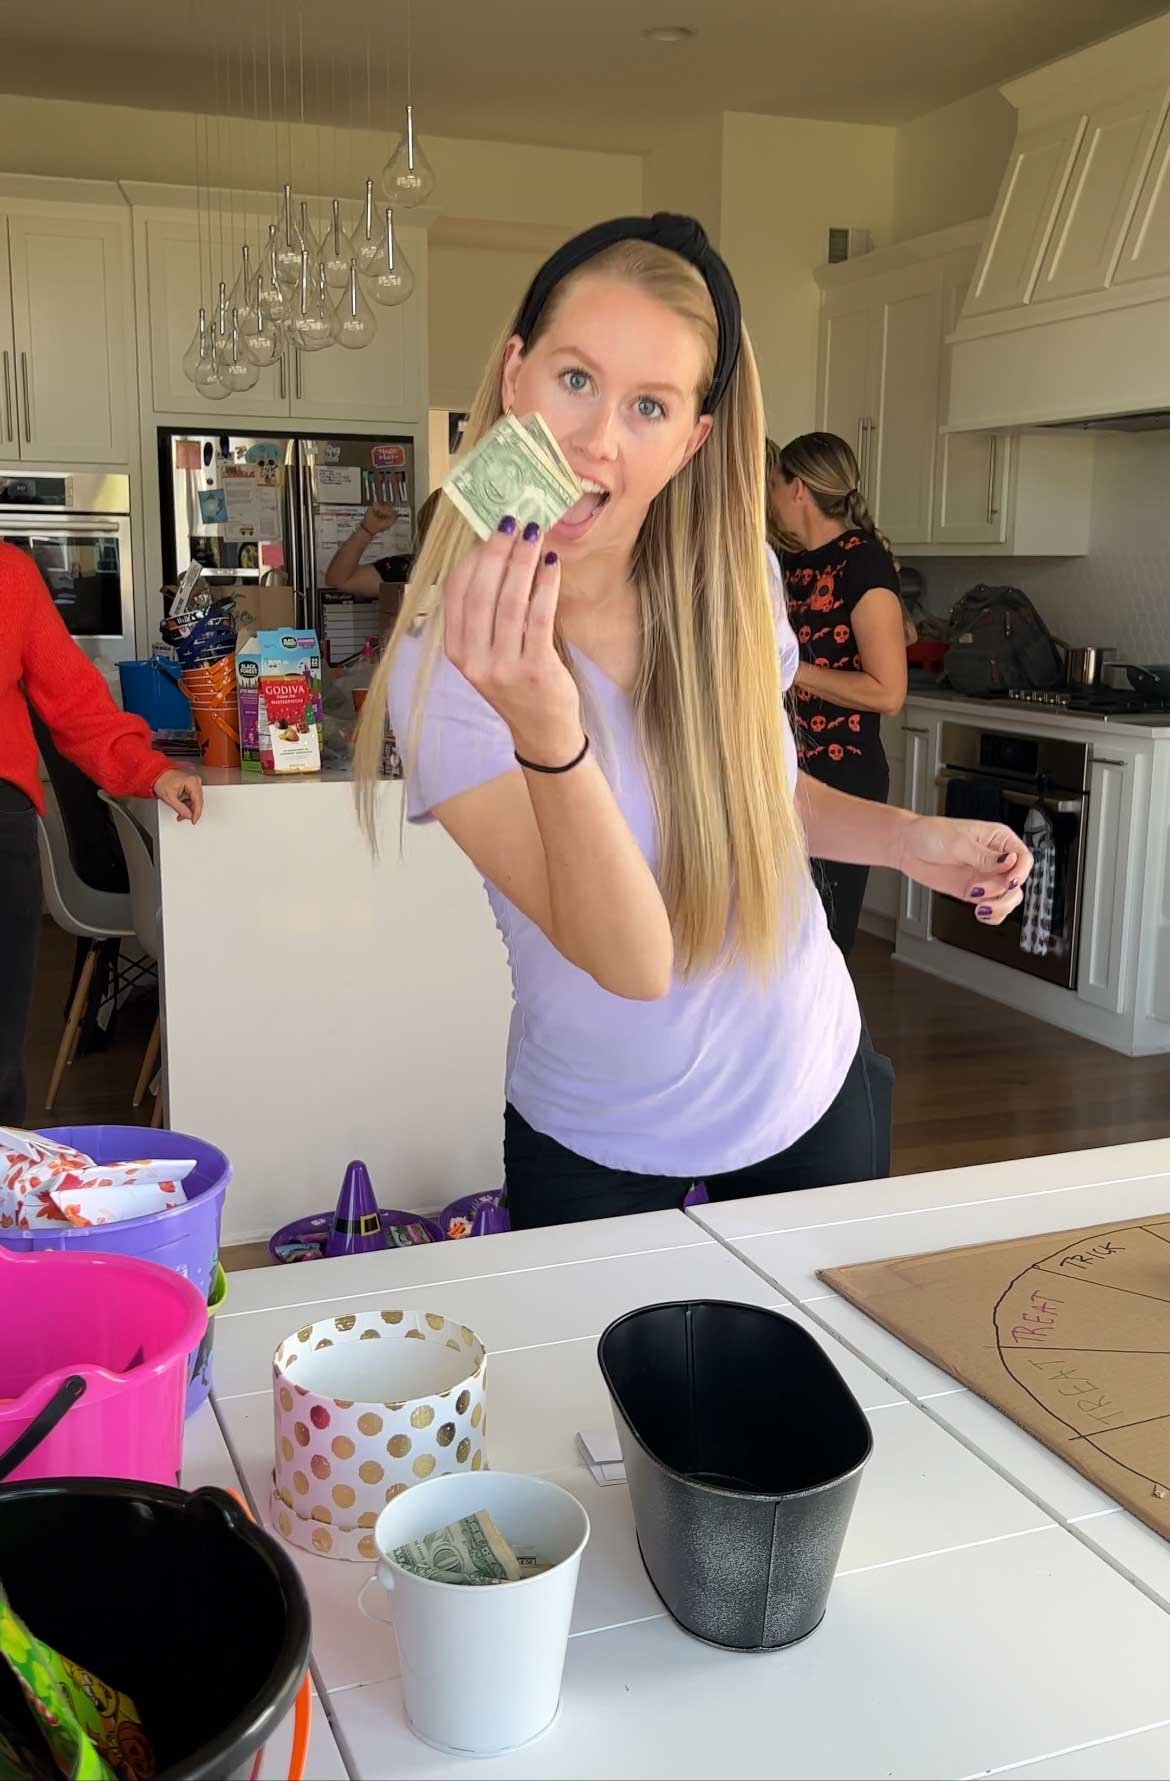
Have people spin first like you do in wheel of fortune. Instead of putting out treat spots, tape gift cards, cash, or lotto tickets to the game board. Then have players spin BEFORE you ask them the Halloween trivia questions. Whatever they land on, they win only if they answer the question correctly.
If they answer the question correctly and win the prize, they take that prize off and that spot now becomes a trick as well.
Option 3:
For this version, you will want equal amounts of tricks and treats on the board. You will also need to print out this Halloween name that tune sheet. You will also want a bucket of treat items such as spider rings. These will be used as markers not prizes for this game.
Split the players into equal teams. You can have as many teams as you want or play individually. Each team will need a piece of paper and a pen.
To play, you will read off one of the song lines from the name that tune sheet. Each team will write down what they think the song is within an allotted time, 15 seconds worked great for me. Then you will check the answers. If anyone got it correct they get to spin the wheel.
If they land on a treat space they get to pick up one of the treat markers. If they land on a trick they complete a trick card.
This will continue until you go through all twelve of the songs.
The goal of this game is to collect as many treat markers as you can in the twelve rounds. Whatever team has the most treat markers at the end wins!
Bone To Pick Prize Ideas
If you’re putting this together for kids or an event where everyone wins a prize I suggest using small prizes so that everyone can get one. Things like bouncy balls, suckers, spider rings, or sticky hands work great.
If you are using it for adults or teens who won’t win a prize each time here are some of my favorite prizes.
- Gift cards, cash, or Lotto tickets (adults love these!)
- Candy
- Anything from this Halloween party favor list.
- Fall candles or soaps
- Color-coordinated gifts like these cute decorative pumpkins and candy corn for an orange bucket.
- Any of these Halloween party snacks, even better if you tie them up with one of these Halloween gift tags!
- Any Halloween trinkets like bouncy balls, wind-up guys, bracelets, spider rings, etc.
Other Ways to Play
Don’t want to do the trick or treat version of the game? You can still use the spinner and just switch the things you put on the board! Try things like:
- Fitness activities like jumping jacks, push-ups, or laps around the gym
- Actual prizes – just like a normal prize wheel, put the prizes right on the spinner!
- Points – use it to score points after answering trivia questions, completing challenges, etc.
- Safe or not – spin to stay in the game! If they get a strike, they’re out.
Game FAQs
How do you earn a spin?
Players can earn a spin either by answering trivia questions, completing challenges, or being the first to name one of these Halloween party songs when they play! Or you can just let anyone have a spin regardless of if they earn it or not and the spin can be the entire game!
What should I use as tricks?
You can either use things from this printable list of tricks (from our trick or treat game), any of the scares from our truth or dare game, or come up with your own list of Halloween challenges and silly things to do.
What can I use instead of the bone?
If you can’t find a bone similar to the one we used, you can use anything that’s somewhat sturdy, long, thin, and round. Some items that might work would be a longer PVC pipe, an empty paper towel roll, or an empty wrapping paper roll cut down to size.
More Halloween Games
This spinner game would be perfect with any of these other fun Halloween party games!
- Halloween bingo – a Halloween inspired version of the classic favorite!
- Guess the food game – hilarious game that includes eating “spooky” foods that aren’t so spooky!
- Halloween charades – tons of Halloween words that are perfect for a rousing game of charades!
- Halloween punch game – this game went viral on TikTok for a reason, it’s a blast!
- Halloween pictionary – lots of fun Halloween words to use for a silly game of Halloween pictionary!
DIY Game Spinner
Ingredients
- 1 plastic bone
- 1 large piece cardboard
- 2 plastic straws
Instructions
Prep The Cardboard
- Start by cutting your cardboard to the desired size. A box cutter, scissors, or Exacto knife will all work for this. Remember to be careful while doing this portion.1 large piece cardboard
- Once cut you will want to mark the center of the cardboard using a marker.
- Using your compass place one pencil in the center of the cardboard. Then without moving the pencil in the middle begin drawing a circle with the other attached pencil by keeping the string taut while you circle the cardboard. This is easier if you have a large circular item like a clock you can trace. Or you can freehand it if you trust yourself!
- Then use a straight edge, like a ruler or a leftover piece of cardboard, and divide the circle into twelve sections. It’ll look like a pie chart.
- With the game board set up, it is time to prep the spinner. Begin by inserting one of the two straws into the other. I had to squish mine to make it fit, it doesn’t have to be pretty, it’s just for support.2 plastic straws
- Next mark the center of your bone using a pencil or marker.
- Using your drill with a drill bit that is slightly larger than your straw, drill a hole through the mark on your bone. You’ll want to keep this as straight as possible when you go through the bone so it spins easily.1 plastic bone
- Test your straw to make sure it fits easily into the hole you’ve drilled. Make adjustments as needed using larger drill bits.
- Make a hole the size of your straw in the marked center of the cardboard.
- Cut three slits into the end of the doubled-up straw about an inch long. Then fold those sections so they sit flat on a surface like a tripod.
- Insert the straw into precut hole in the cardboard with the cut slits on the bottom of your game board.
- Tape the cut slits to the back of the cardboard to secure your straw in place.
- Put the bone onto the secured straw then cut the straw to an appropriate length so you don’t have an extra long straw sticking out of your game board.
- Test out your spinner and make any minor adjustments you need.
- Using a different colored marker for each section, write the word treat in eight of the twelve sections.
- Then using a black marker write the word trick in the remaining four. These can be in any order you want. There is no wrong way to do this.
- Once your game board is filled in how you want it, your spinner is ready to go!
Tips & Notes:
- Cardboard – I used an old box I had lying around the house. You will want it to be big enough to fit the bone and writing. You can also use a foam board.
- Plastic bone – I got mine from the Dollar Tree. If you can’t find one there, you can try using a paper towel roll with a bone drawn on it or a piece of PVC pipe. Or really anything else long and skinny that will spin.
- Markers – it worked best to have a variety of colors for the game we played with it. If you’re just going to do trick or treat (and not use the colors), you can just do black permanent marker.
- Plastic straw – you will want two of these.
- Drill – while I would highly recommend using a drill with a drill bit for this, you could try using an Exacto Knife. Please remember to use caution when using this and keep it out of the hands of any kids. If you are using a paper towel roll a knife will be just fine.
- Tape – I used painter’s tape because that’s what I found first, but any type will do as long as it’s sturdy!
- Compass – I used a makeshift compass by tying two pencils together with a string. You can also simply trace a circle if you have something on hand large enough. I have used a clock before that worked great as well or a pizza pan works too!



Leave a Reply