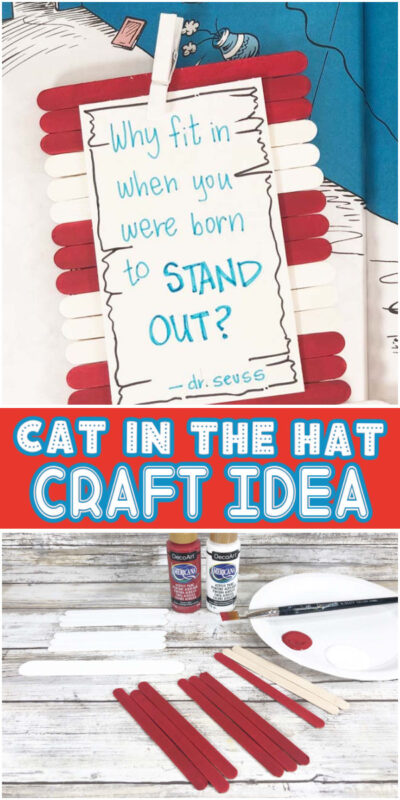
This quick and easy cat in the hat craft is a fun Dr. Seuss inspired craft that’s perfect for making for Read Across America or any time you just want to do something Dr. Seuss themed! All you need are some craft sticks, a little paint, glue, and the free template to make this simple project!
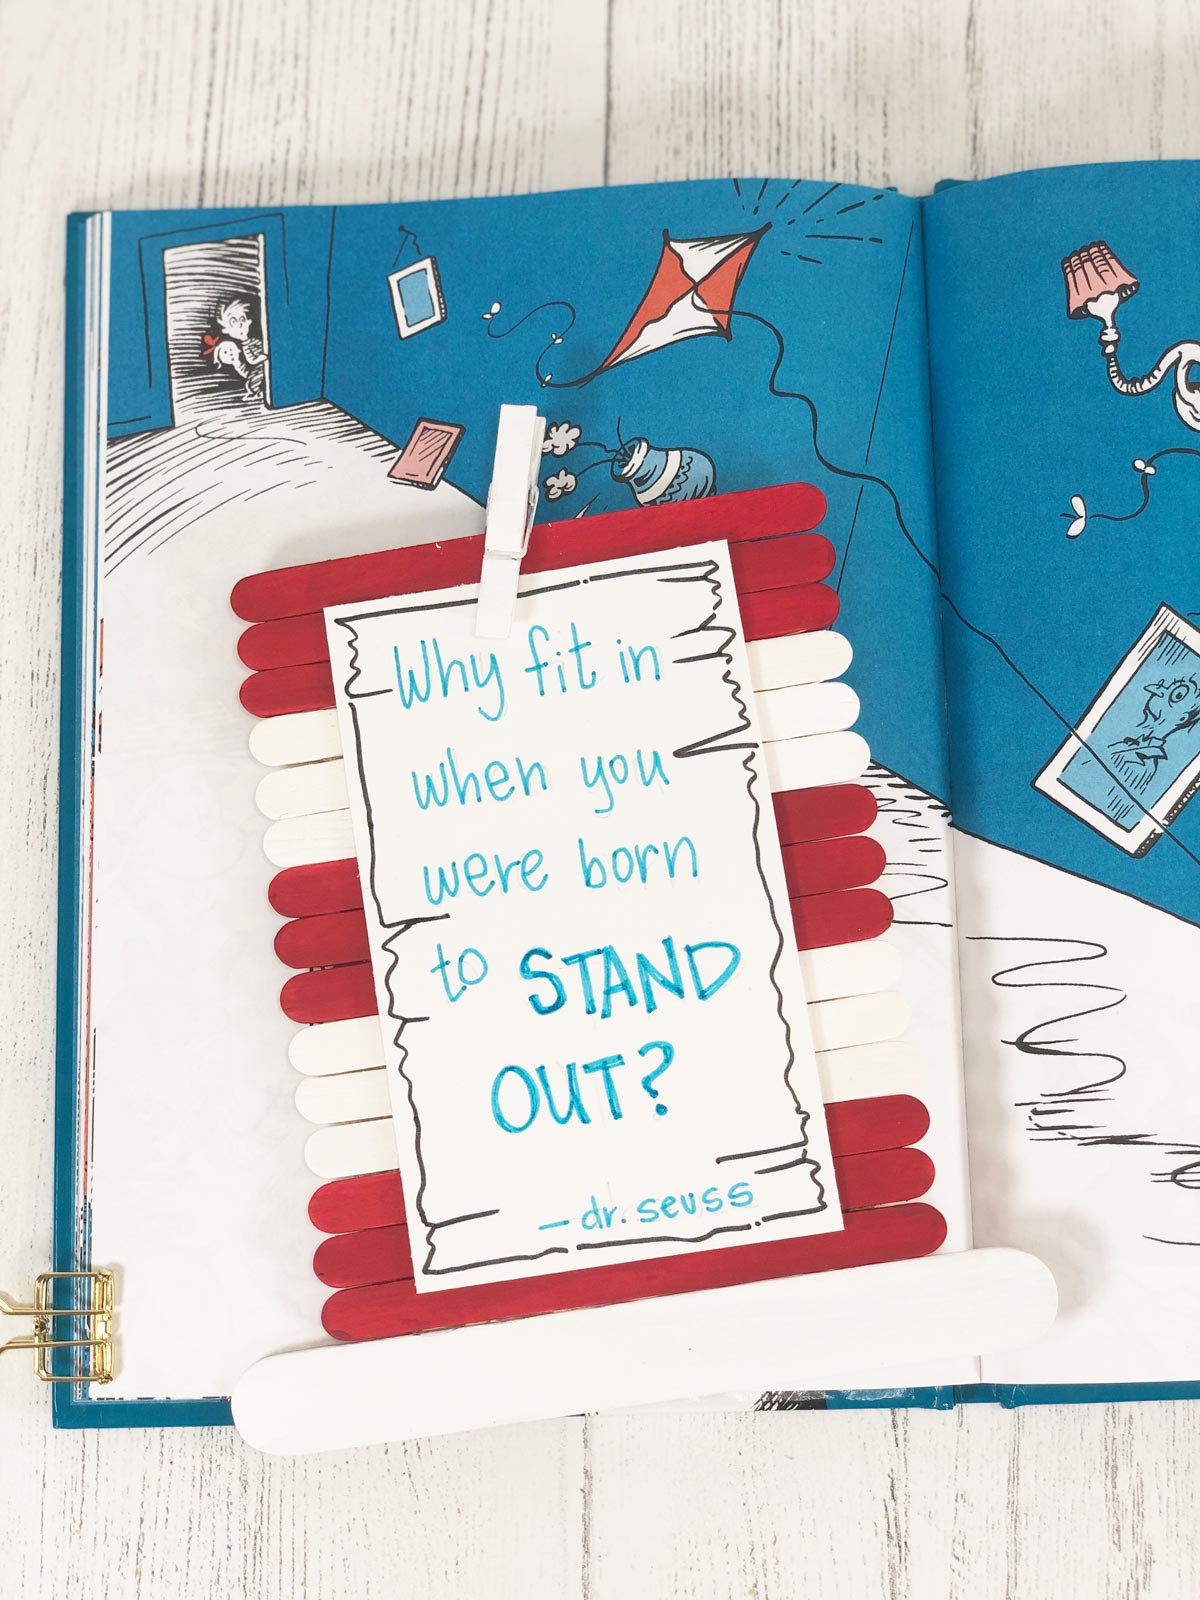
Easy Dr. Seuss Craft Idea
With Read Across America Day (aka Dr. Seuss Day or Dr. Seuss’s birthday) coming up on March 2nd, I thought it would be fun to a share a Dr. Seuss inspired craft to go along with all of the Dr. Seuss games and the Dr. Seuss scavenger hunt I’ve already shared!
Cat in the Hat is one of my favorite Dr. Seuss books so I decided to make a craft that looks like his hat – a cat in the hat craft! Crafts are definitely one of my ways to make reading fun, so this is perfect!
If you want to make this with younger children, you can do just the craft itself. It’s a great way to practice fine motor skills of cutting and gluing!
If you’re looking for cat in the hat crafts for older children, I have included a free printable template in this post that you can print out to have kids add Dr. Seuss quotes to for the top.
You can choose however you want to use this but whichever of the cat in the hat activities you go with, it’ll still be a fun way to celebrate Dr. Seuss week!
And if you really want to go all out, I also have some really fun Dr. Seuss inspired handouts that would work for pretty much any age – they’d be great for Dr. Seuss’ birthday!
Cat in the Hat Craft Supplies
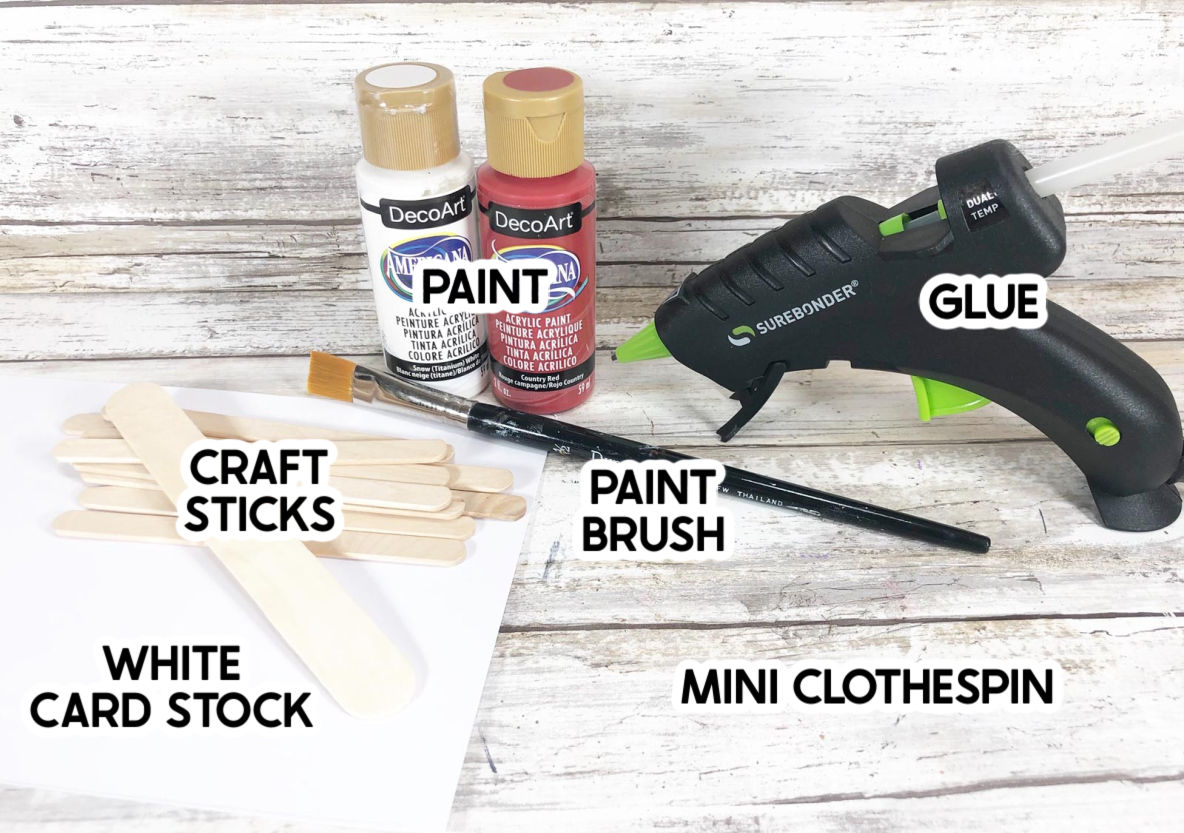
Supply Notes
- White card stock – I like to use card stock for these instead of regular printer paper to give them a nice solid base. Or if you’d prefer to not use card stock, you can skip the paper altogether and just have kids glue the craft sticks together and then put a couple on the back to brace the whole thing, like I did with this penguin craft.
- Craft sticks – You’ll need one jumbo size craft stick and 15 regular size (4.5 inches) craft sticks. If you want to make this more crafty, buy the natural colored ones. If you want to make this less of a craft and more about just gluing, you can skip at least some of the painting and buy red craft sticks for kids to use. They apparently don’t make white ones so no luck there but at least you can skip double painting!
- Paint – if you’re doing this with older children who can be trusted with paint, craft paint works best. If you’re making the cat’s hat with younger kids, washable paints are always a must. You’ll need red paint and white paint.
- Glue – this cute craft can be made with hot glue, craft glue, or even Elmer’s glue – just make sure to give the sticks adequate time to dry on the paper!
- Mini clothespins – I found some little mini clothespins (you can see them at the bottom of the post) at the dollar store that I added to the tops to hold the quotes on. If you want to add these, here are some similar white ones. If you buy them, I recommend just buying them in whatever color you want instead of painting them (like I did) because painting the little guys is kind of a pain.
- Quote template – you can get the quote template that you see in these pictures to download right here! It has four quote cards on it so you can split them across a group of kids or you can write a bunch of different quotes and just switch them out whenever you feel like!
Note!
If you’re planning to add the quotes on top, you’ll also need the printed out template and some markers to write the quotes on. I didn’t include that in the photo above because the actual craft part doesn’t require those items – just the add-on!
How to Make This Cat in the Hat Craft
This cute craft is just as simple to make as it looks and that’s why it’s so much fun to make with kids! It’s easy, hard to mess up, and ends up with a really cute thing for kids to take home. It’s really the perfect activity to do in honor of Dr. Seuss or just on a rainy day!
1 – Paint the Craft Sticks
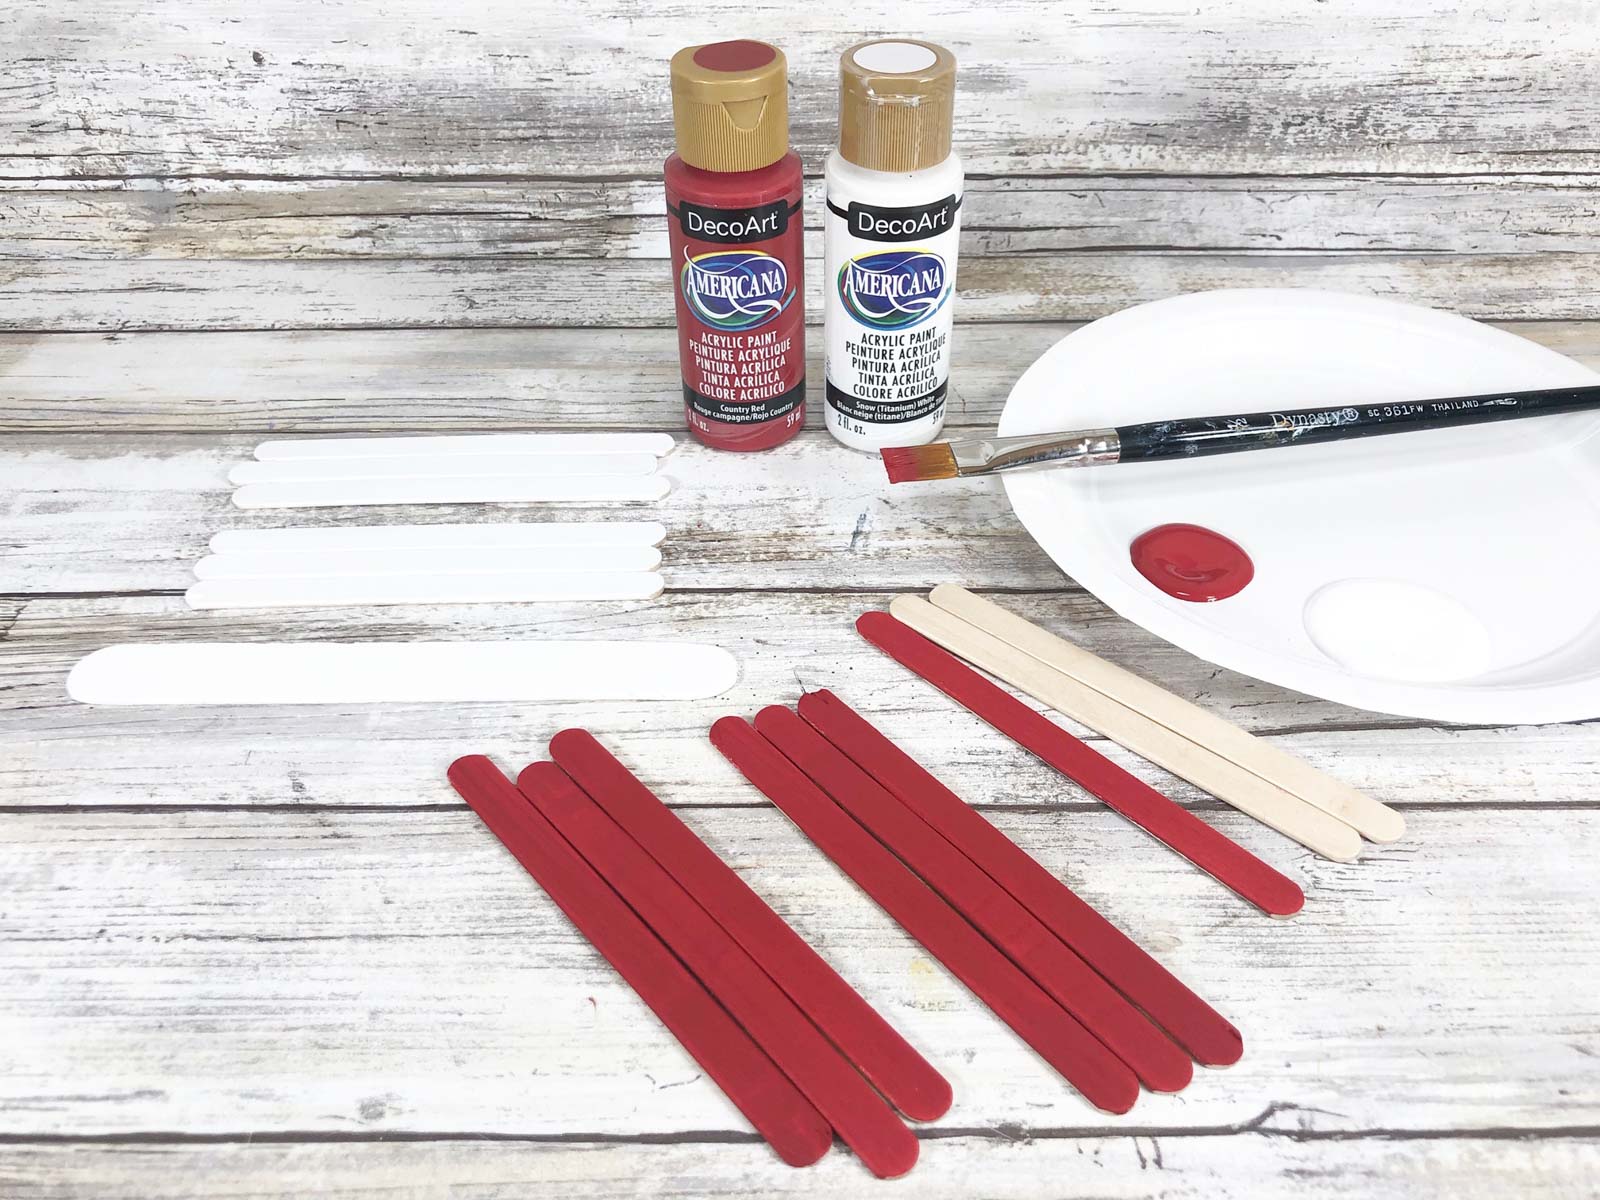
Start by painting one side of the craft sticks using the red and white paint. You need to paint:
- Six regular size craft sticks white
- Nine regular size craft sticks red
- One jumbo craft stick white
- One mini clothespin white (if using and if you didn’t buy these already white)
Once they are painted, set them aside to allow them to dry. You can’t finish the cat in the hat art project until they’re dry, but you can get started on cutting and writing while you wait!
2 – Cut the Paper and Printables
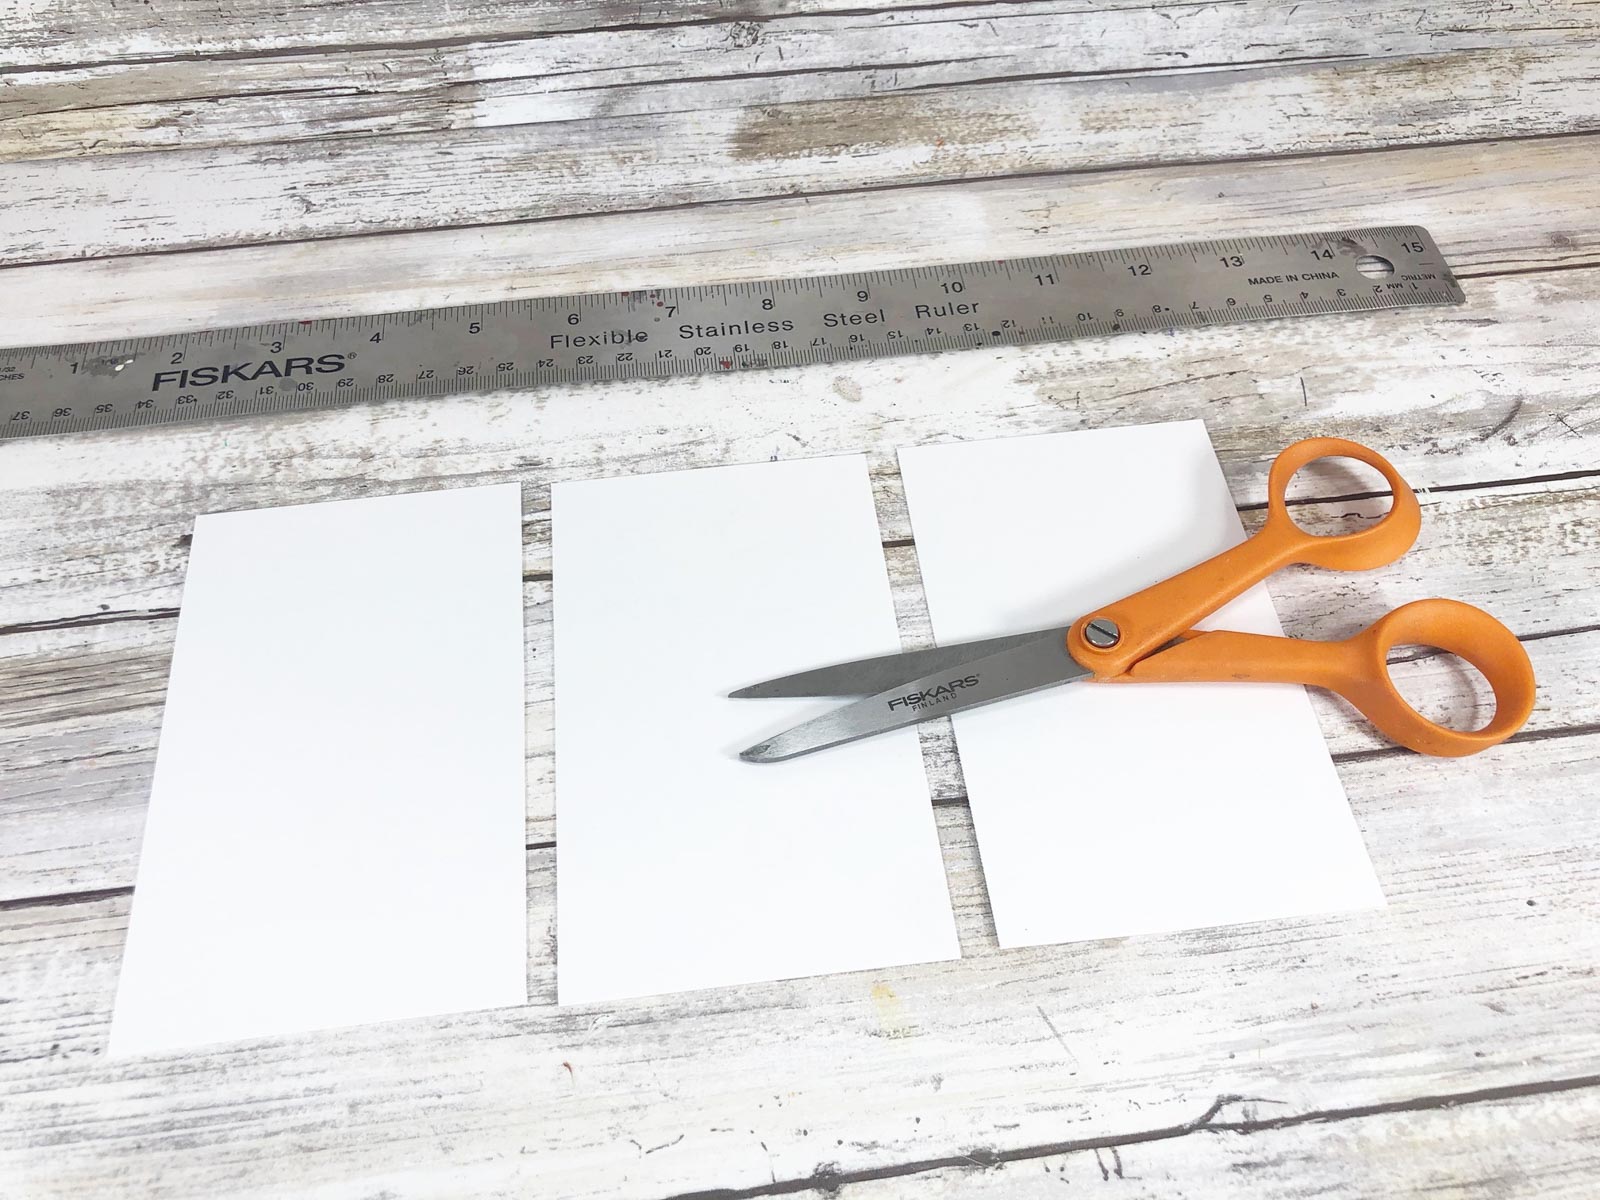
While you’re waiting for the paint to dry, fold your piece of white card stock in three even pieces then cut into pieces.
Note!
Each person making this fun craft will only need one third of a piece of white card stock. You can either have them fold and cut on their own or you can cut them all ahead of time and just give everyone a third of a sheet. I like to have them cut the pieces, especially for young kids who need to practice fine motor skill, but understand why you may not. If they do cut them on their own, collect the other two thirds of the sheet for more easy crafts later!
Next, cut out each of the printable templates on the provided printable. The template includes four blank quote cards that you can cut out and change out with different quotes.
Or just like the white cardstock, you can cut these ahead of time if you want and just give one to anyone doing the craft.
3 – Put together the hat
After the paint has completely dried, it’s time to put together the cat’s hat.
Glue the jumbo craft stick at the bottom of the piece of paper then glue three red craft sticks right above that, three white right above that, continuing to alternate with the regular craft sticks until you use all of them.
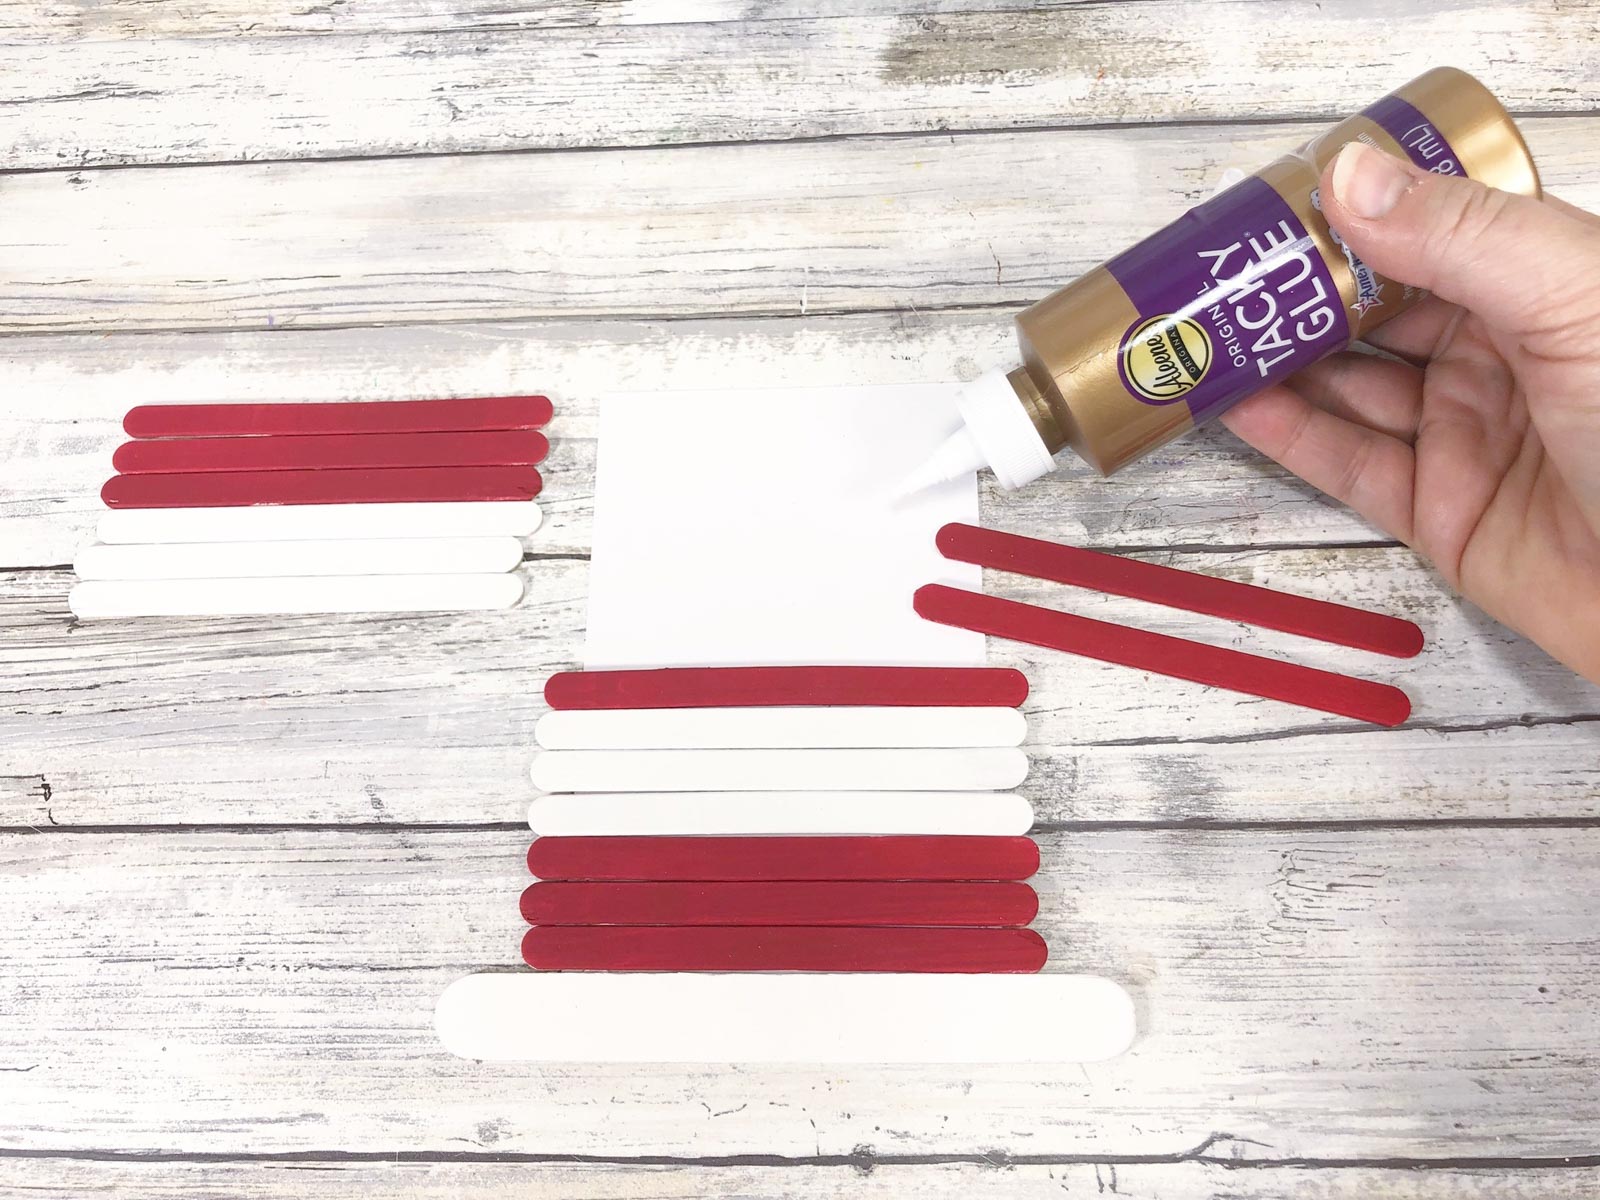
Once finished, you’ll have the jumbo one at the bottom, three sets of three red craft sticks, and two sets of three white craft sticks. The red sticks will create the red stripes on his hat and the white sticks will create the white strip on his hat.
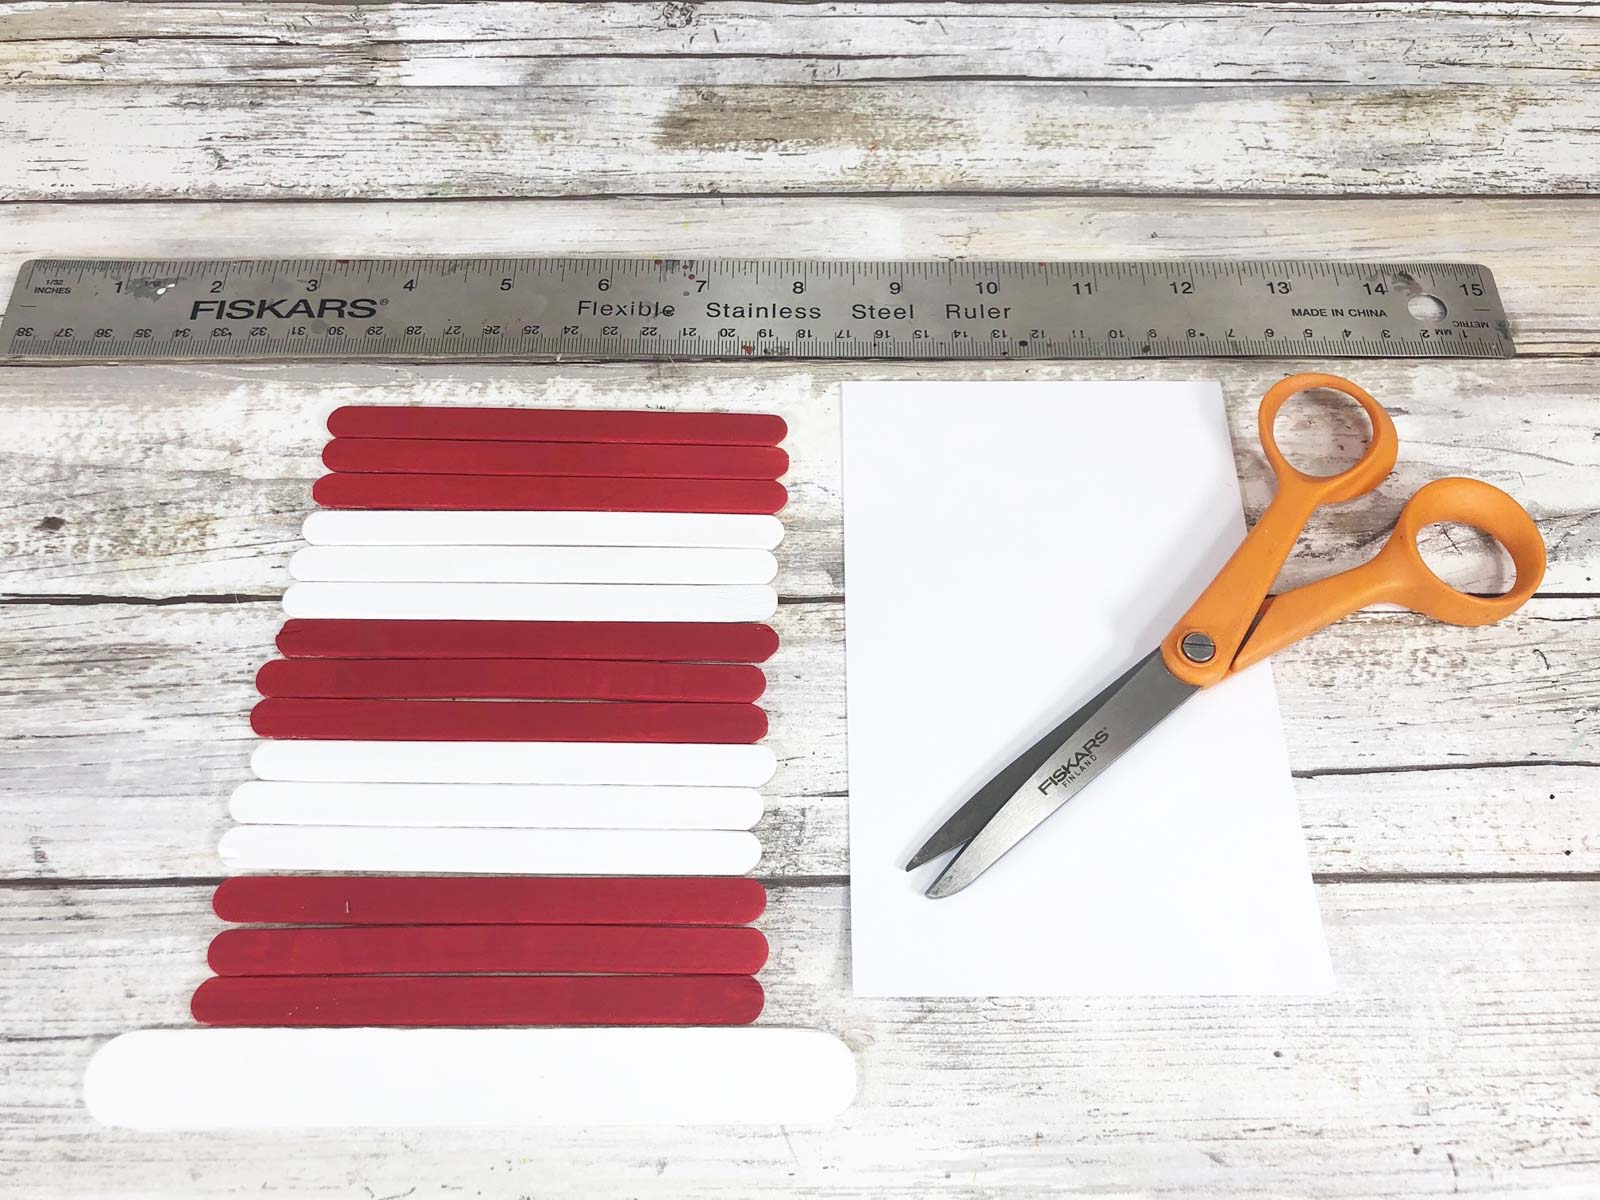
If you’re using hot glue, the glue will dry immediately. If you’re using craft glue or white glue, it’ll likely take a bit longer to dry – and that’s the perfect time to write out some quotes with older kids. Younger children will be done at this point, and I like to read some of our favorite Dr Seuss books while the hats dry!
Add clothespins!
If you are going to add the mini clothepins to the cat in the hat craft, you can do it now or wait until the craft sticks are completely dried. It’s a fun way to hold on the quotes – otherwise, you can just tape them (this Dr Seuss inspired washi tape would be great for this).
4 – Write & Add Quotes
Pick reading themed or inspiring or just favorite quotes from your favorite books by Dr. Seuss and write them onto the printed out book page templates. There are tons of quote ideas here if you need ideas.
I like to use red and blue markers to match The Cat in the Hat book, but a child’s imagination is a wonderful thing so feel free to let them use it! Or you can just use a black marker if that’s easier!
Write, draw, add stickers, or whatever to decorate the quote cards!
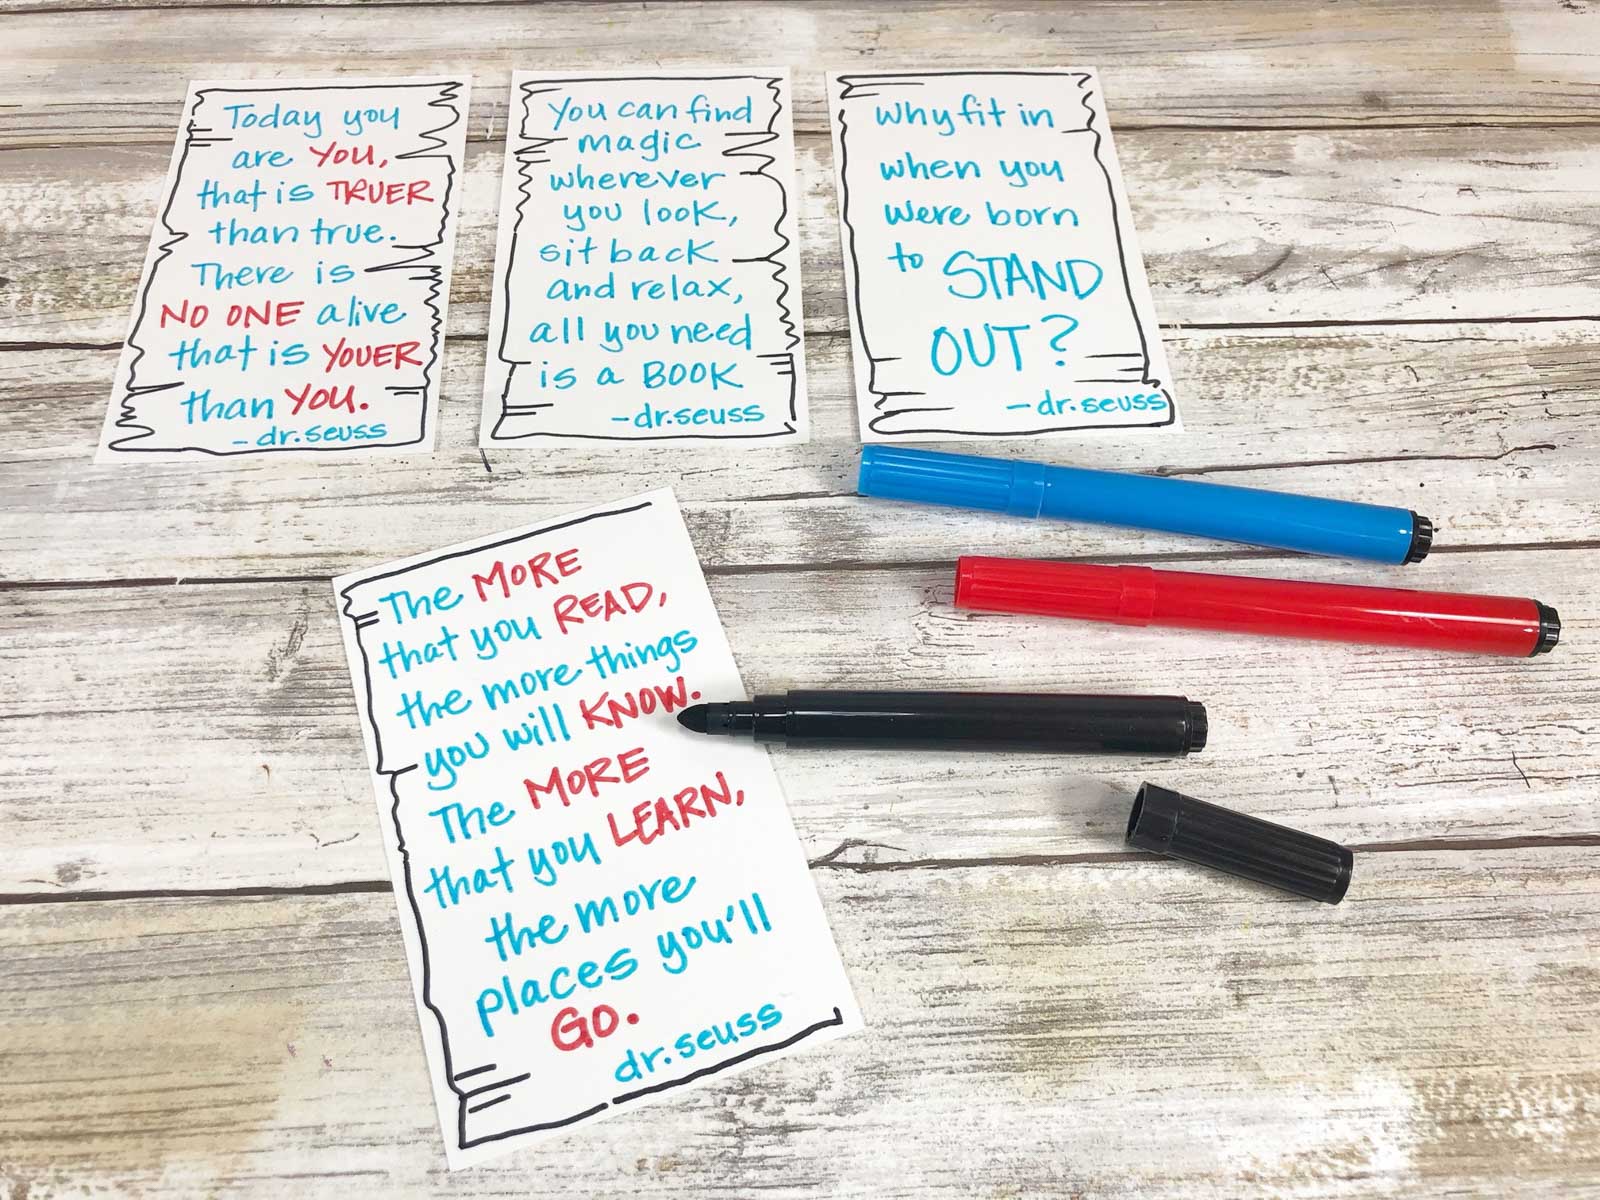
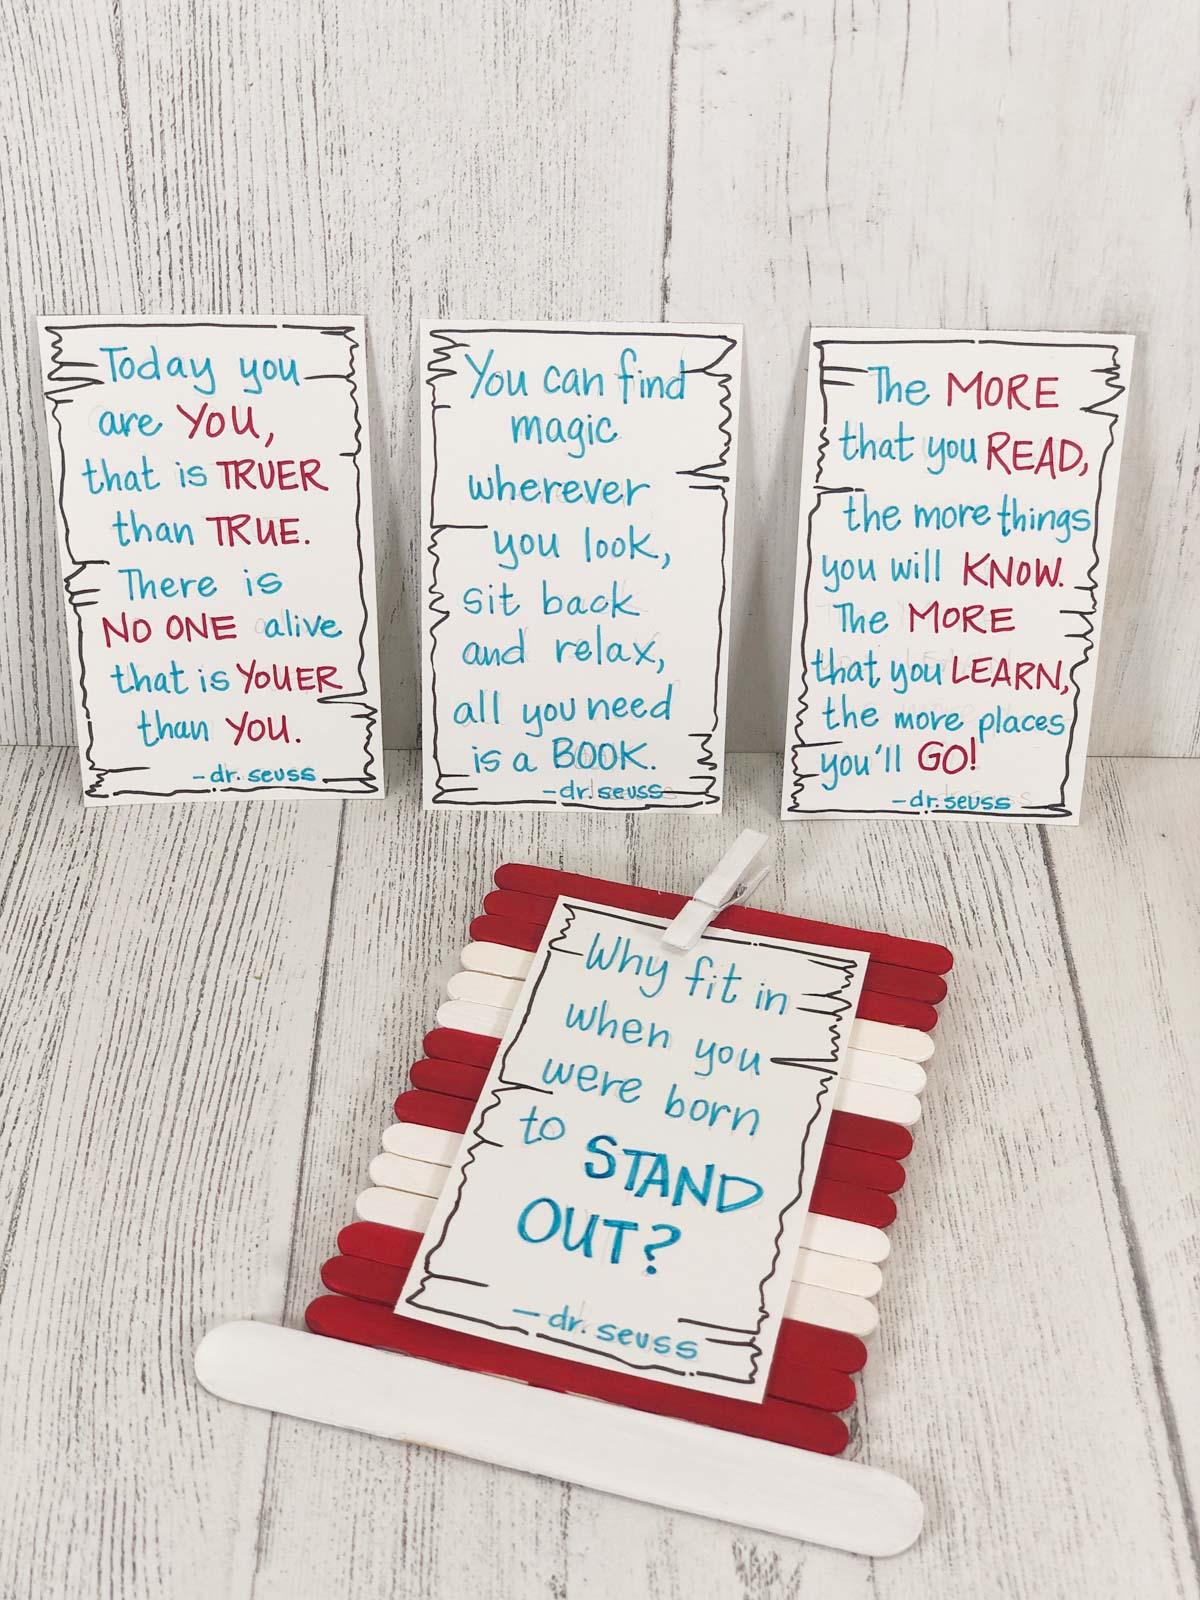
Then attach your favorite quote using the clothespin and keep the others to switch it out whenever you want!
And that’s it! I hope you love how the end result turns out and if not, at least that you have a fun afternoon making this fun craft on your own or with your favorite little crafter today!
Craft FAQs
Where can I get the printable quote template?
You can get the quote template right here! Just download this cat in the hat craft template!
When is Read Across America Day?
Read Across America Day is March 2nd every day, Dr. Seuss’ birthday! Many schools across the country celebrate with Dr. Seuss activities all week long!
More Easy Crafts
If you like simple crafts like this easy cat in the hat craft, these are also a great option!
- Turkey Craft – tons of fun and easy turkey crafts that are perfect for the fall!
- Christmas handprint crafts – a collection of the best handprint and footprint crafts with a holiday theme!
- Pumpkin patch craft – a simple pumpkin craft that uses another fall staple, apples!
- Christmas ornament crafts – easy DIY ornaments that you can make with kids!
- Dinosaur craft – a simple dinosaur craft for kids that includes painting, building, and more!

Cat in the Hat Craft
Ingredients
- 1 jumbo craft stick
- 15 4.5 inch standard craft sticks
- red paint
- white paint
- 1 piece white card stock
- 1 mini white clothespin
- 1 printable quote template
Instructions
- Paint the jumbo craft stick white. Paint nine of the regular size craft sticks red, and paint the remaining six white. Set aside to dry.1 jumbo craft stick, 15 4.5 inch standard craft sticks, red paint, white paint
- While the paint dries, cut the piece of white card stock into thirds. Set aside two of the pieces to use for another project another day.1 piece white card stock
- Cut out the printable templates. Use the colored markers to write your favorite Dr. Seuss quotes on the pages.1 printable quote template
- Once the craft sticks are dry, glue the jumbo one at the bottom of the piece of card stock (make sure it’s turned vertical). Then glue three red sticks above that, then three white sticks. Continue alternating sets of three red sticks then three white sticks until you use all of the sticks and create the hat.1 jumbo craft stick, 15 4.5 inch standard craft sticks
- Glue the clothespin to the top of the craft sticks to use to hold quotes on.1 mini white clothespin
- Add your favorite quote and set aside the others to switch out whenever you want.



Leave a Reply