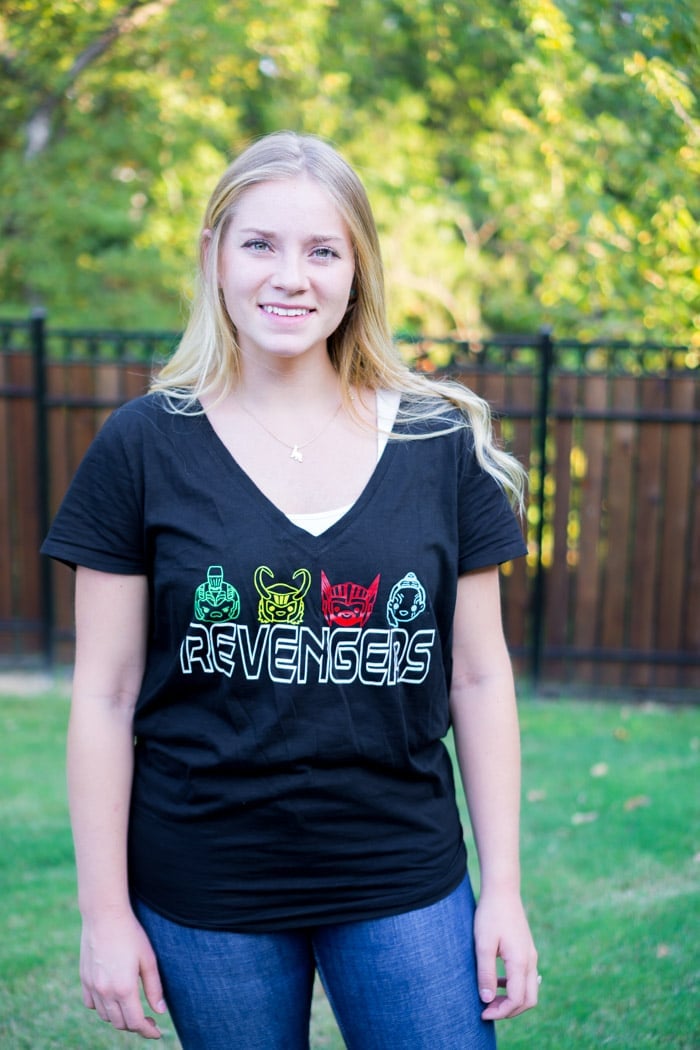
Any fan of the new THOR RAGNAROK movie needs this DIY Thor Shirt to show their support for Team Revengers! Use the free SVG cut file to cut out iron on vinyl using a Cricut Maker then press it onto your favorite shirt with the Cricut Easy Press for one great shirt to wear to the premiere of THOR Ragnarok!
Want to save this Idea?
Enter your email below and we’ll send this idea straight to your inbox (plus you’ll receive tons of fun weekly ideas from us!)

THOR RAGNAROK Movie Inspiration
When I found out I was invited to the THOR: RAGNAROK event, I knew I wanted to make a shirt to wear during interviews. Because you know, that’s what I do. I make cute shirts like these Lion King shirts and these Beauty and the Beast ones! And this was before we had our interview list for the event, so I know maybe, just maybe, one of the stars would see my shirt and comment on it. I mean, that would be huge!
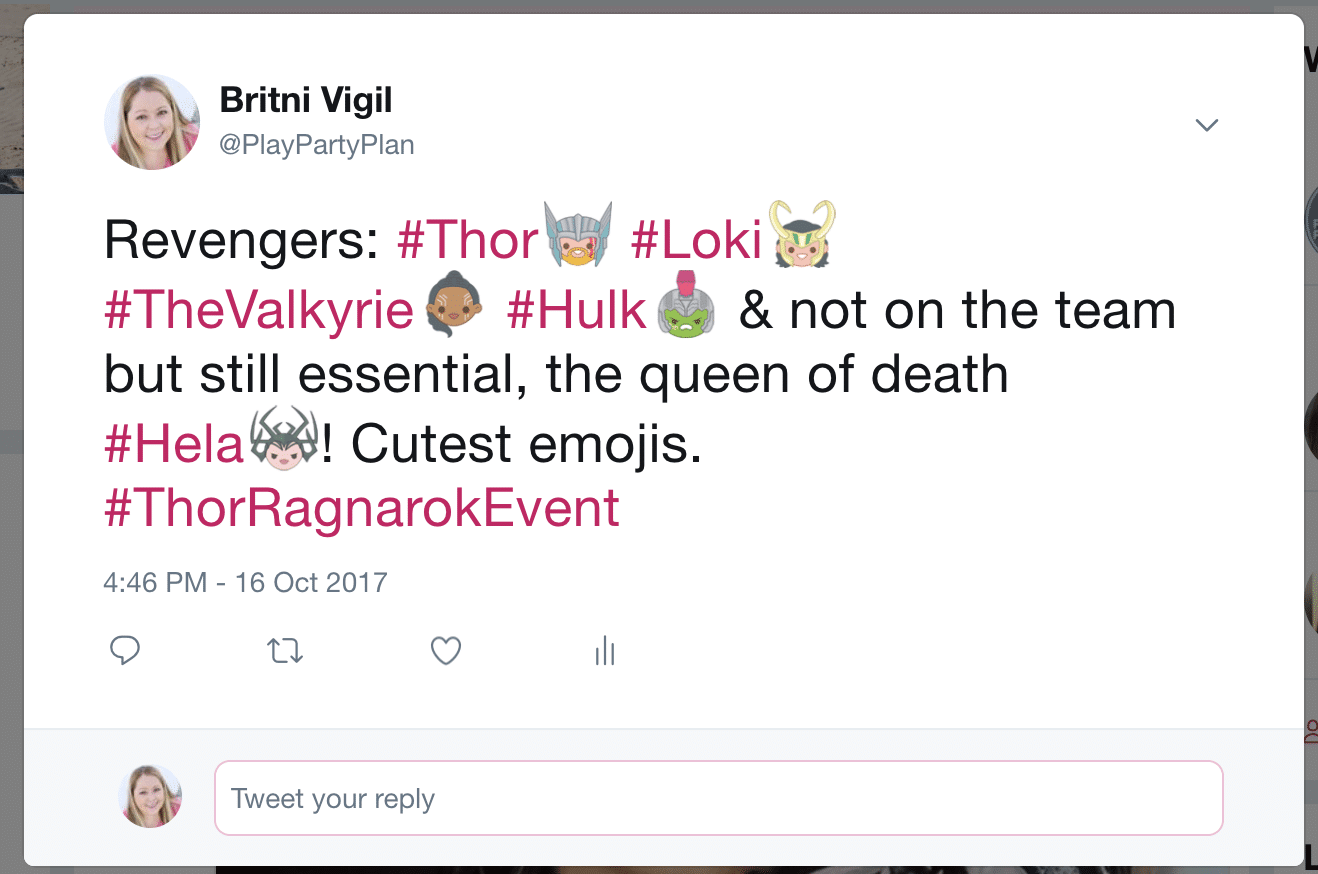
After seeing the THOR trailer way too many times, I finally decided that I wanted to make some sort of Revengers shirt. I already have Team Thor shirt, so it was only fitting to make a shirt dedicated to his newest team – The Revengers. And when I saw the new emojis for the THOR: RAGNAROK characters on Twitter, I immediately knew I wanted those on my shirt! I mean, they’re so cute!
And guess what? We didn’t interview any of the actual Revengers themselves, but we did interview the director Taika Waititi, and he totally commented on my shirt! Life made!
DIY THOR Shirt Supplies
For this project, I used the following supplies along with my Cricut Maker, but you could easily use a Cricut Explore as well if that’s all you have. You may want to consider getting a Cricut Maker eventually though if you ever want to cut fabric, felt, or even heavier things like wood and leather – I love mine!
- Cricut Maker (could also use Cricut Explore or Cricut Explore Air 2)
- Cricut Easy Press
- Cricut Bright Pad (optional)
- Cricut 12×12 Standard Grip Cutting Mat
- Cricut Craft Weeder (this is a must-have!!!!)
- Cricut Iron On Vinyl Lite, White
- Cricut Iron On Vinyl Lite,Aqua
- Cricut Iron On Vinyl Lite, Kelly Green
- Cricut Iron On Vinyl Lite, Maize
- Cricut Iron On Vinyl Lite, Metallic Purple
DIY THOR Shirt Instructions
I used a little Photoshop magic and this awesome tutorial from Hey Let’s Make Stuff to turn those adorable little emojis into one of my favorite DIY shirts ever. And to put them into a free SVG file that you can use to create your own shirt, bag, or even a pillowcase if you need a little protection while you sleep. ! I won’t go into the process for transforming them into an SVG here but might in a future tutorial!
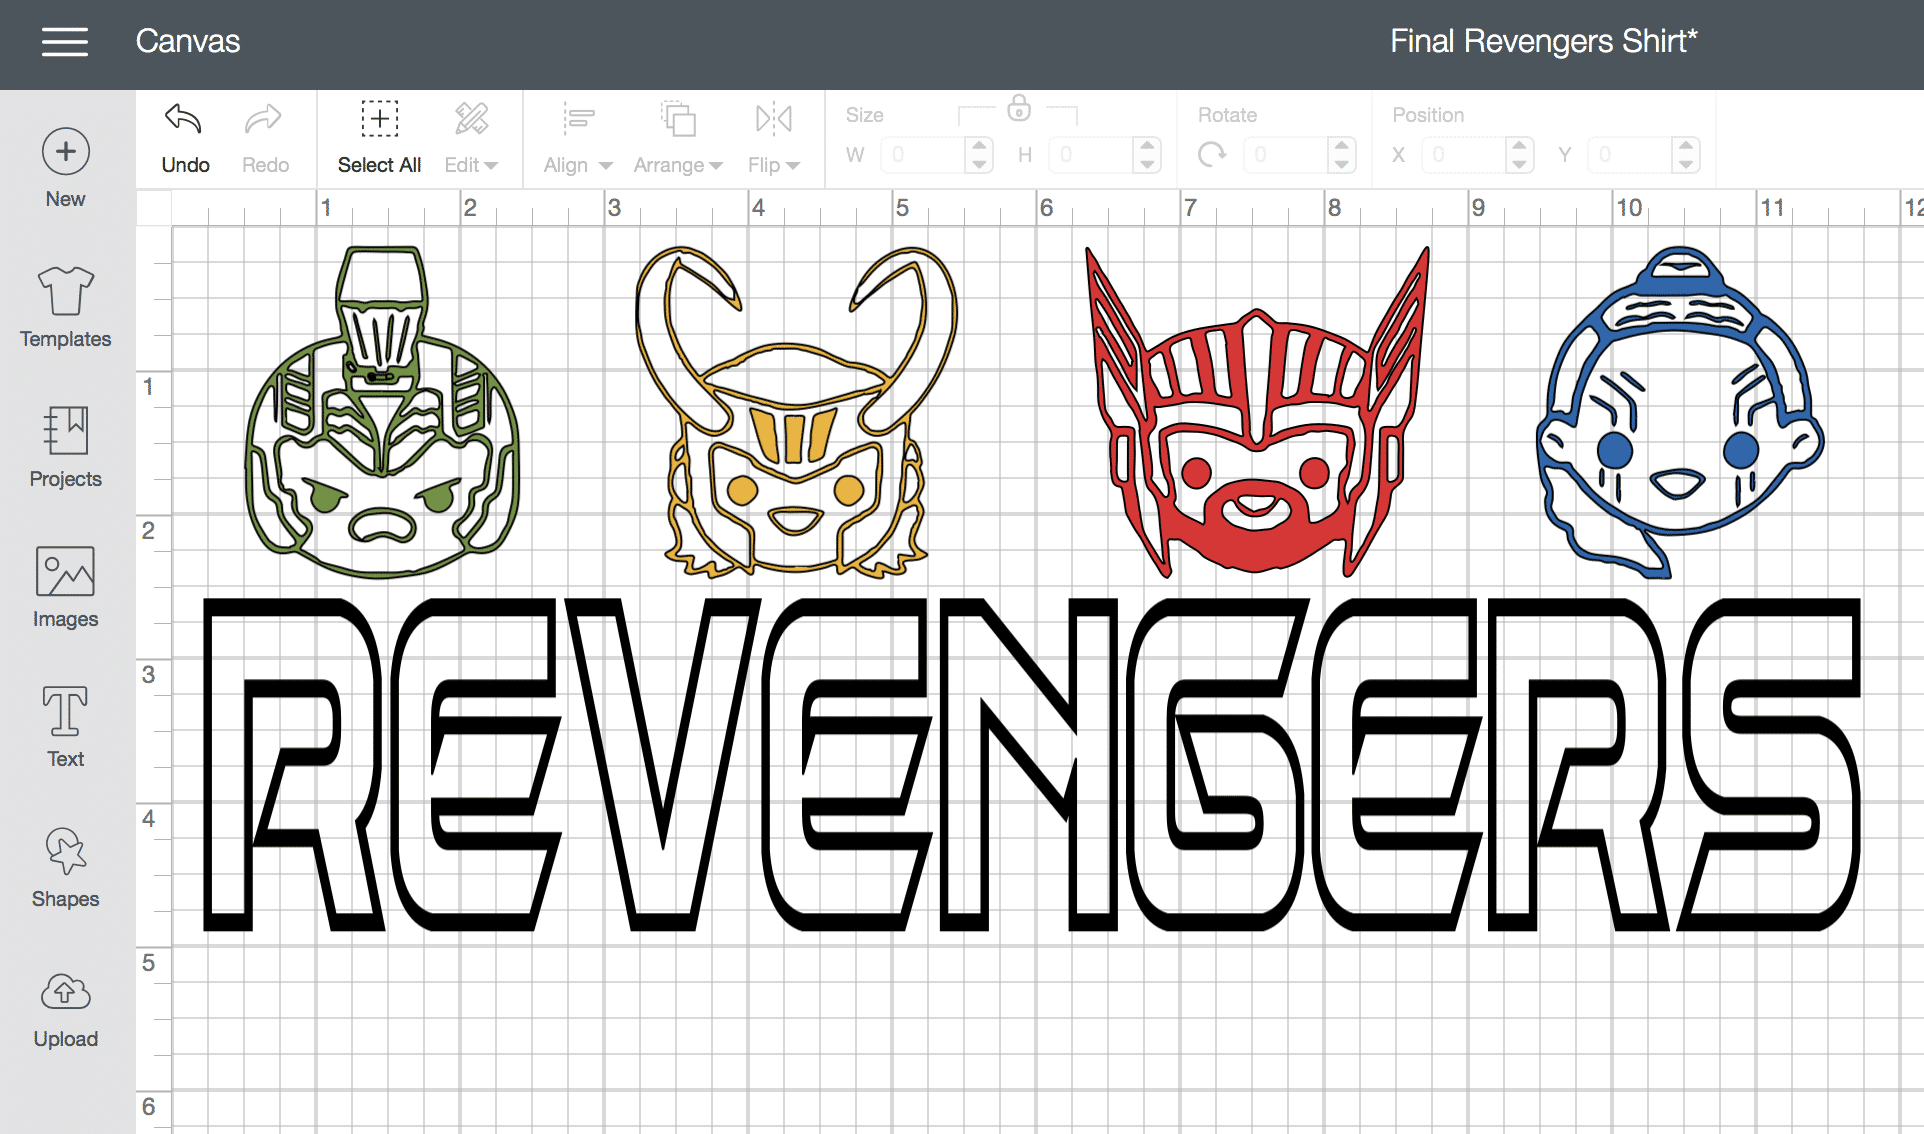
Step 1 – Open the Thor shirt cut file in Cricut Design Space
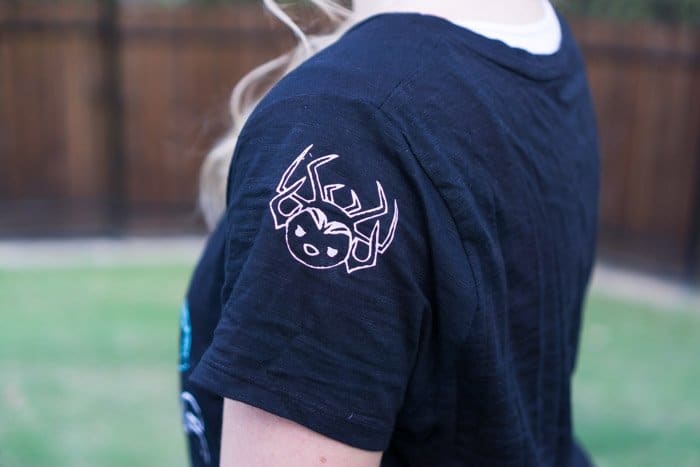
First things first, open the cut file in Cricut Design Space. The design is currently sized to fit on a regular women’s t-shirt but feel free to customize the size as you see fit. It’s also set up with each of the different characters to cut in a different color (to go with the colorful THOR movie trailers) but if you want to cut it all in one color, just select all (other than Hela) and attach them together! And I left Hela off to the side because I wanted to cut her separately. She’s an on-the-sleeve type of villain!
Step 2 – Cut the THOR RAGNAROK MOVIE Revengers Design
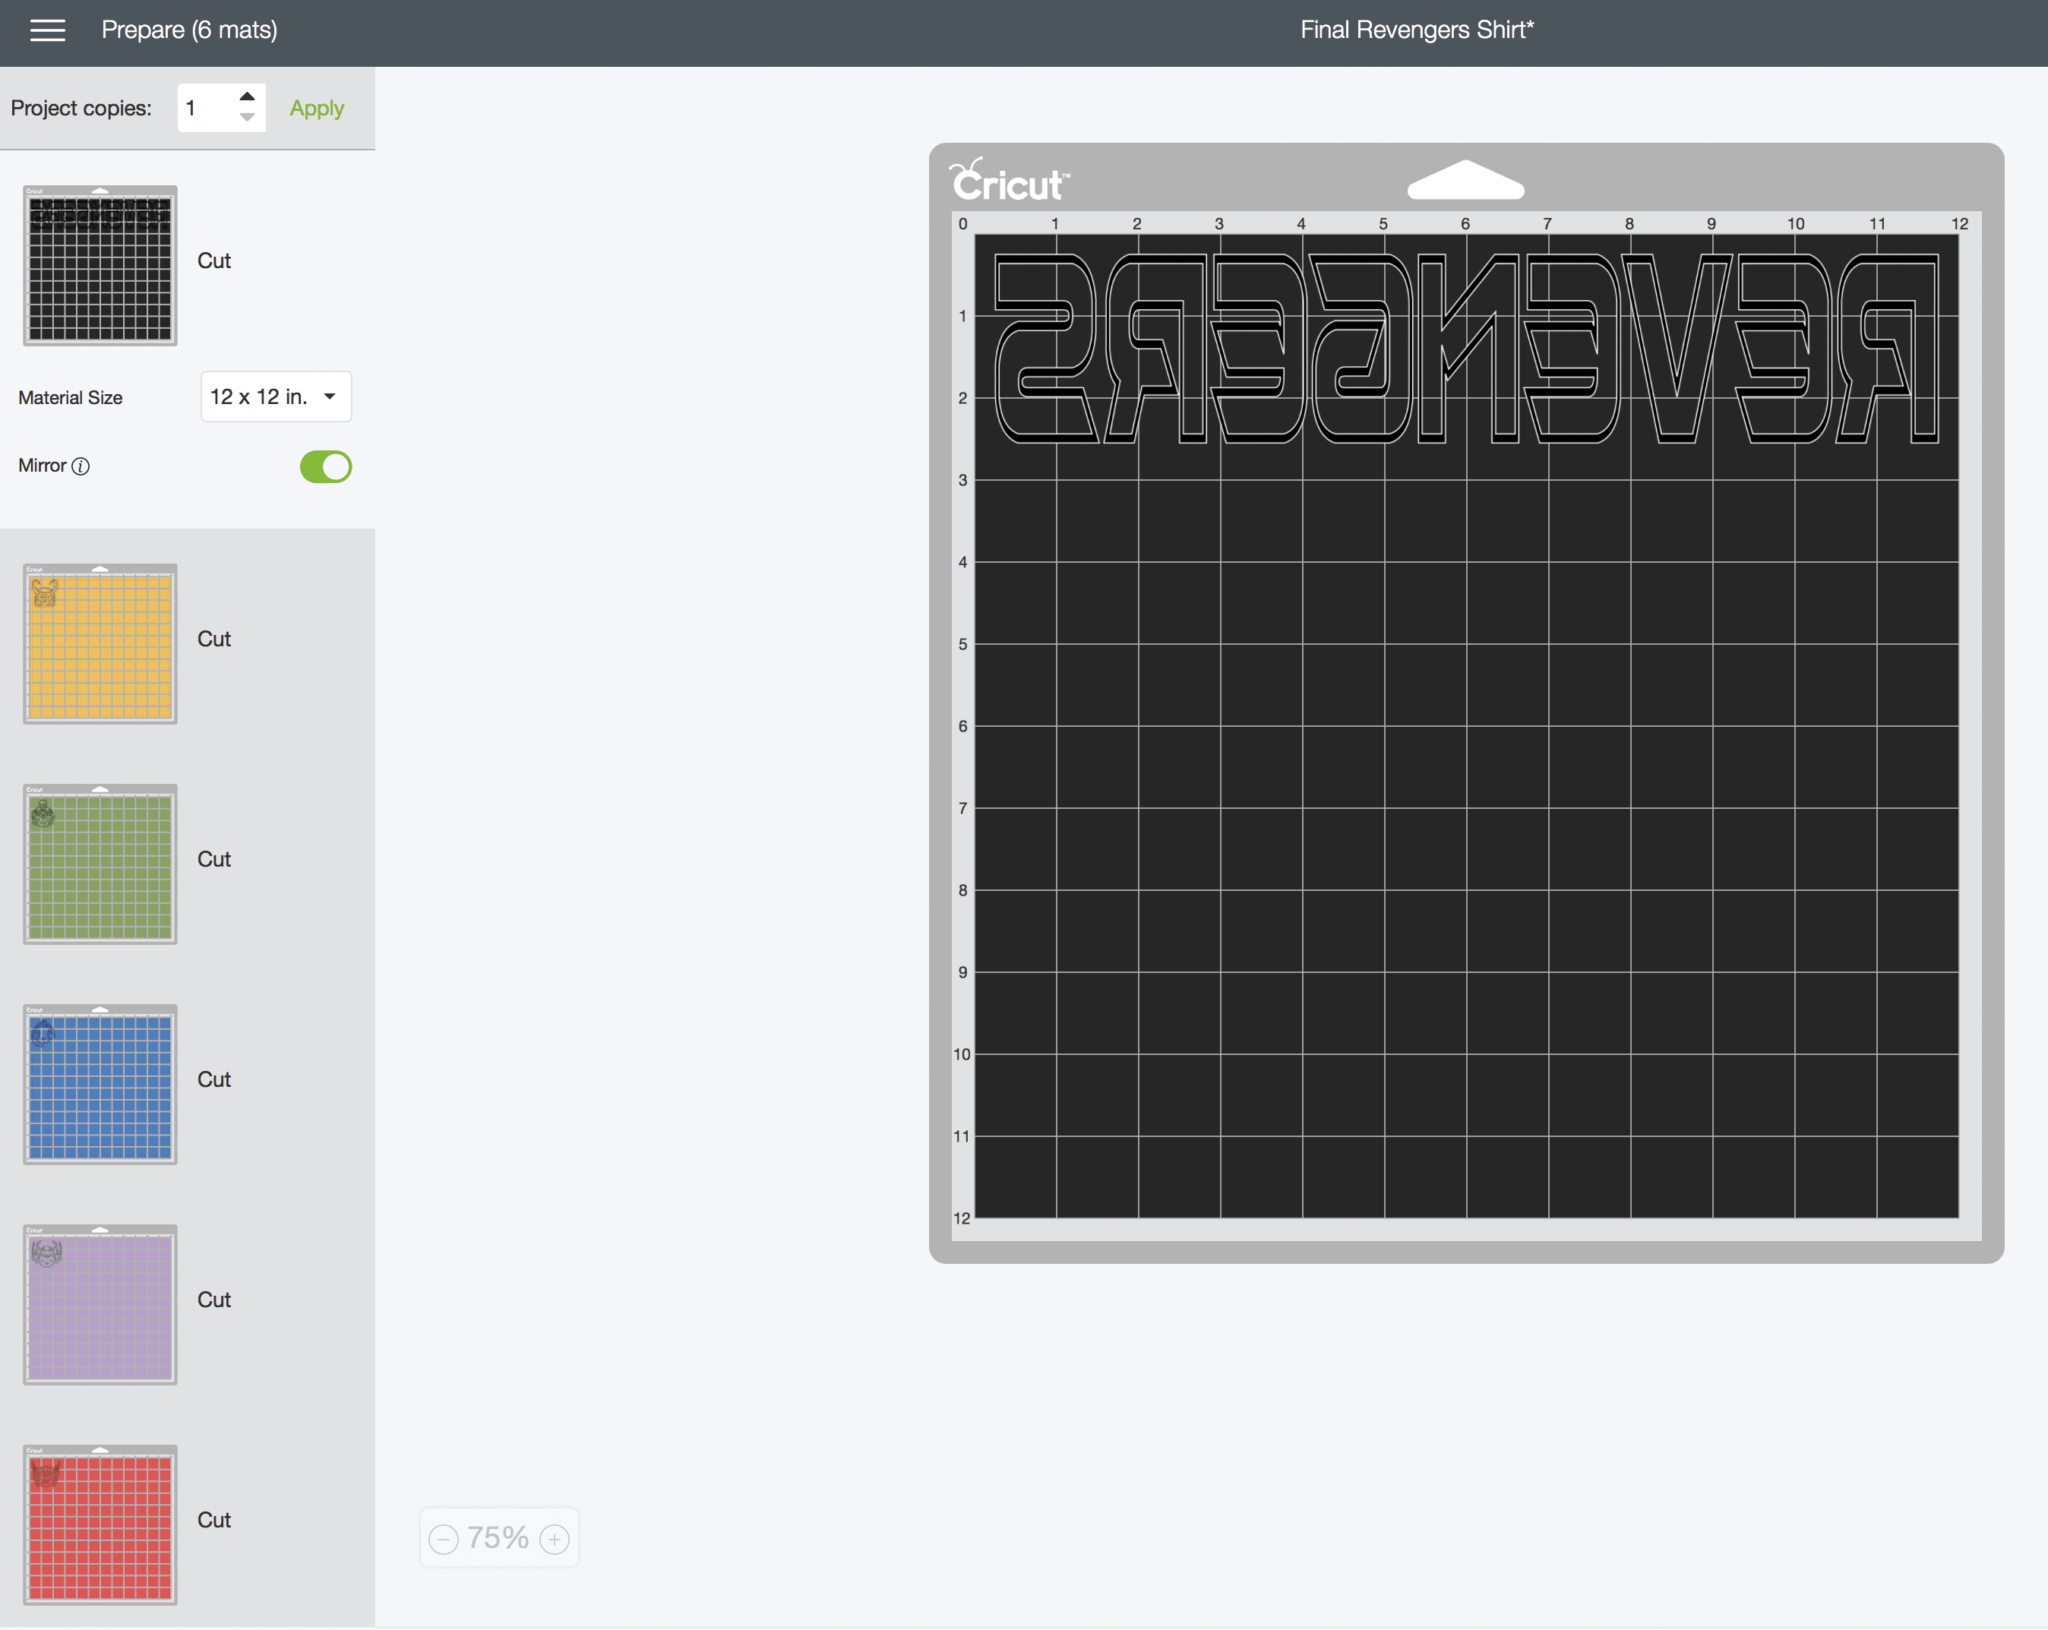
After the design is how you want it, click the “Make It” button in the top right corner. This should pull up a screen broken up by color of the different items you’re going to cut.
Select whichever design you want to cut first and make sure to toggle the mirror button (for iron-on) to on so your design cuts a mirrored version of the actual design. Then follow the prompts to select your machine and the type of iron-on vinyl you’ll be using. Place the vinyl on your mat shiny side down then again follow the prompts to load the mat and cut the vinyl. Since there are some really little pieces in the design, I recommend skipping the option for fast cutting, you want all those little pieces in place in your final design!
Step 3 – Weed the THOR Shirt Design
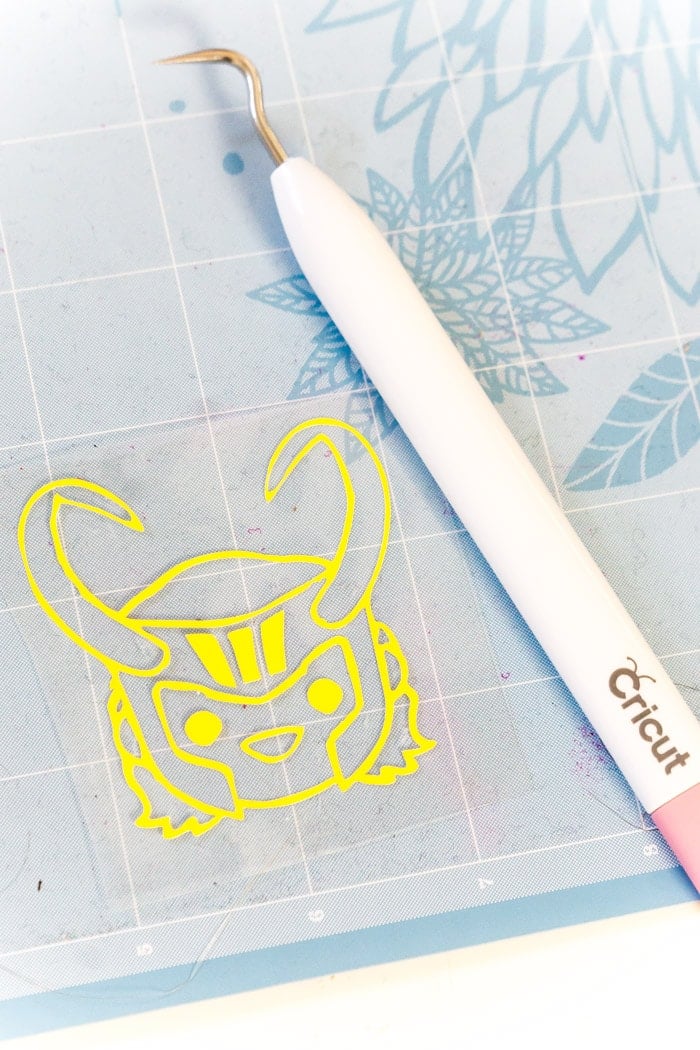
After all of your designs are cut out, it’s time to weed using your craft weeder! This was easily the trickiest part of the entire process for me not because there were tiny pieces but because I kept weeding out the pieces that needed to stay instead of the pieces that needed to be removed. My recommendation is to have the design up on your screen while you’re weeding, so you can make sure to remove the pieces you want to. Putting them back in after they’ve been weeded out is not fun, trust me on that one.
I also recommend using a Cricut Bright Pad to make the process so much easier! But again, if you don’t have one – no big deal. Just go slow and be careful.
Step 4 – Use the Cricut Easy Press to Press On Your Designs
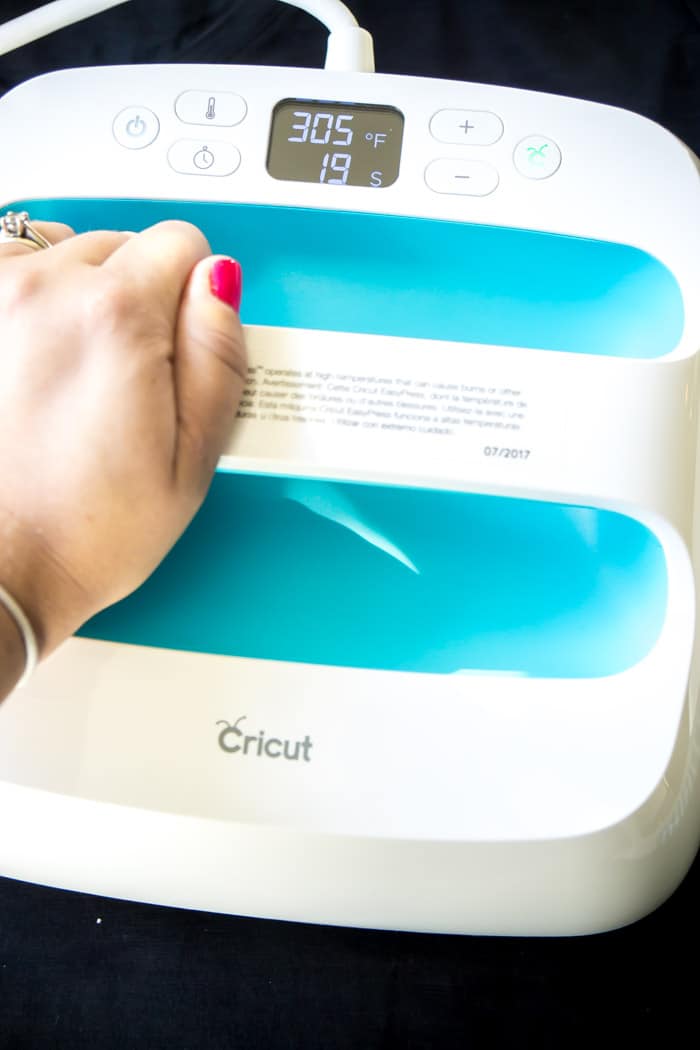
Once all the designs have been weeded, it’s time to press them on to your shirts using the Cricut Easy Press! I’ve made a lot of shirts and one of the most annoying things in the past has always been ironing on the vinyl. The iron gets too hot, the iron doesn’t get hot enough, the vinyl sticks for one day then comes off, or one of another plethora of problems. The Cricut Easy Press is a game-changer when it comes to iron-on vinyl. It’s as easy as 1-2-3 to use and the vinyl stays on as long as if you’d used an actual heat press!
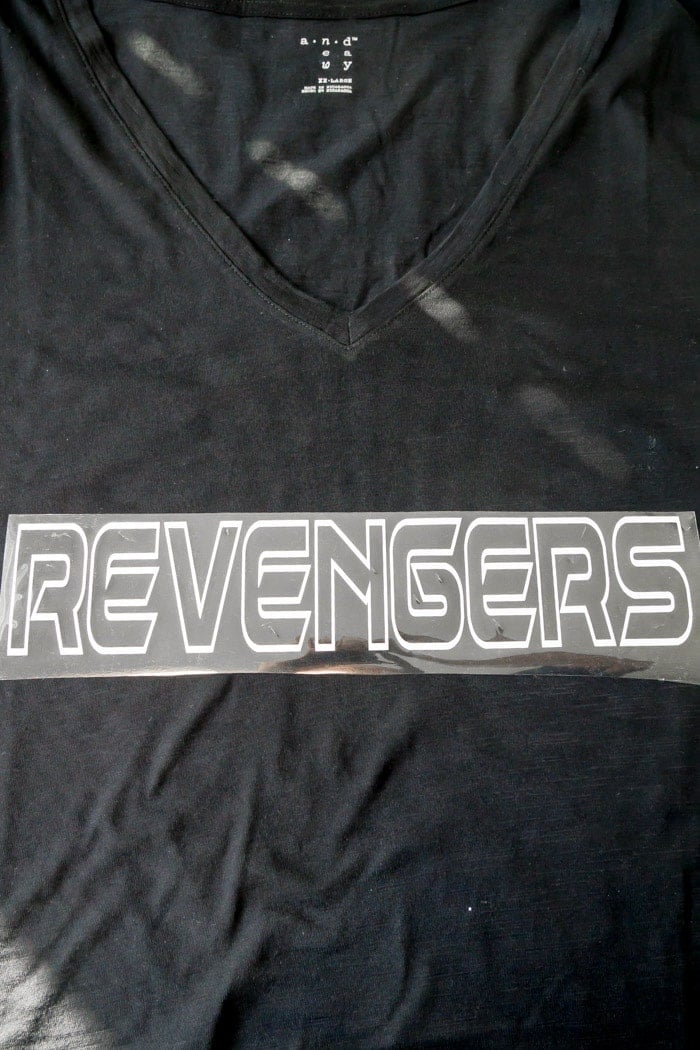
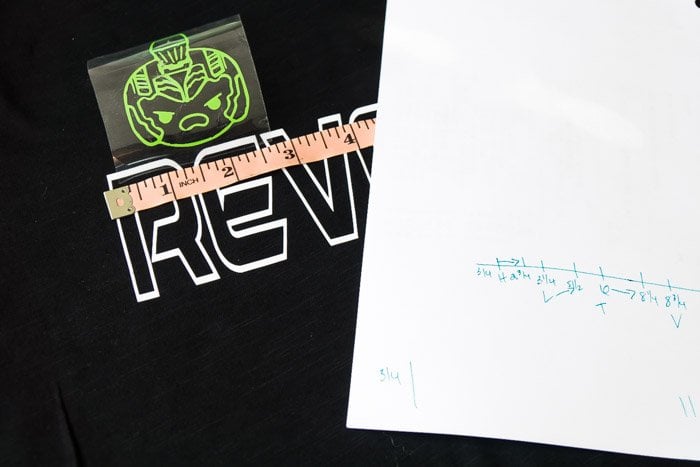
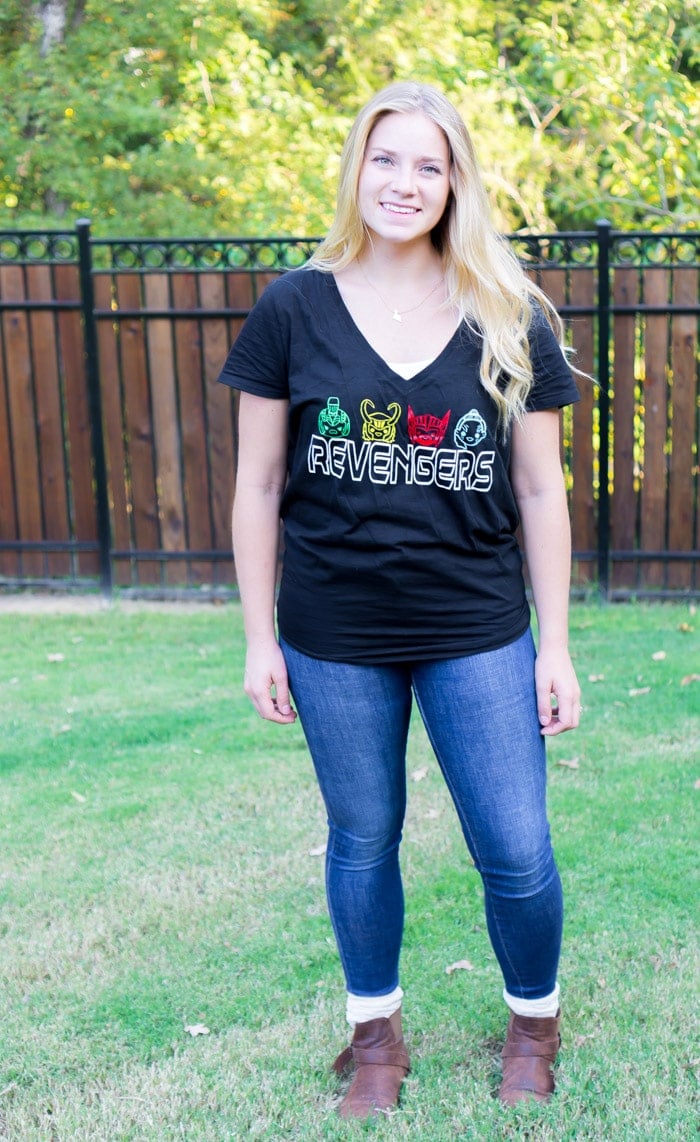
Simply heat up the easy press to whatever temperature is recommended for the type of vinyl you’re using, change the amount of time (again based on the recommendations), then press the vinyl on top of the design for the allotted amount of time. Turn the design over and press it again through the back of the fabric. If the Easy Press surface doesn’t fully cover the design like on The Revengers shirt, just do it in two sections. And if you’re OCD like me, make sure to measure out your emojis so they are evenly spaced.
Remove the Easy Press, and you’re done. That’s it – less than two minutes to get a fully pressed custom shirt that won’t come off or start peeling. It’s seriously my new favorite Cricut product and that’s saying a lot with the amazing Cricut Maker out!
Step 5 – Remove the Iron-On Protective Sheet
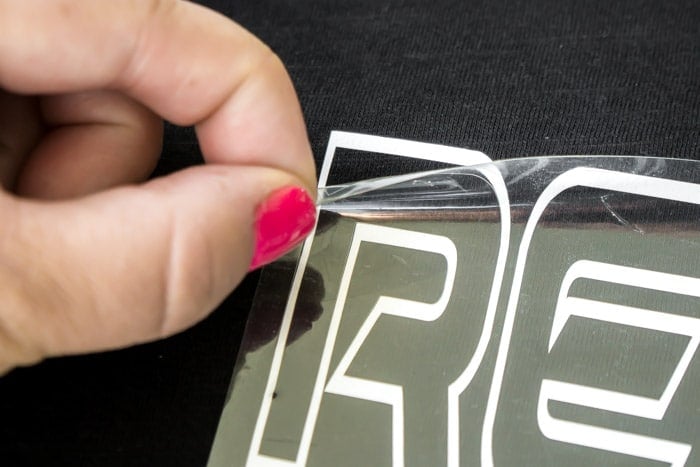
Last but not least, remove that plastic protective sheet from the iron-on design. Then join Team Revengers because your shirt is done! If you want to add Hela to your sleeve like I did, just repeat the same process as above, just adding her to the sleeve instead of the front of the shirt. And don’t be fooled by how cute the Hela emoji is, Cate Blanchett is nothing but fierce in the upcoming THOR RAGNAROK movie!
Want to make your own? Simply click the “click to print” button below then follow the prompts to download the free SVG cut file and/or get the link to the project in Cricut Design Space to use on the shirts!
Get The Free SVG File
If you’re ready to download the free SVG file to use this idea, simply click the button below or click here.
Don’t forget to pin this DIY THOR Shirt for later!
This is a sponsored conversation written by me on behalf of Cricut. The opinions and text are all mine.
Want More Fun Ideas?
Want more fun ideas like this one? Enter your first name and email address in the form below to join the Play Party Plan community! You’ll receive weekly recipes, party ideas, games, and more directly to your inbox!







Leave a Reply