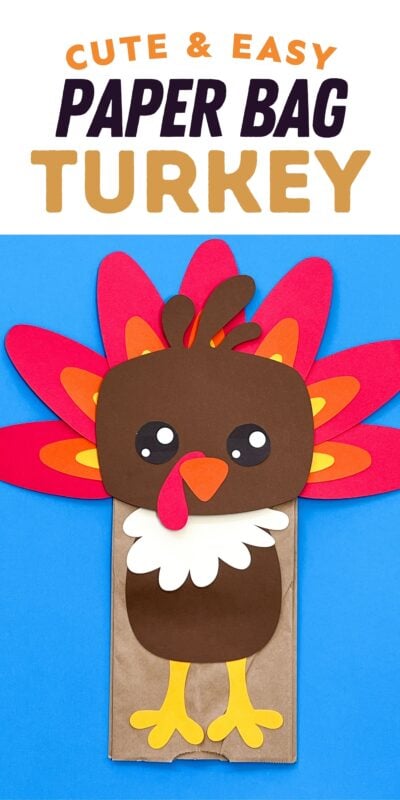
This simple turkey paper bag craft is perfect for someone looking for an inexpensive and easy craft for Halloween! Make these cute turkeys with preschoolers, kindergarteners, or even your toddlers with just a little help!
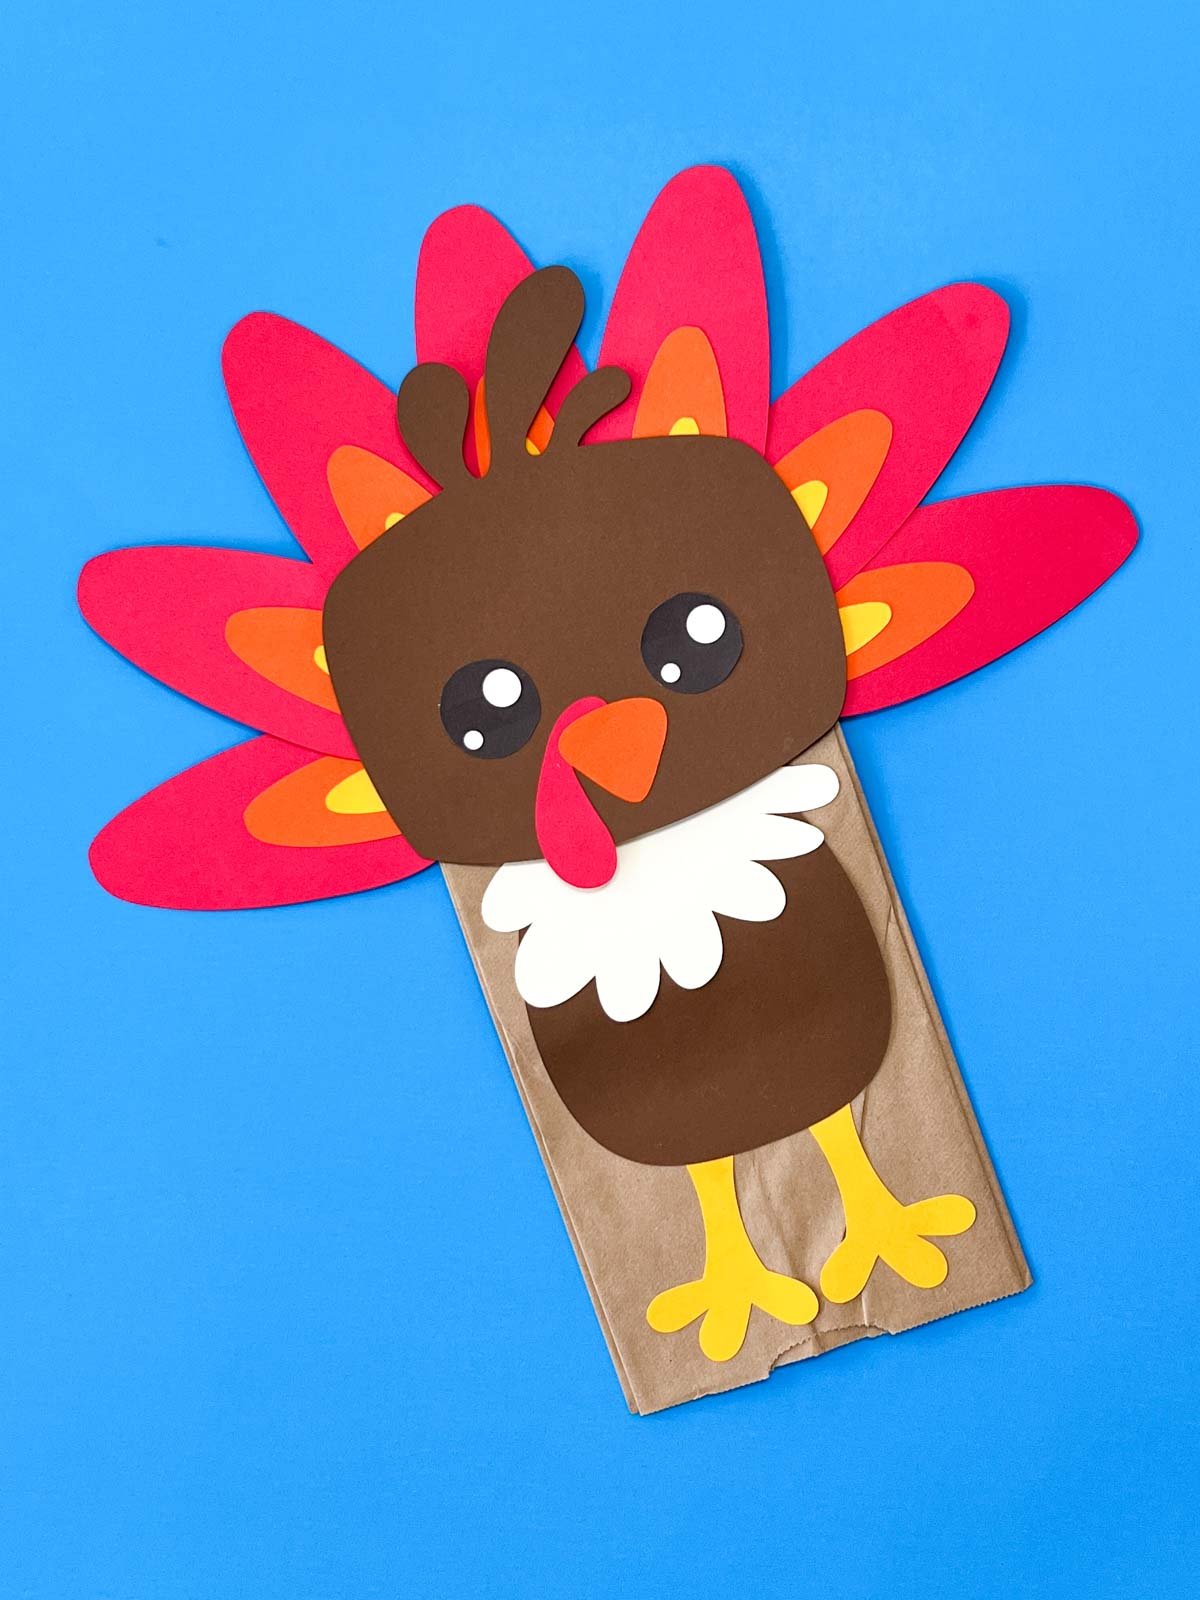
Paper Bag Turkey Project
With Thanksgiving just around the corner, it’s time to start planning out the activities to do leading up to Thanksgiving Day and the things you’ll do on the actual day before and actual Thanksgiving dinner!
This simple turkey craft is a fun way to get kids excited about the holiday season because it’s something they can actually make! And it’s inexpensive – you really just need a brown bag, some scissors, and some colored paper to make this fun brown paper bag turkey craft!
Free Template Provided
You can get a free downloadable template at the bottom of this post that kids can trace if they don’t want to freehand their turkeys! It makes this simple activity even simpler!
Add this to some Thanksgiving games for a Thanksgiving day at school, make these cute little turkeys as a Thanksgiving activity for kids before dinner, or even just do it as a fun activity with your own kids or friends!
Why you’ll love this
- Simple supplies – nothing fancy for this easy craft, just glue and paper.
- Free printable – you don’t have to be an artist for this, just trace the printable guide and you’ll be set!
- Great for all ages – with just a few adjustments, this works great for young children to elementary kids.
- Fine motor skills practice – this inexpensive craft combines cutting and gluing – two great activities for working on fine motor skills. Plus, the best part is kids will never know that they’re practicing because they’ll be having so much fun!
Supplies
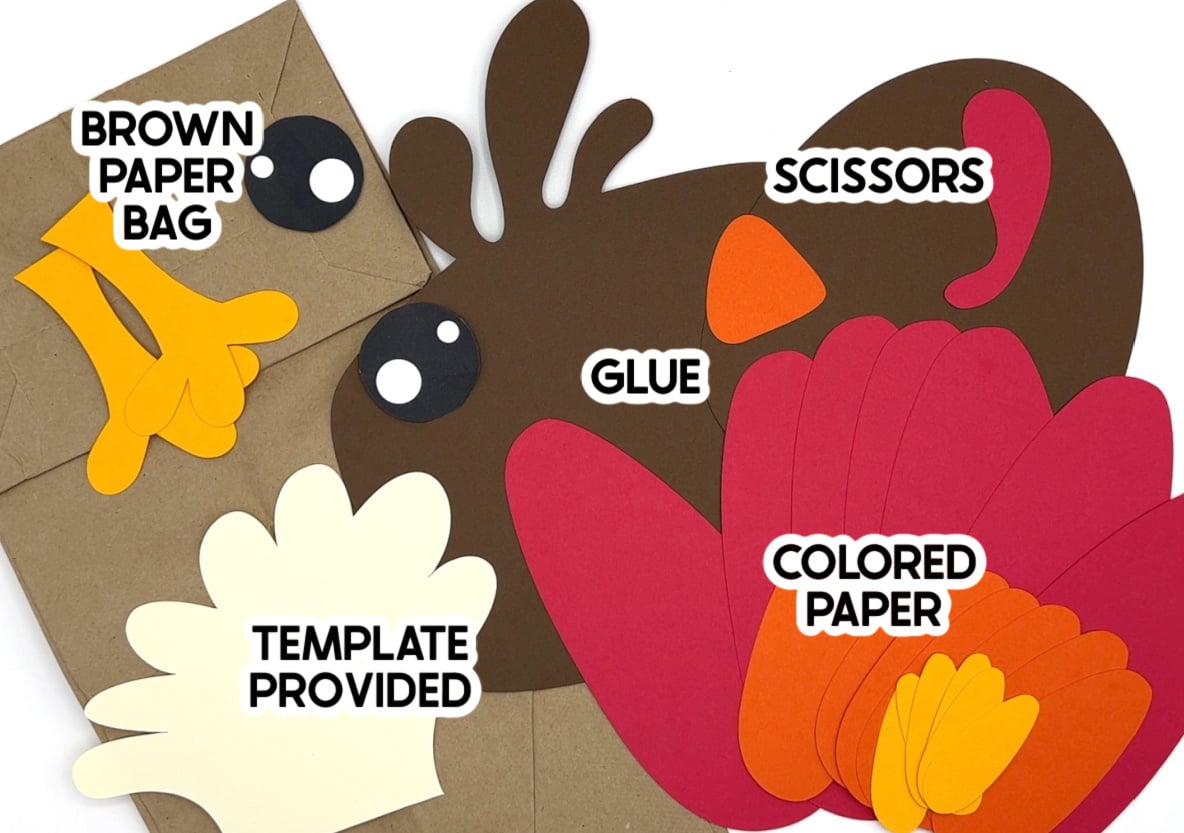
Supply notes
- Printable pattern – print out multiple copies of the printable template included in this post for people to use as a guide if they want for tracing.
- Colored paper – the sturdiness of card stock is helpful for this but not necessary, you can use whatever colored paper you have on hand. I used red, orange, yellow, black, brown, an off-white, and white paper for our turkeys! The color of paper really doesn’t matter!
- Glue – use whatever type of glue you have on hand such as Elmer’s glue, craft glue, or even tacky glue. I do not recommend using hot glue as it can be too heavy for paper bag crafts. Plus, it’s not the best thing to use with younger kids!
- Brown paper lunch bags – the printable is designed to fit a regular 4 lb brown paper lunch bag, so I recommend getting the normal size.
Note!
The free template includes both options for tracing and/or just cutting out the pieces. Feel free to use whichever one works best with the group you’re doing this craft with. If you go with the colored pieces, you can skip the colored paper above all together!
How to make paper Bag turkeys
Making this lunch bag turkey is simply a matter of tracing, cutting, and gluing.
Below are detailed instructions on how to complete this cute Thanksgiving craft. Of course, you can always get creative and do it without the guide or make your own adjustments to this simple craft.
1 – Prep The Pieces
- Begin by printing the pattern onto the card stock paper, pay attention to the different colors when printing.
- Carefully cut out the pieces as shown in the free template instructions. Try to be precise with the cutouts. You will want one pattern per person plus as many additional copies as you’ll need to make seven feathers and two eyes (the white circles).
2 – Assemble Feathers
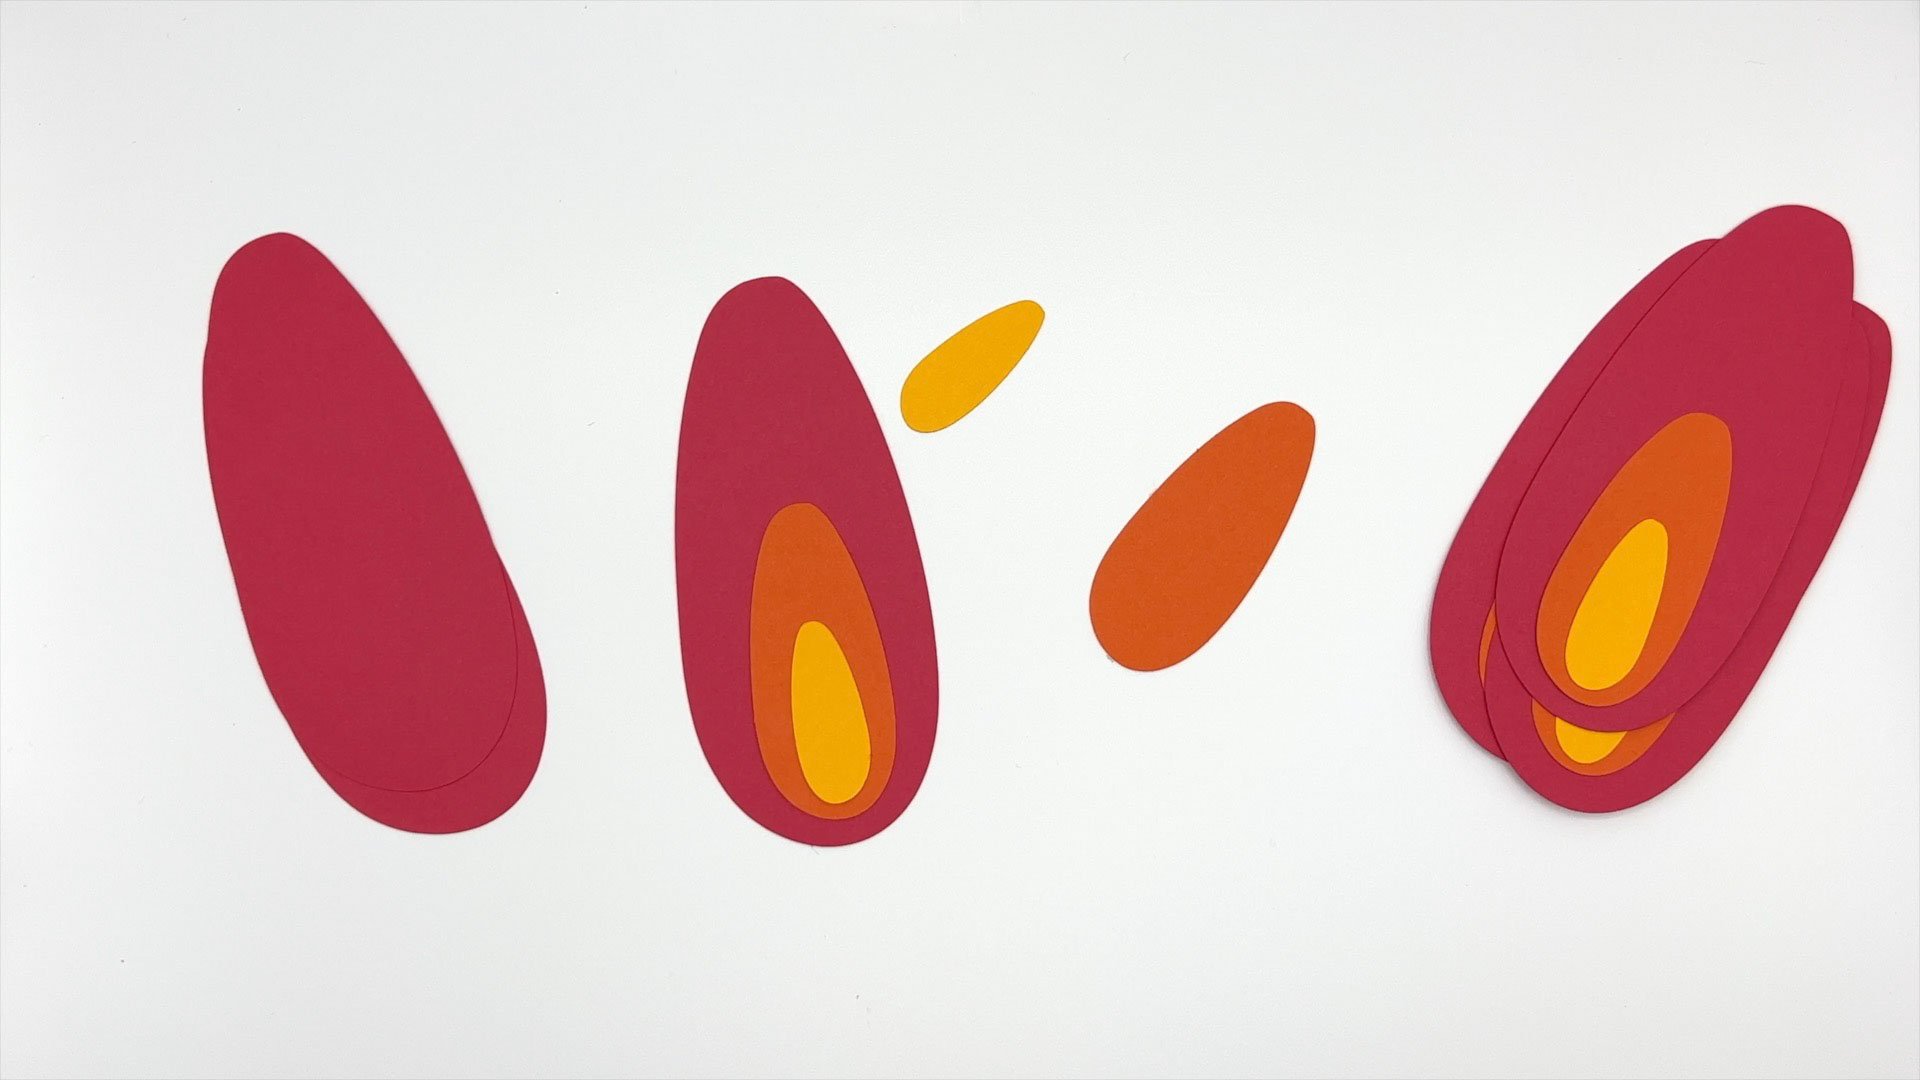
- Assemble the colorful feathers one at a time. Gather all of your cut-out feather shapes and arrange them by size.
- Start by gluing the medium feather to the bottom edge of the large feather. Then glue the smallest feather to the medium feather at the bottom edge. Repeat this for all seven feathers.
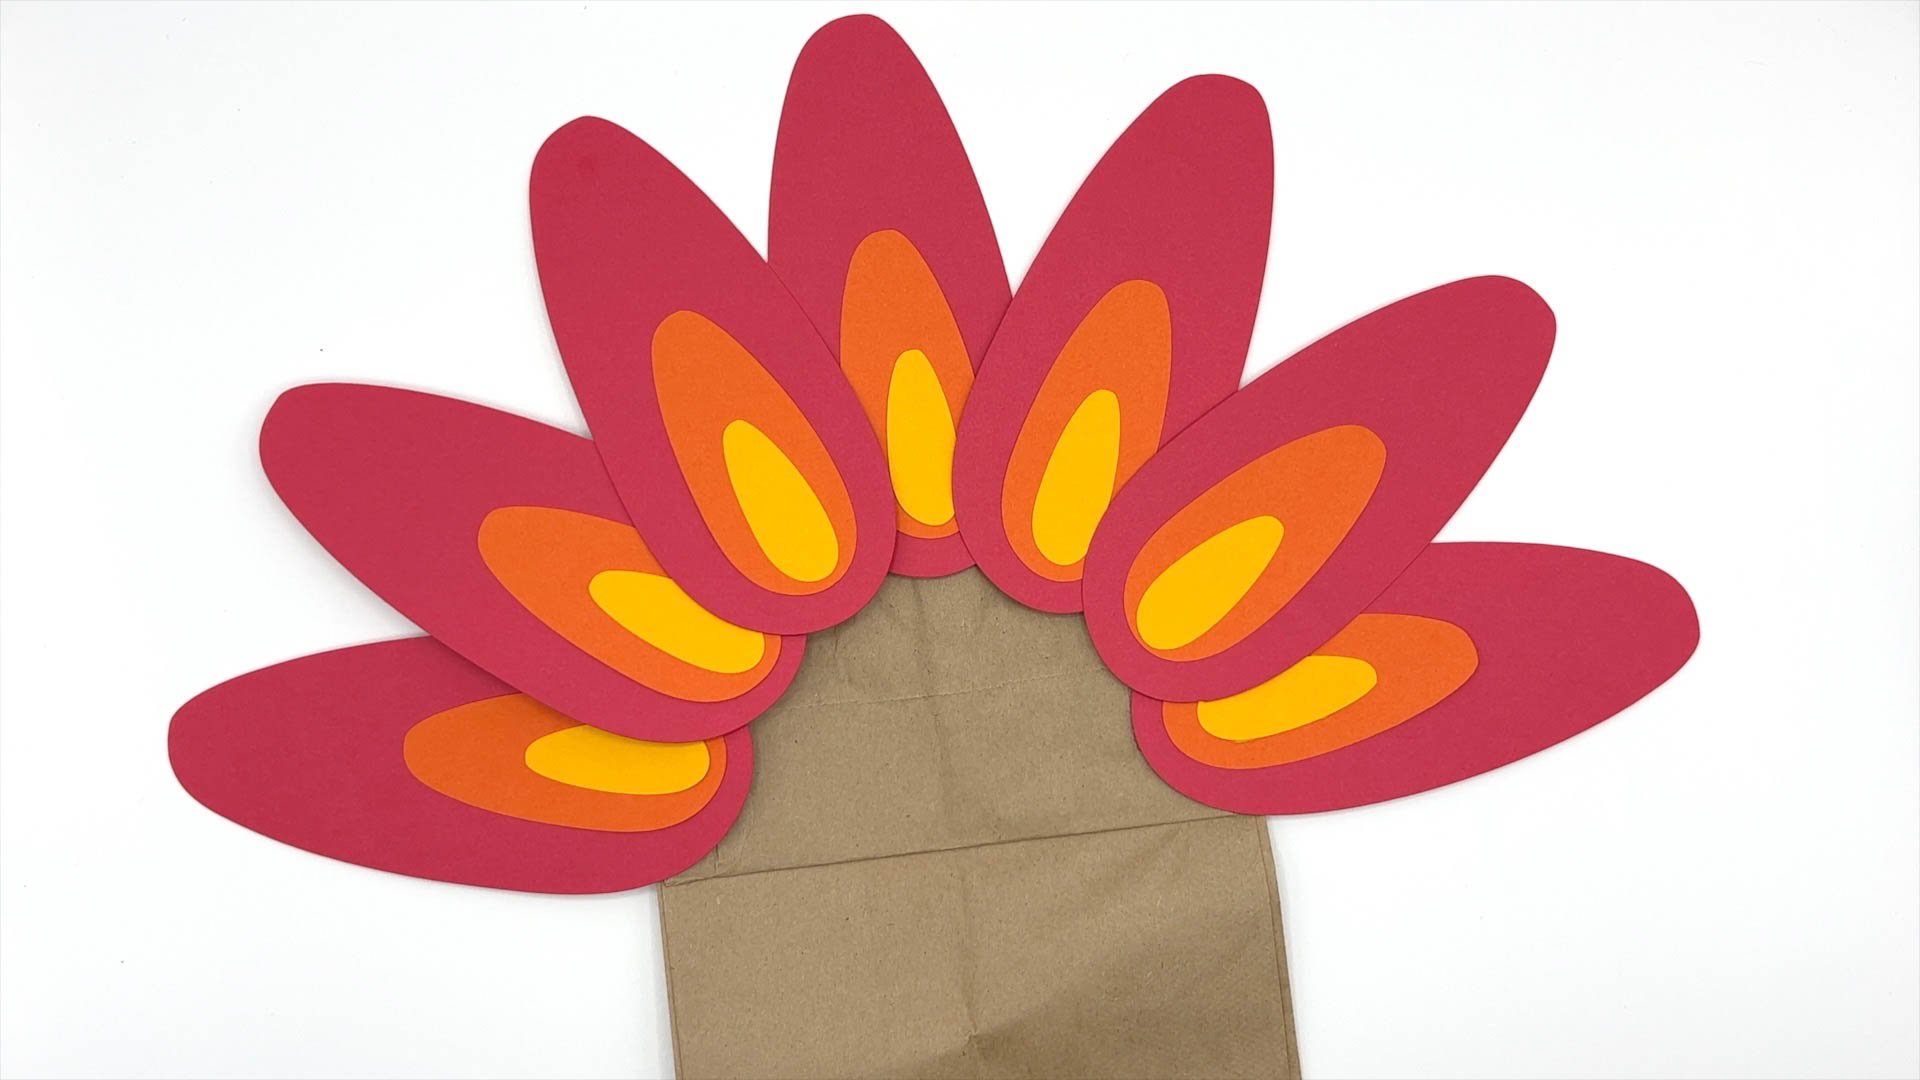
- Now arrange the seven layered feathers into a fan shape. Then glue them together in that shape. Allow this to dry completely while you start on the turkey head.
- Now that the tail feathers are dry, grab your brown bag and arrange it so the top of the bag is facing down and the bottom of the bag is at the top with the flap facing you.
- Next, take your feathers and glue them to the bottom flap of your bag. It doesn’t matter how high or low you place the feathers, just glue them on where you think they look good.
3 – Assemble The Turkey
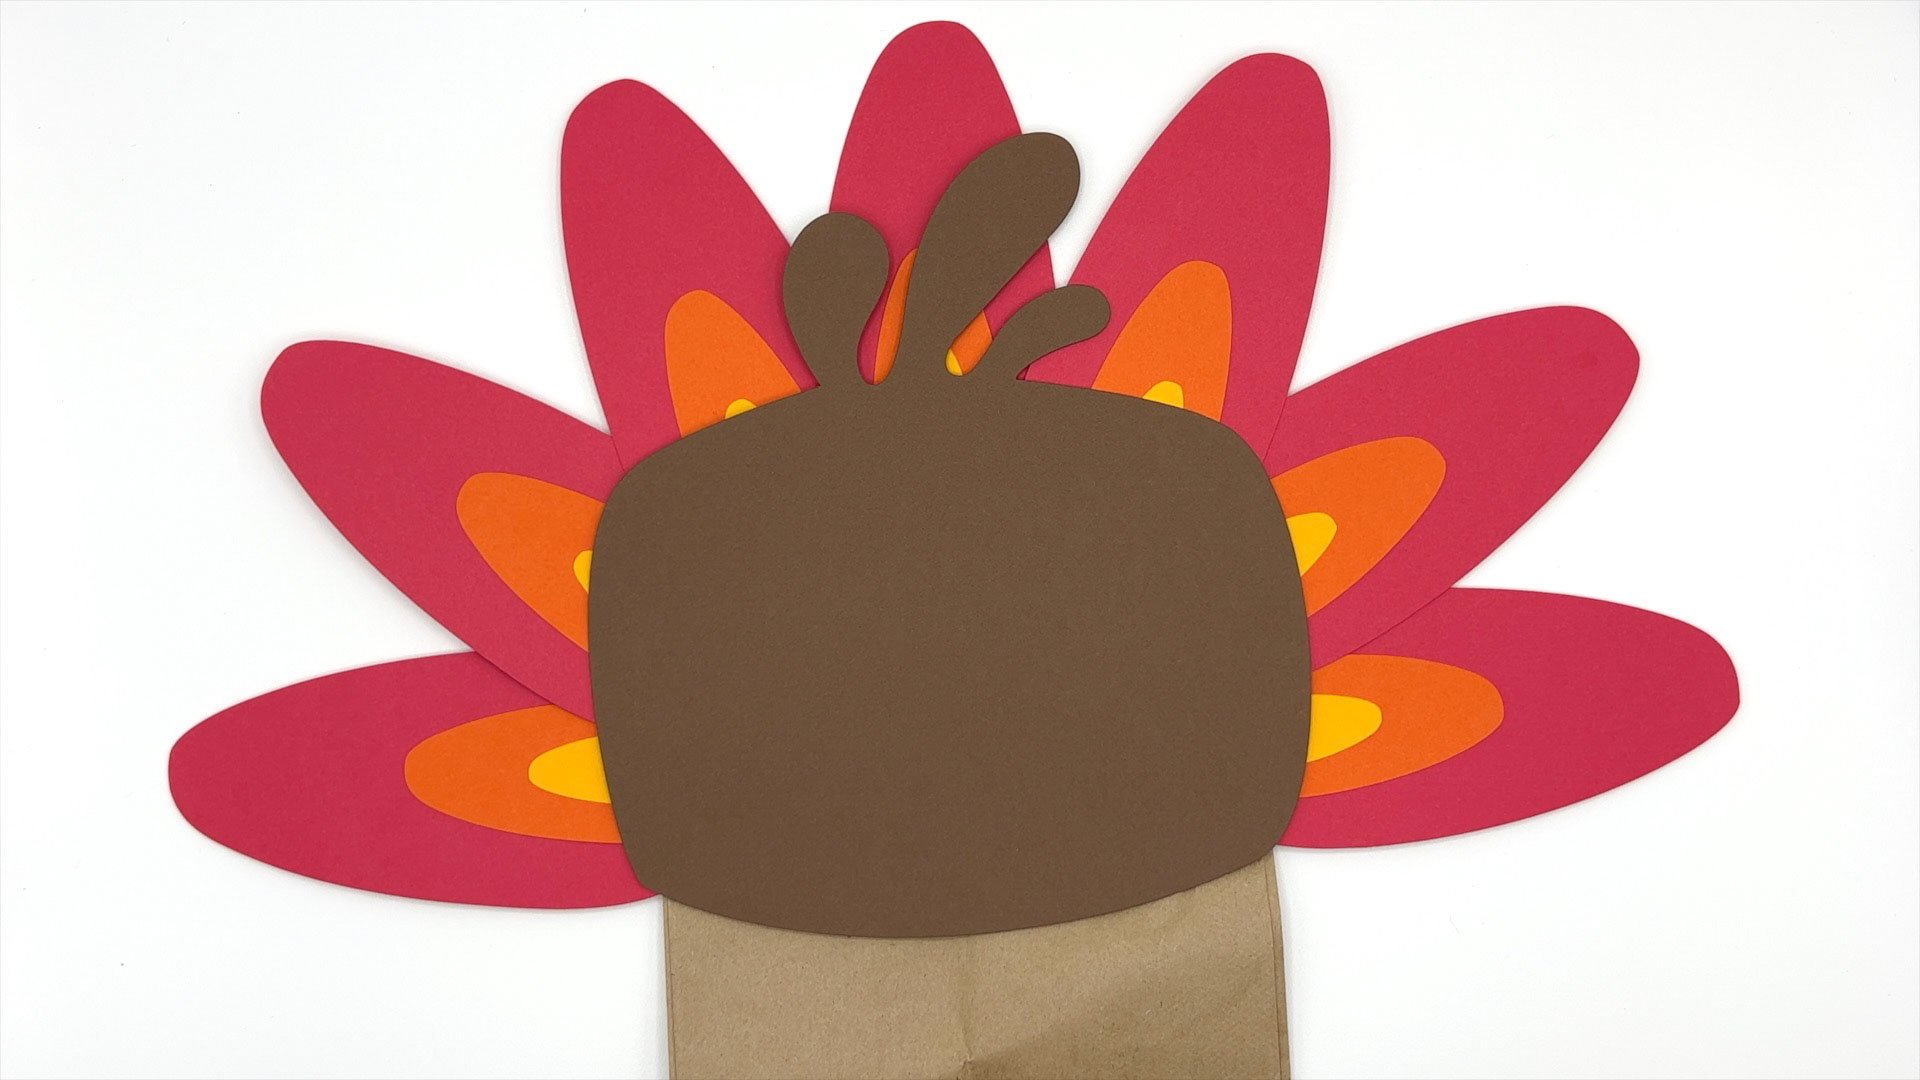
- Now add the head piece. Apply some glue to the headpiece and attach it to the flap over the feathers. Adding it to the bottom of the paper bag will allow you to use this like a little puppet! And what kid doesn’t love animal puppets?
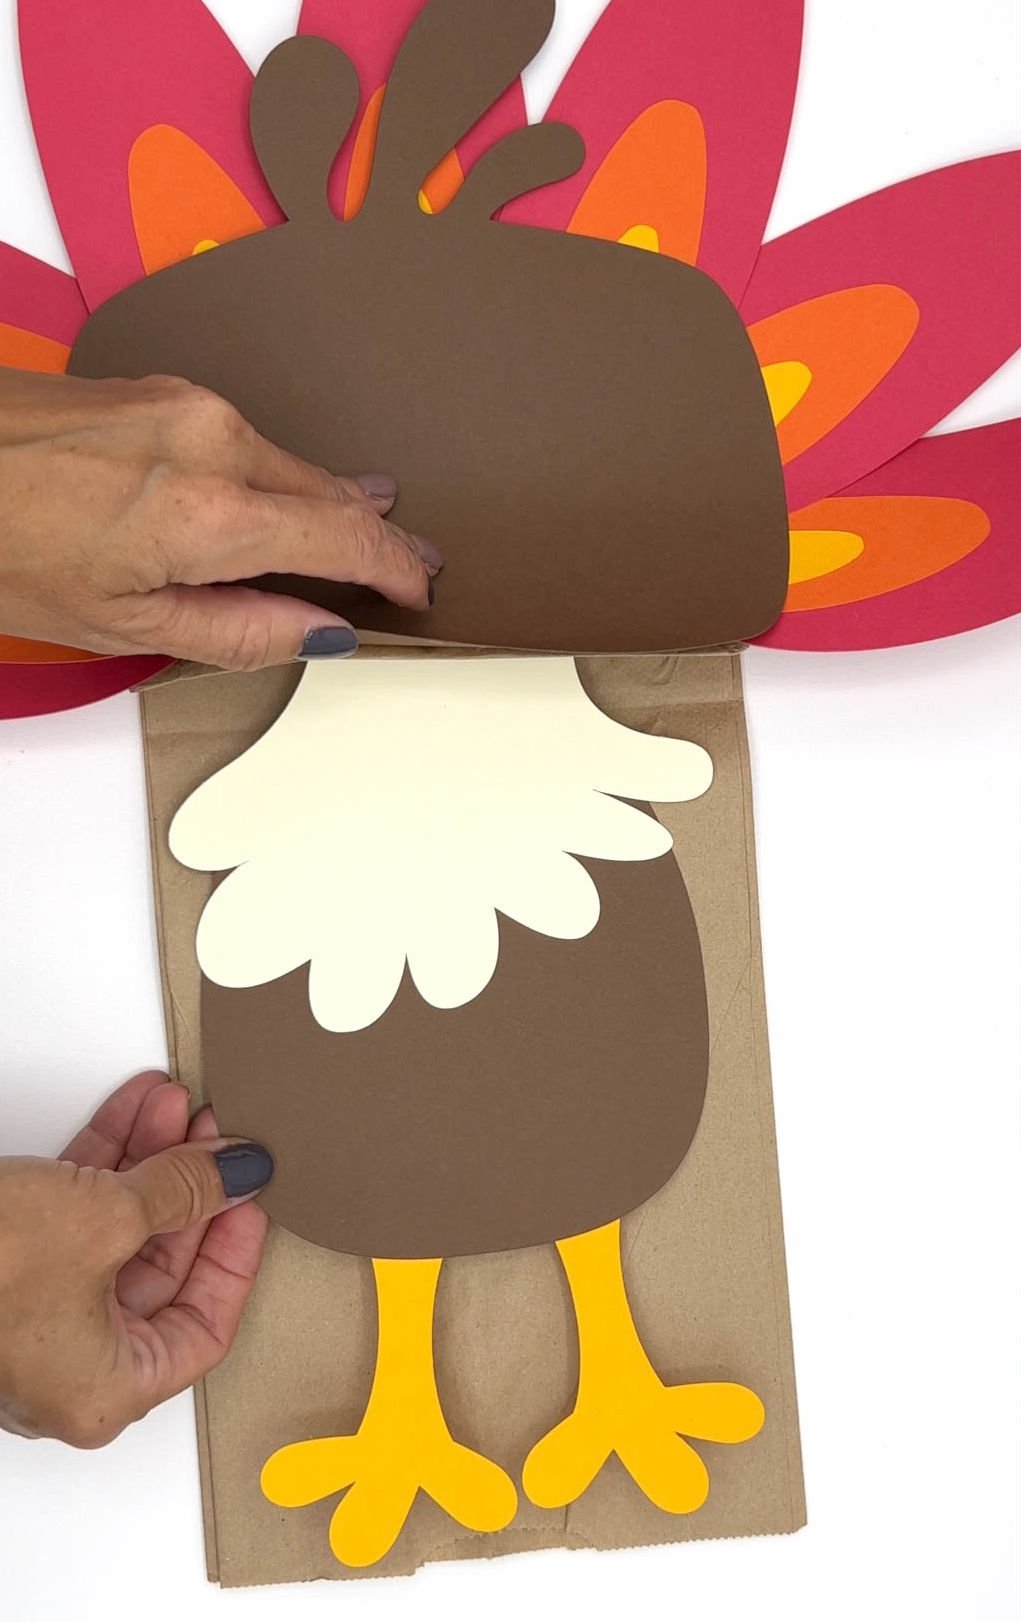
- Grab the cut-out chest feathers and legs then glue them onto the body piece.
- Attach the whole body to your bag, tucking the top of the chest feathers slightly under the brown head flap. The back of the bag will be empty.
4 – Finishing Touches
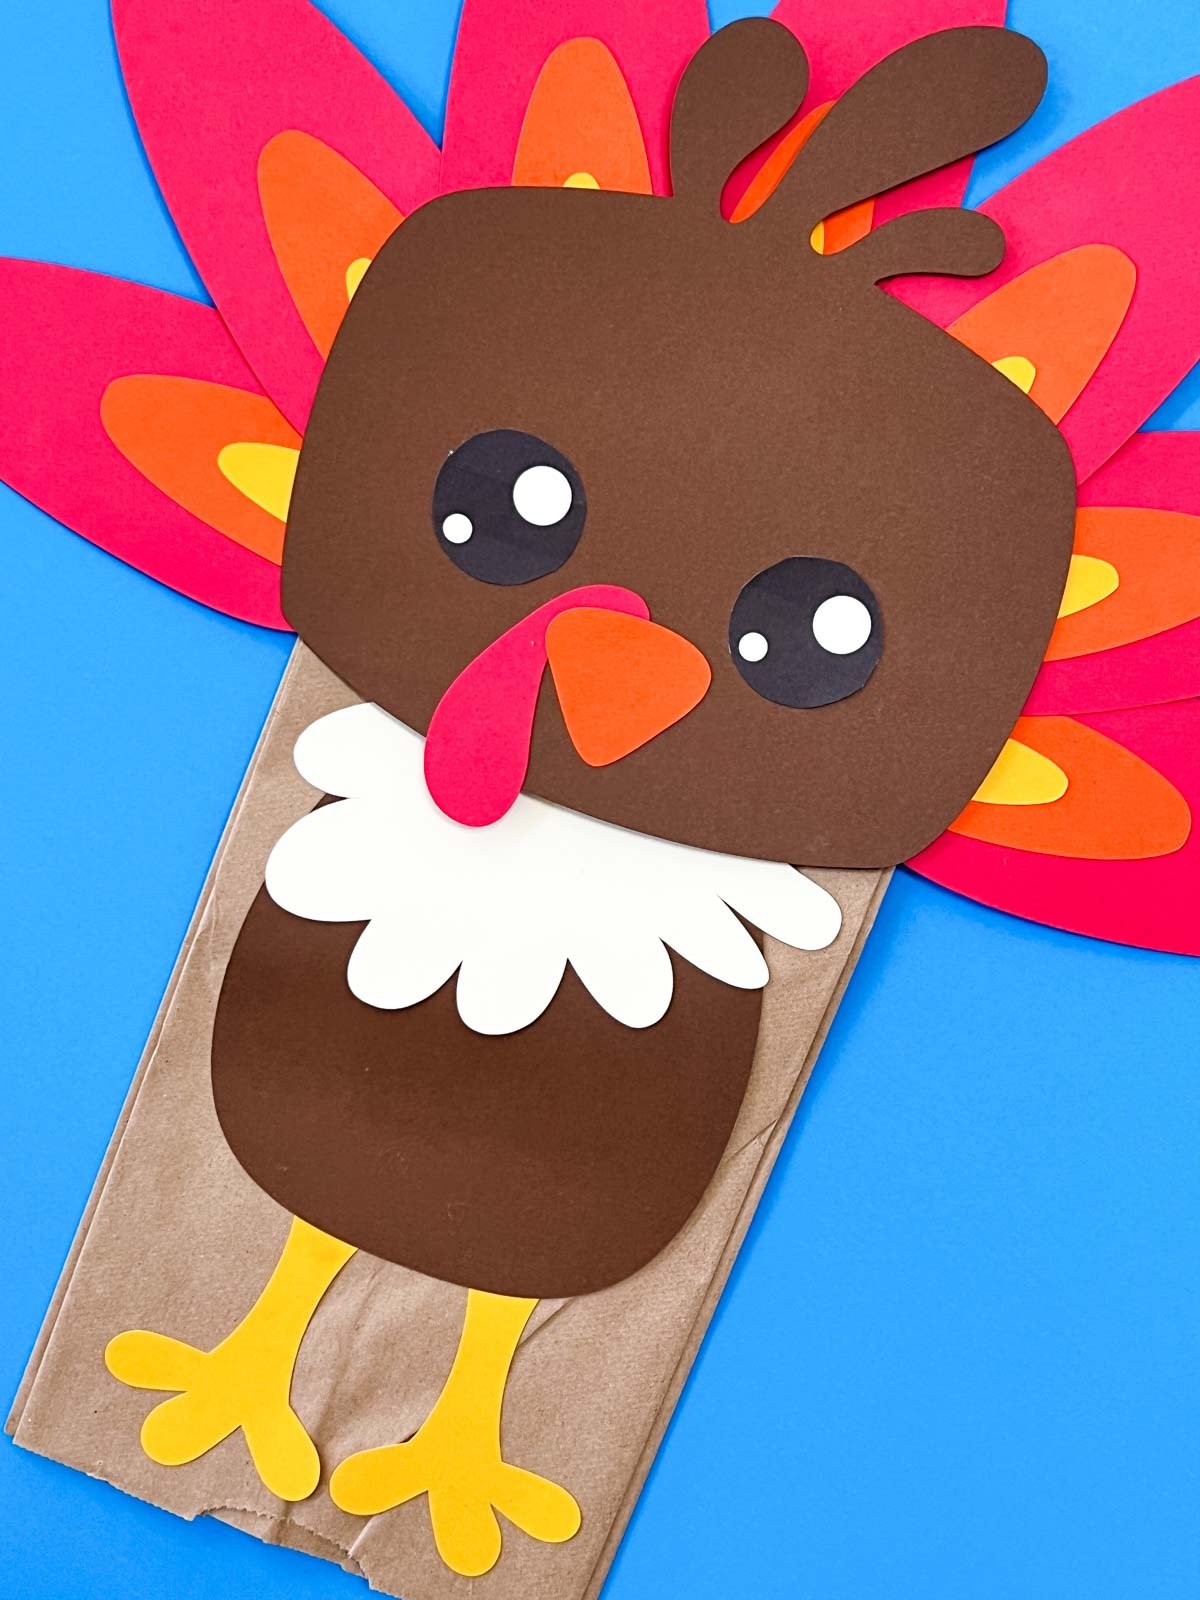
- Give it a personality by adding the snood (the little orange triangle) to the turkey head first. Then, stack the beak on top and finish up by adding the eyes.
- Once everything is dry, you are done and have cute little puppet turkeys!
Tips & tricks
For younger children have an adult help them cut out their pieces or have them cut out before they start.
For older kids provide blank paper and an example that they can reference, but let them create their own versions without the pattern.
Using a glue stick will allow the pieces to dry faster and can be less messy with younger kids.
Add googly eyes, turkey feathers, and markers to the craft table so the kids can personalize their cute turkey craft.
Craft FAQs
How do you make a turkey out of a paper bag?
Making a turkey out of a paper bag is easy with the free printable pattern. Just follow the pattern and attach it to the bag as directed for an easy turkey craft that doubles as a turkey puppet!
What colors of paper do I need for this paper bag turkey?
If you want to trace the pieces on colored paper, I recommend having red paper, orange paper, yellow paper, brown paper, white paper, and an off-white colored paper of some sort.
If you’d prefer to not get colored paper, you can just print the template out on white paper and have kids cut out the already colored pieces instead!
More Thanksgiving Activities for Kids
If you’re looking for more fun ideas for this time of year, these are a great way to get kids thinking about gratitude and Thanksgiving!
- Gratitude game – grab a few bags of Skittles and play this sweet game that kids will love!
- Thanksgiving turkey – print and color this fun Thanksgiving turkey full of gratitude activities to do all year long!
- Thanksgiving coloring pages – cute coloring pages featuring turkeys, acorns, and more!
- Thanksgiving scavenger hunt – kids will love following the Thanksgiving themed riddles to find a surprise!
- Roll a turkey – another easy game that only requires this printout and some dice!
Turkey paper bag craft
Ingredients
- 1 turkey craft template
- 1 brown paper lunch bag
- colored cardstock optional
Instructions
- Begin by printing the pattern onto the colored card stock paper, paying attention to the different colors when printing so you print the template on the right colored paper. (Or white if you’re using the already colored template).
- Carefully cut out the pieces as shown in the free template instructions. Try to be precise with the cutouts. You will want one pattern per person plus as many additional copies as you’ll need to make seven feathers and two eyes (the white circles).
- Assemble the colorful feathers one at a time. Gather all of your cut-out feather shapes and arrange them by size.
- Start by gluing the medium feather to the bottom edge of the large feather. Then glue the smallest feather to the medium feather at the bottom edge. Repeat this for all seven feathers.
- Now arrange the seven layered feathers into a fan shape. Then glue them together in that shape. Allow this to dry.
- Now that the tail feathers are dry, grab your brown bag and arrange it so the top of the bag is facing down and the bottom of the bag is at the top with the flap facing you. Next, take your feathers and glue them to the bottom flap of your bag. It doesn’t matter how high or low you place the feathers, just glue them on where you think they look good.
- Now add the headpiece. Apply some glue to the headpiece and attach it to the flap over the feathers.
- Grab the cut-out chest feathers and legs then glue them onto the body piece.
- Attach the whole body to your bag, tucking the top of the chest feathers slightly under the brown head flap. The back of the bag will be empty.
- Give it a personality by adding the snood to the head first. Then, stack the beak on top and finish up by adding the eyes.
- Allow bag to dry and it is done.



Leave a Reply